
camping tips, tricks and treats - part one
Well... Happy 4th of July! I've had the best weekend laying in bed, watching chick flicks, and eating ice cream for dinner. If you haven't figured it out, Tyler was out of town this weekend, so I was left all alone, crafting, cooking, and sleeping. It was kind of nice after our adventure filled weekend last weekend. I love going camping, it's always great to get outdoors to some wide open spaces, but it can be exhausting getting everything ready, making sure you've got all your supplies, and packing up the car.
Now that we've done this whole camping thing a few times, we've kind of gotten it down to a science, at this point we know exactly what we need to take, how to pack it, how to unpack it, how to set it up, and the most important part... how to stay organized. I feel like everyone one always says, "ugh camping! WHY? HOW?" Honestly, I love it and I think everyone would love it if they would just go about it the right way, accept there will be bugs, realize that sleeping on the ground for one night won't kill them, and just come to terms with the fact that not showering every 24 hours is okay.
When we first started camping I searched the internet high and low to find some quick tips and tricks for a beginner camper, what to not forget, what food to bring, how to cook over a fire, etc. To no avail, I decided to make my own checklist which resulted in a list of almost 100 things. Today, that list is short and lean, I have some great campfire recipes and go to's, and it's definitely a more relaxing experience. So, at the behest of a great friend, Mrs. Russell (that's still strange to say), I've decided to share some tips and tricks that will help your camping trip go on without a hitch and a recipe that can be used at the campsite or at your next dinner party! If you're just here for the recipe - scroll on down... seriously, it's okay... keep on scrolling.
Step 1: The Necessities

- I think the number one thing you need, besides a tent and sleeping bags, is bug spray. Like idiots, we forgot ours the first trip and we were miserable.
- Lighter/Matches - DON'T FORGET THIS! Fire is essential for survival, duh!
- It's always a good idea to bring some lighting options - we love our lantern and headlamps!
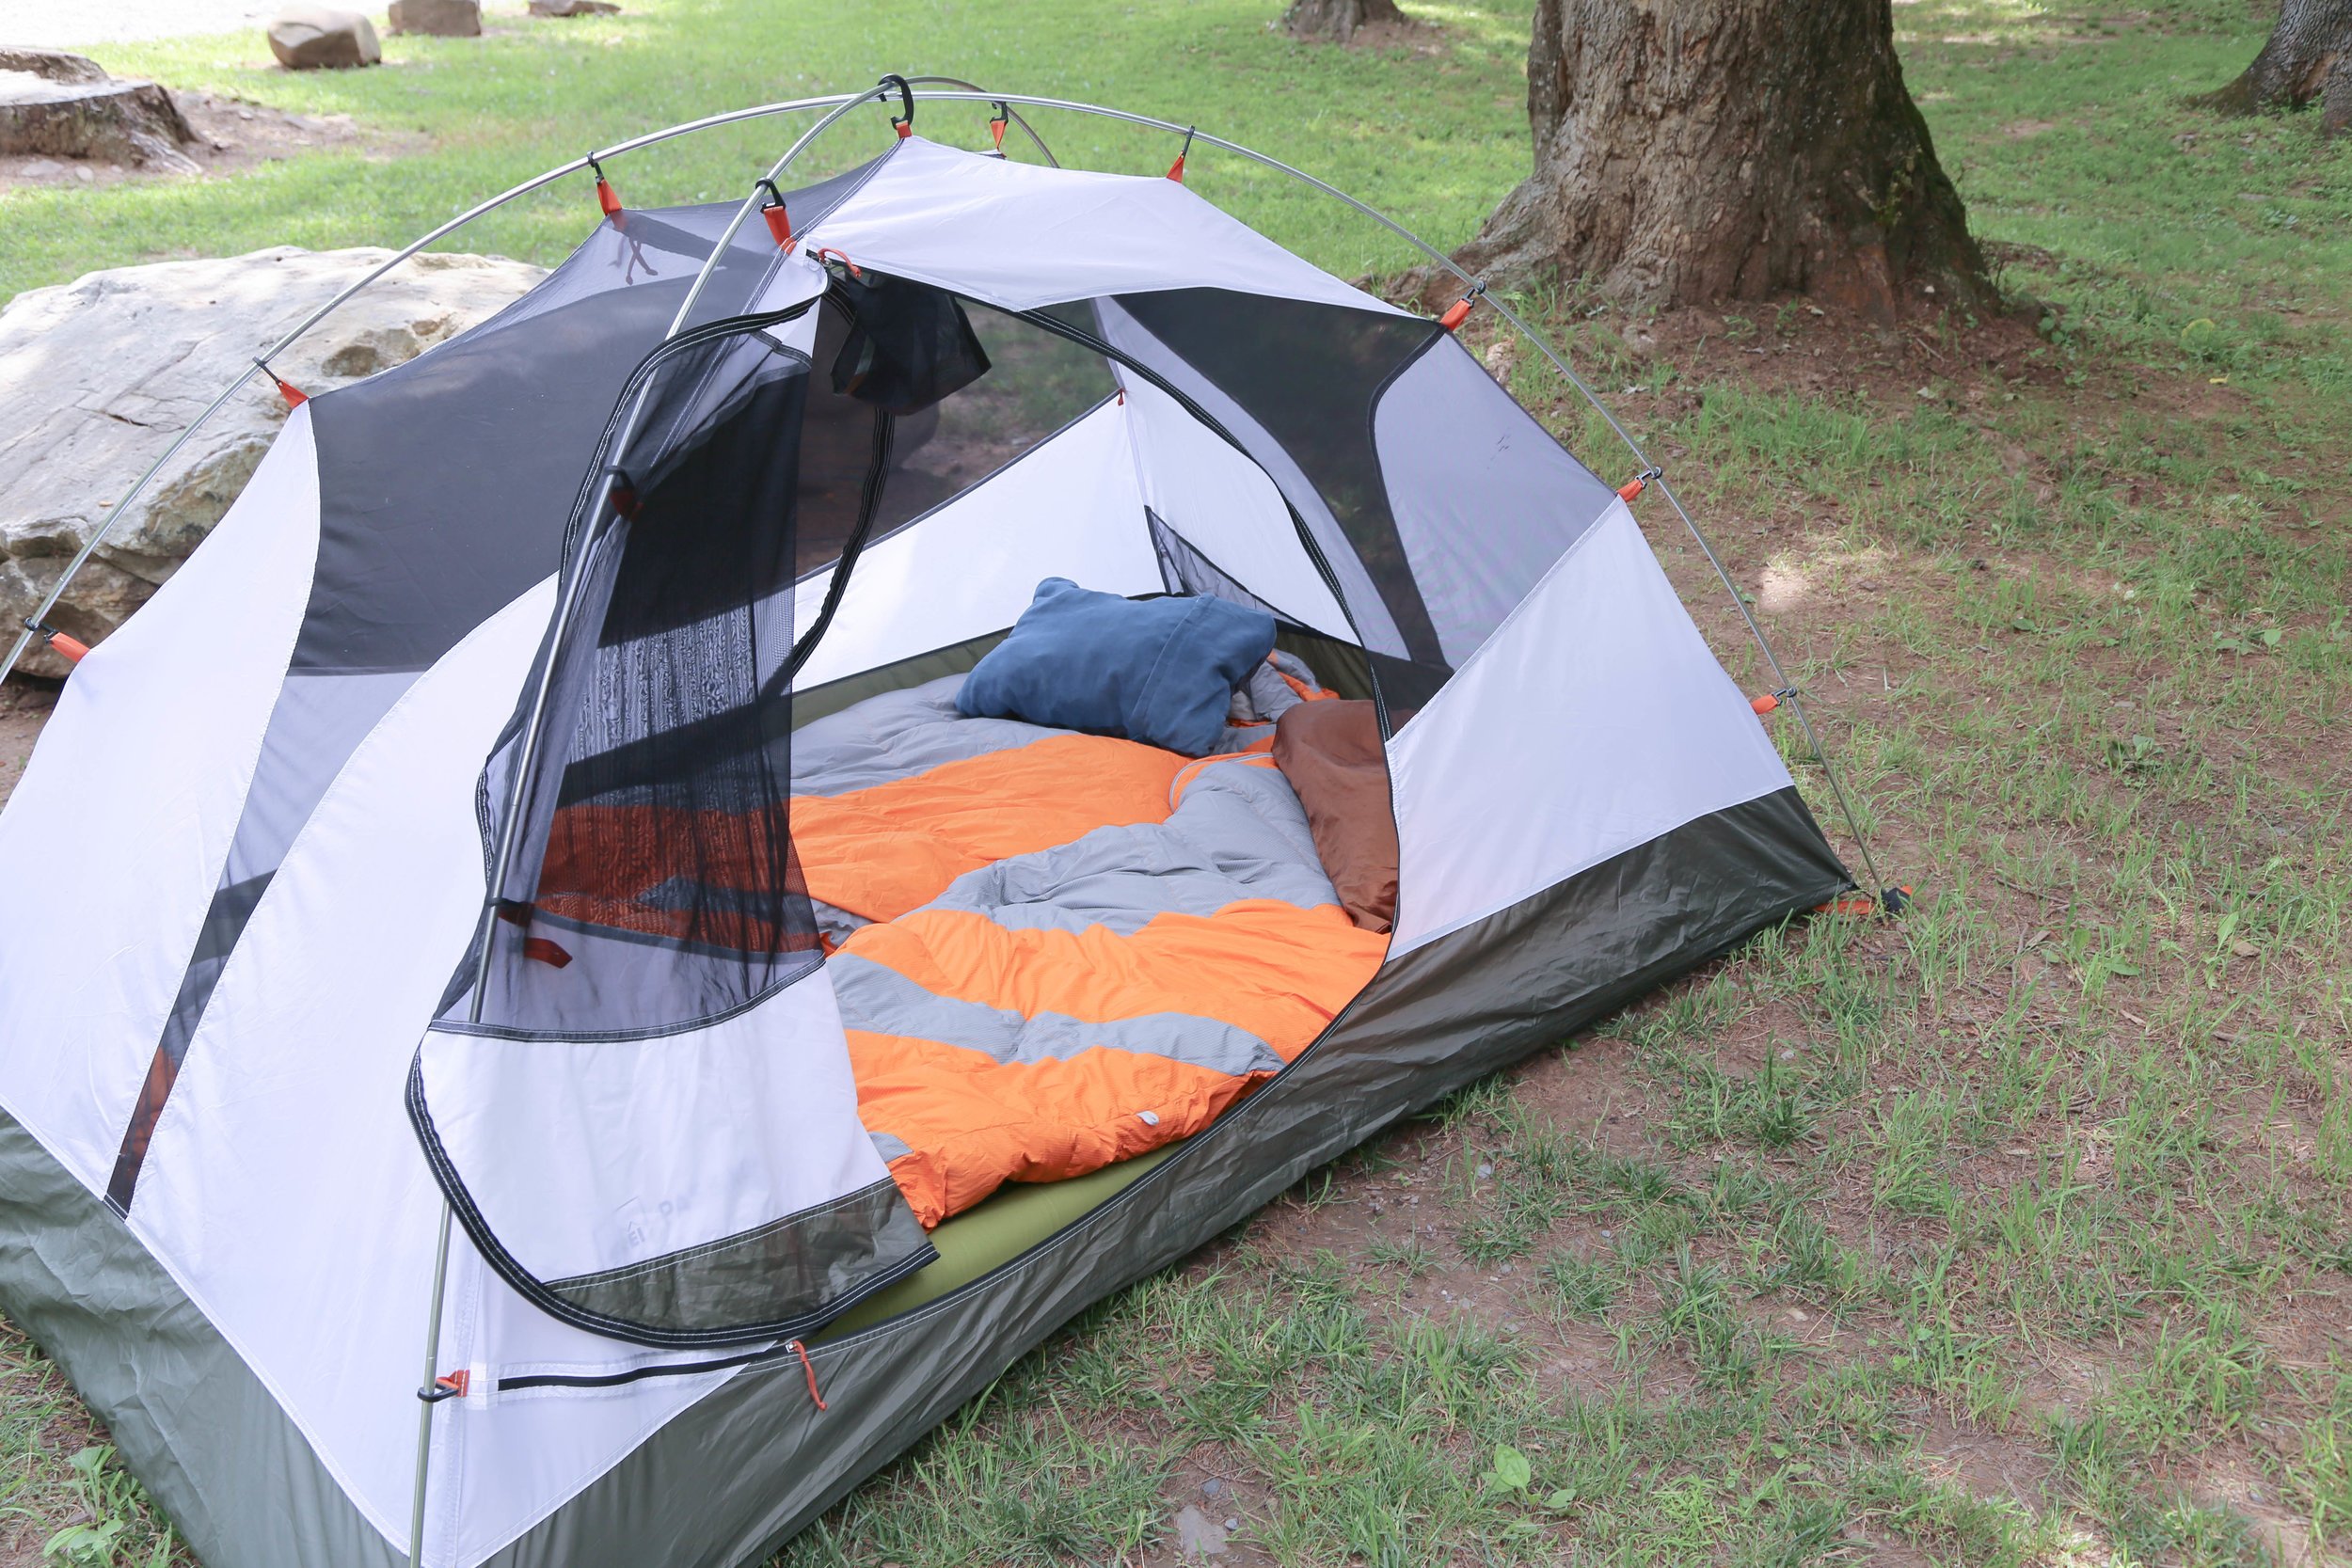
- The sleeping pad - you can use a super thick yoga mat, but we have the ones from REI that you can use backpacking, you blow them up and they make little air mattresses. Personally, I think they're great and a good investment if you think you're going to start doing this camping thing more often.
- The hammock, while not necessarily a necessity, it really does come in handy you can take a nap or keep stuff off the ground away from bugs!
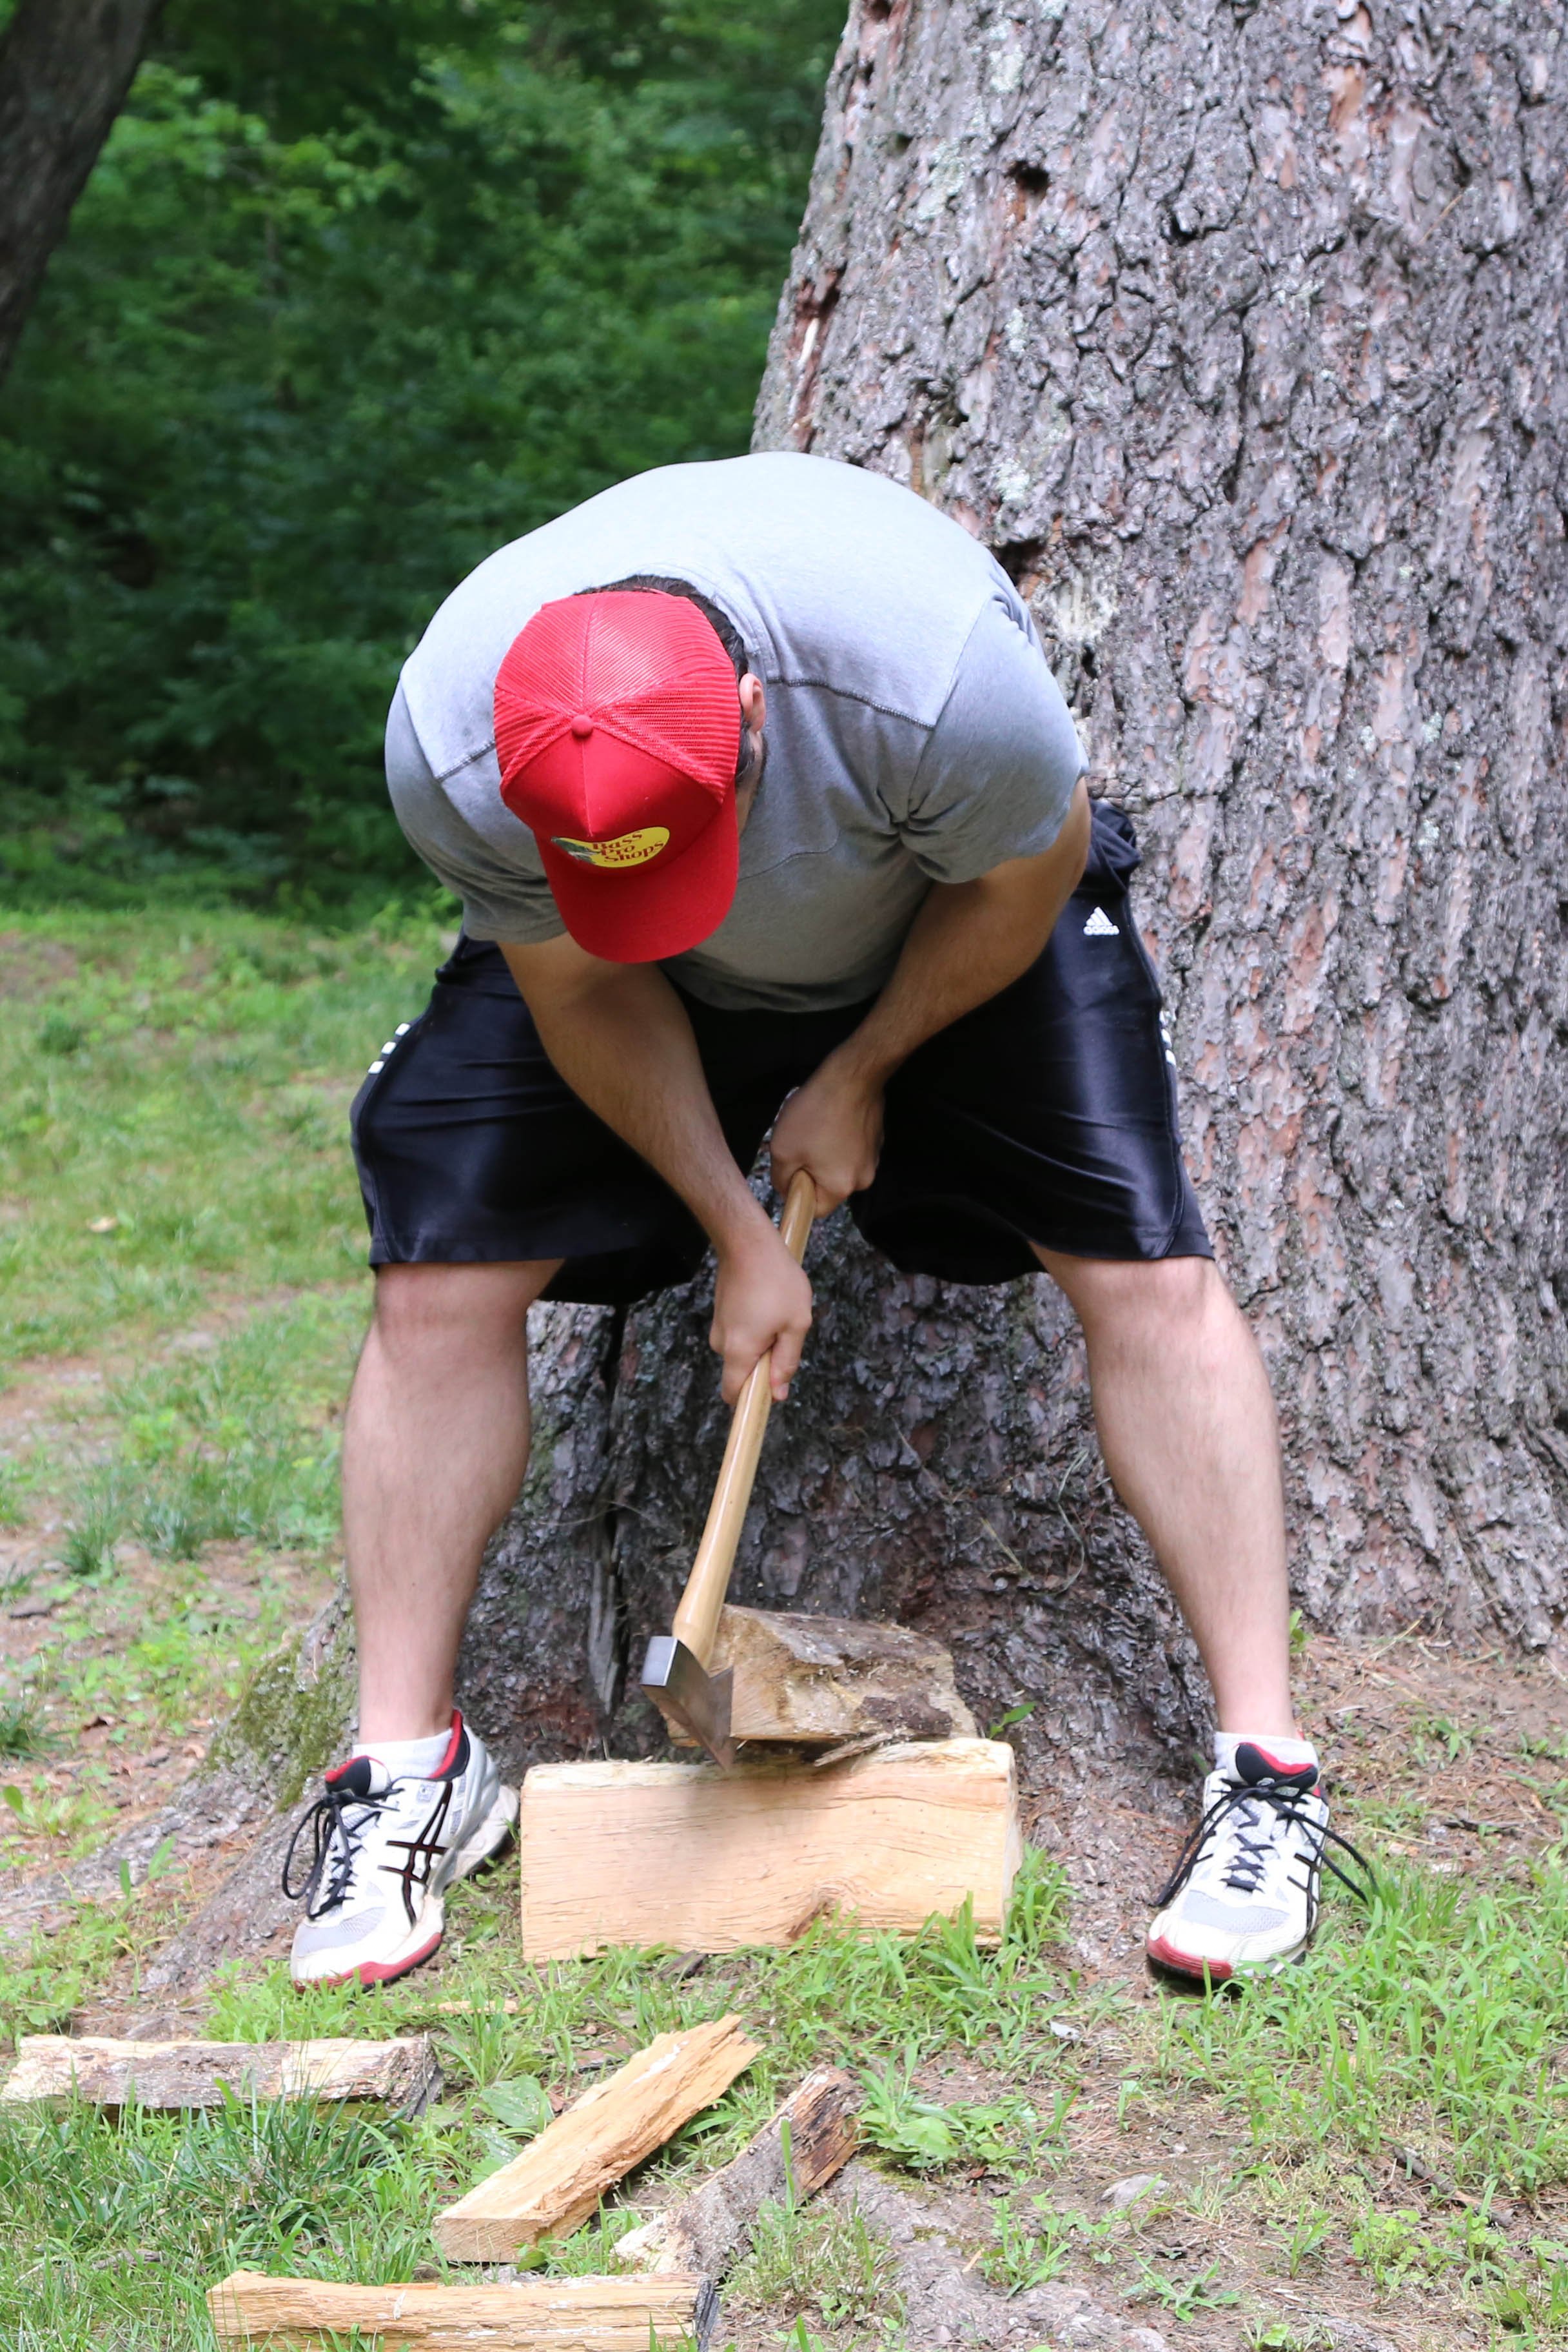
- The ax would be Tyler's number one thing... I've never used it - but I do love how great our fires are and he would tell you "It's because of those medium size pieces I've made with the ax" - he loves that thing.
- Rope, maps, emergency kit, bear spray, a little shovel, and a knife. - if you plan on going on an extensive hike, all of these should be in your hike kit. If you need to ask what the little shovel is for, maybe this will help... the outdoor motto "Leave NO trace behind" (especially from your behind).
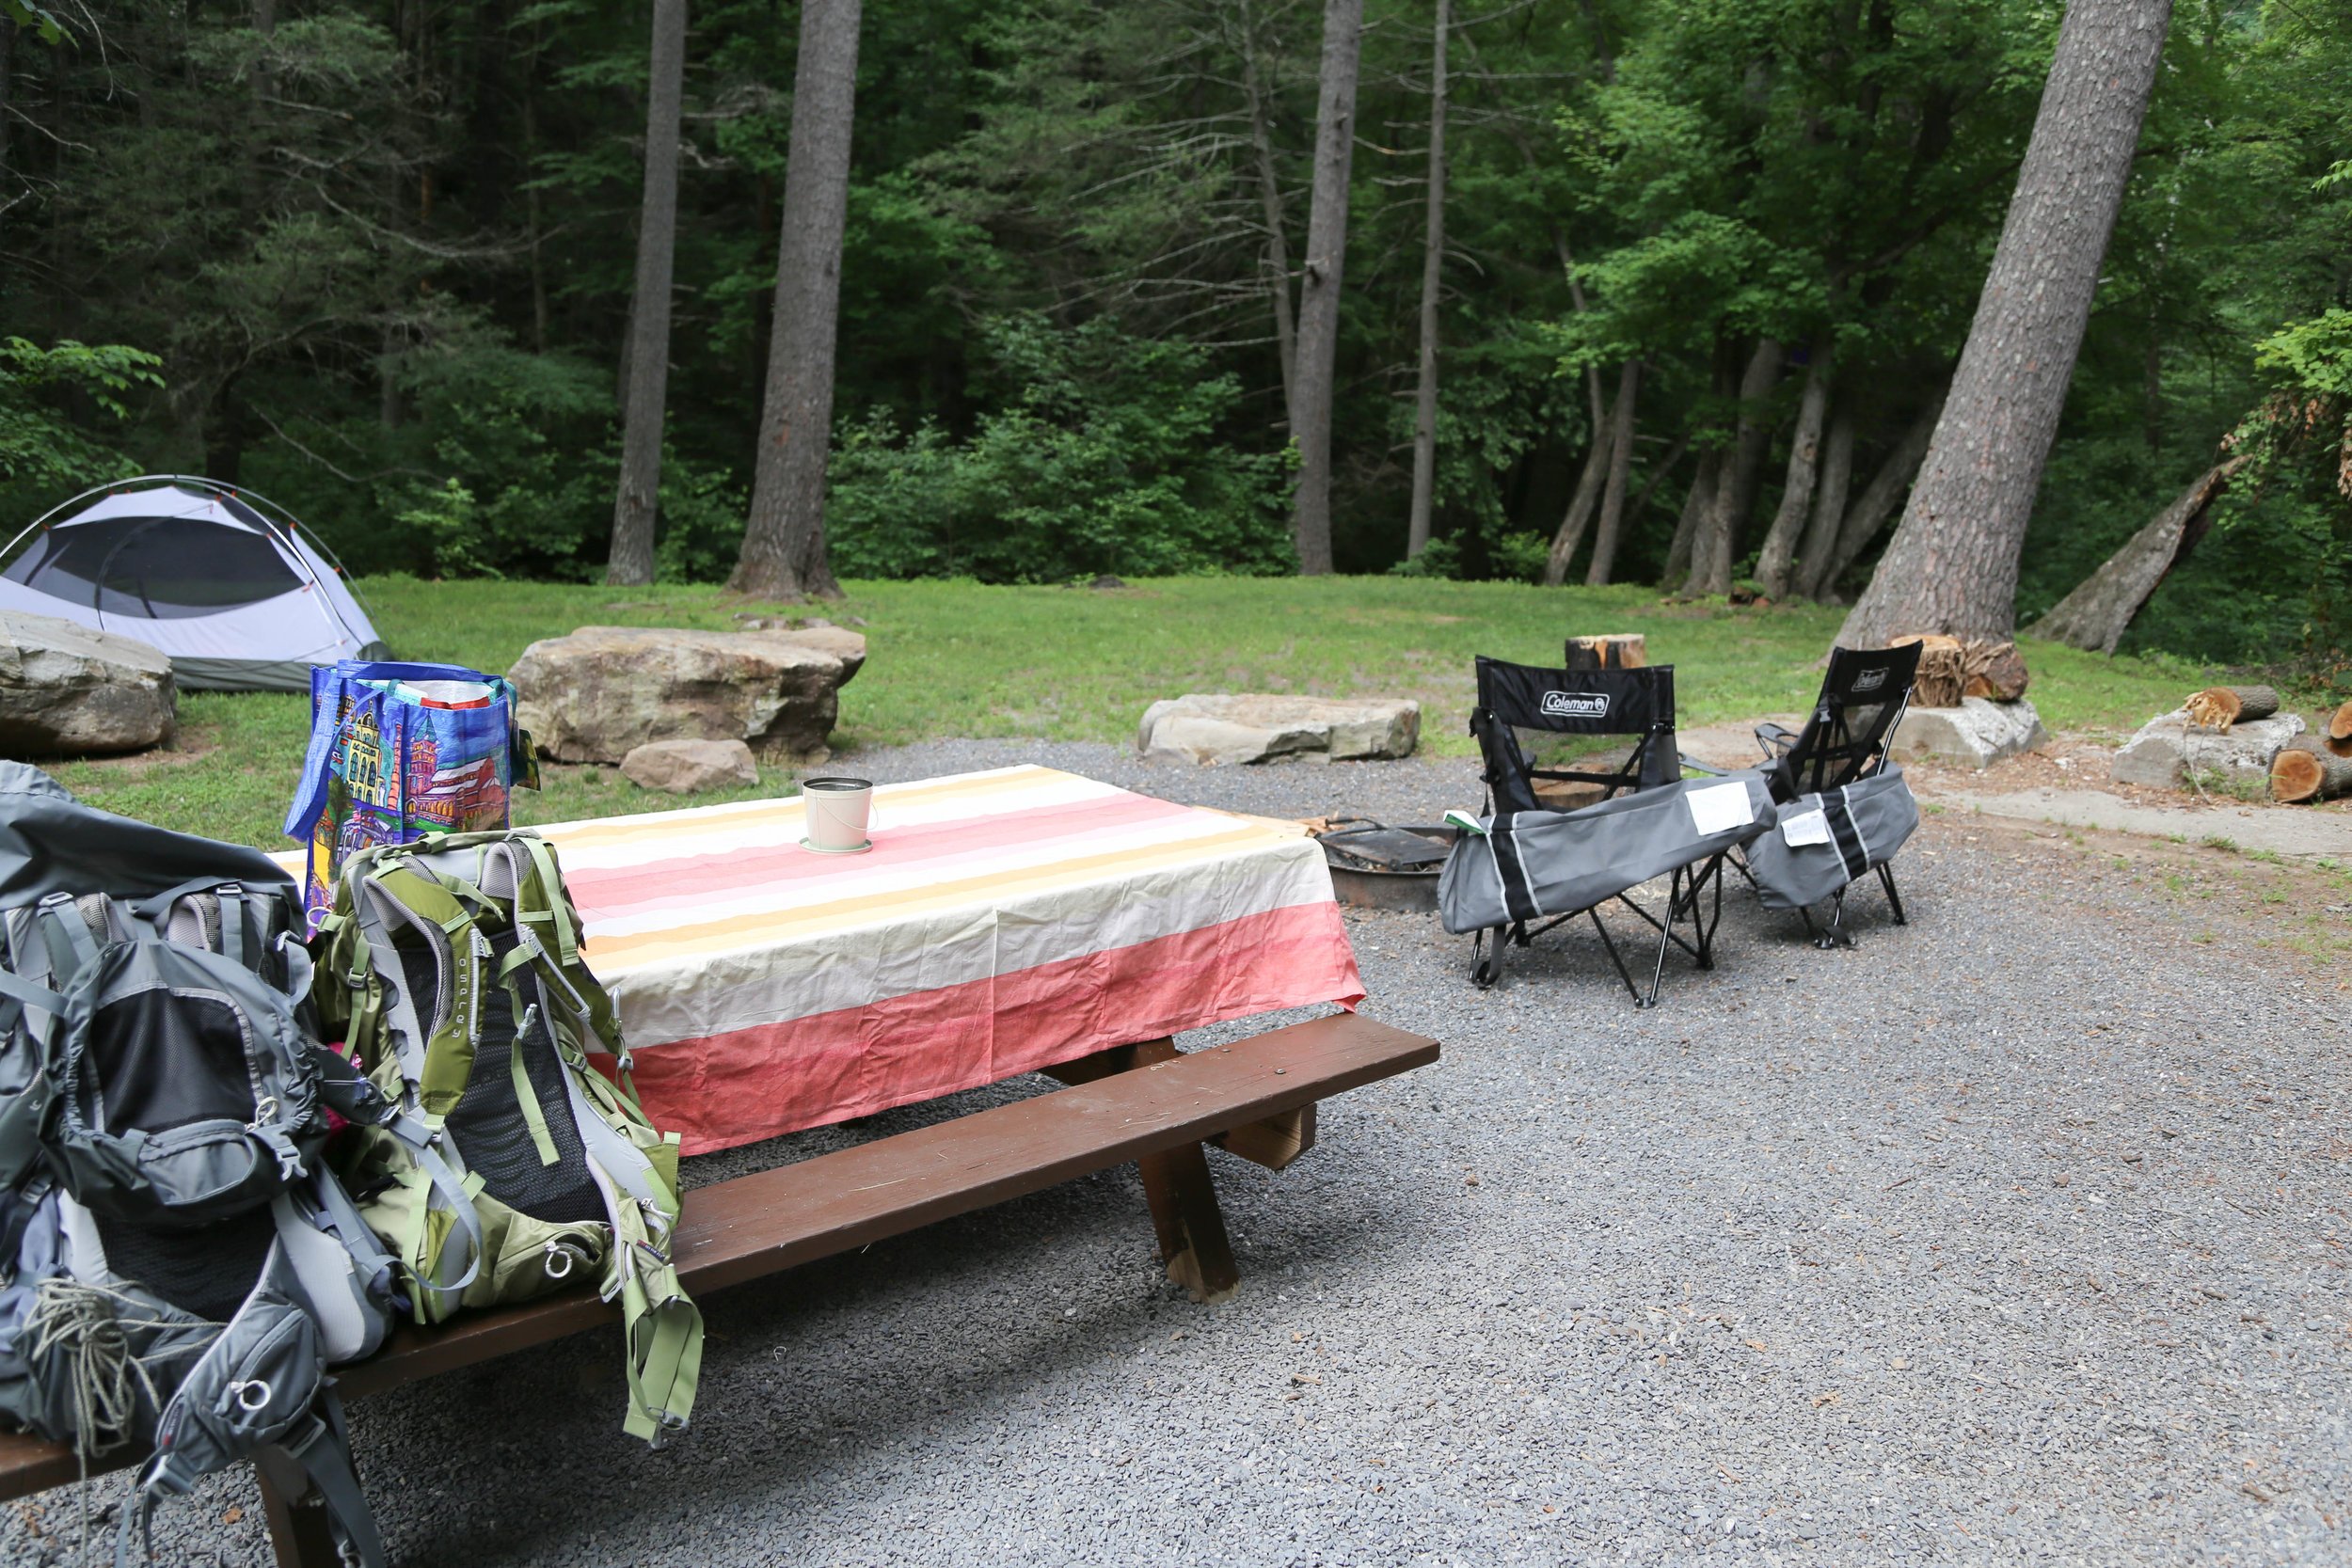
- Also, not pictured here - CHAIRS. They're a must.
Step Two: The Camp Kitchen
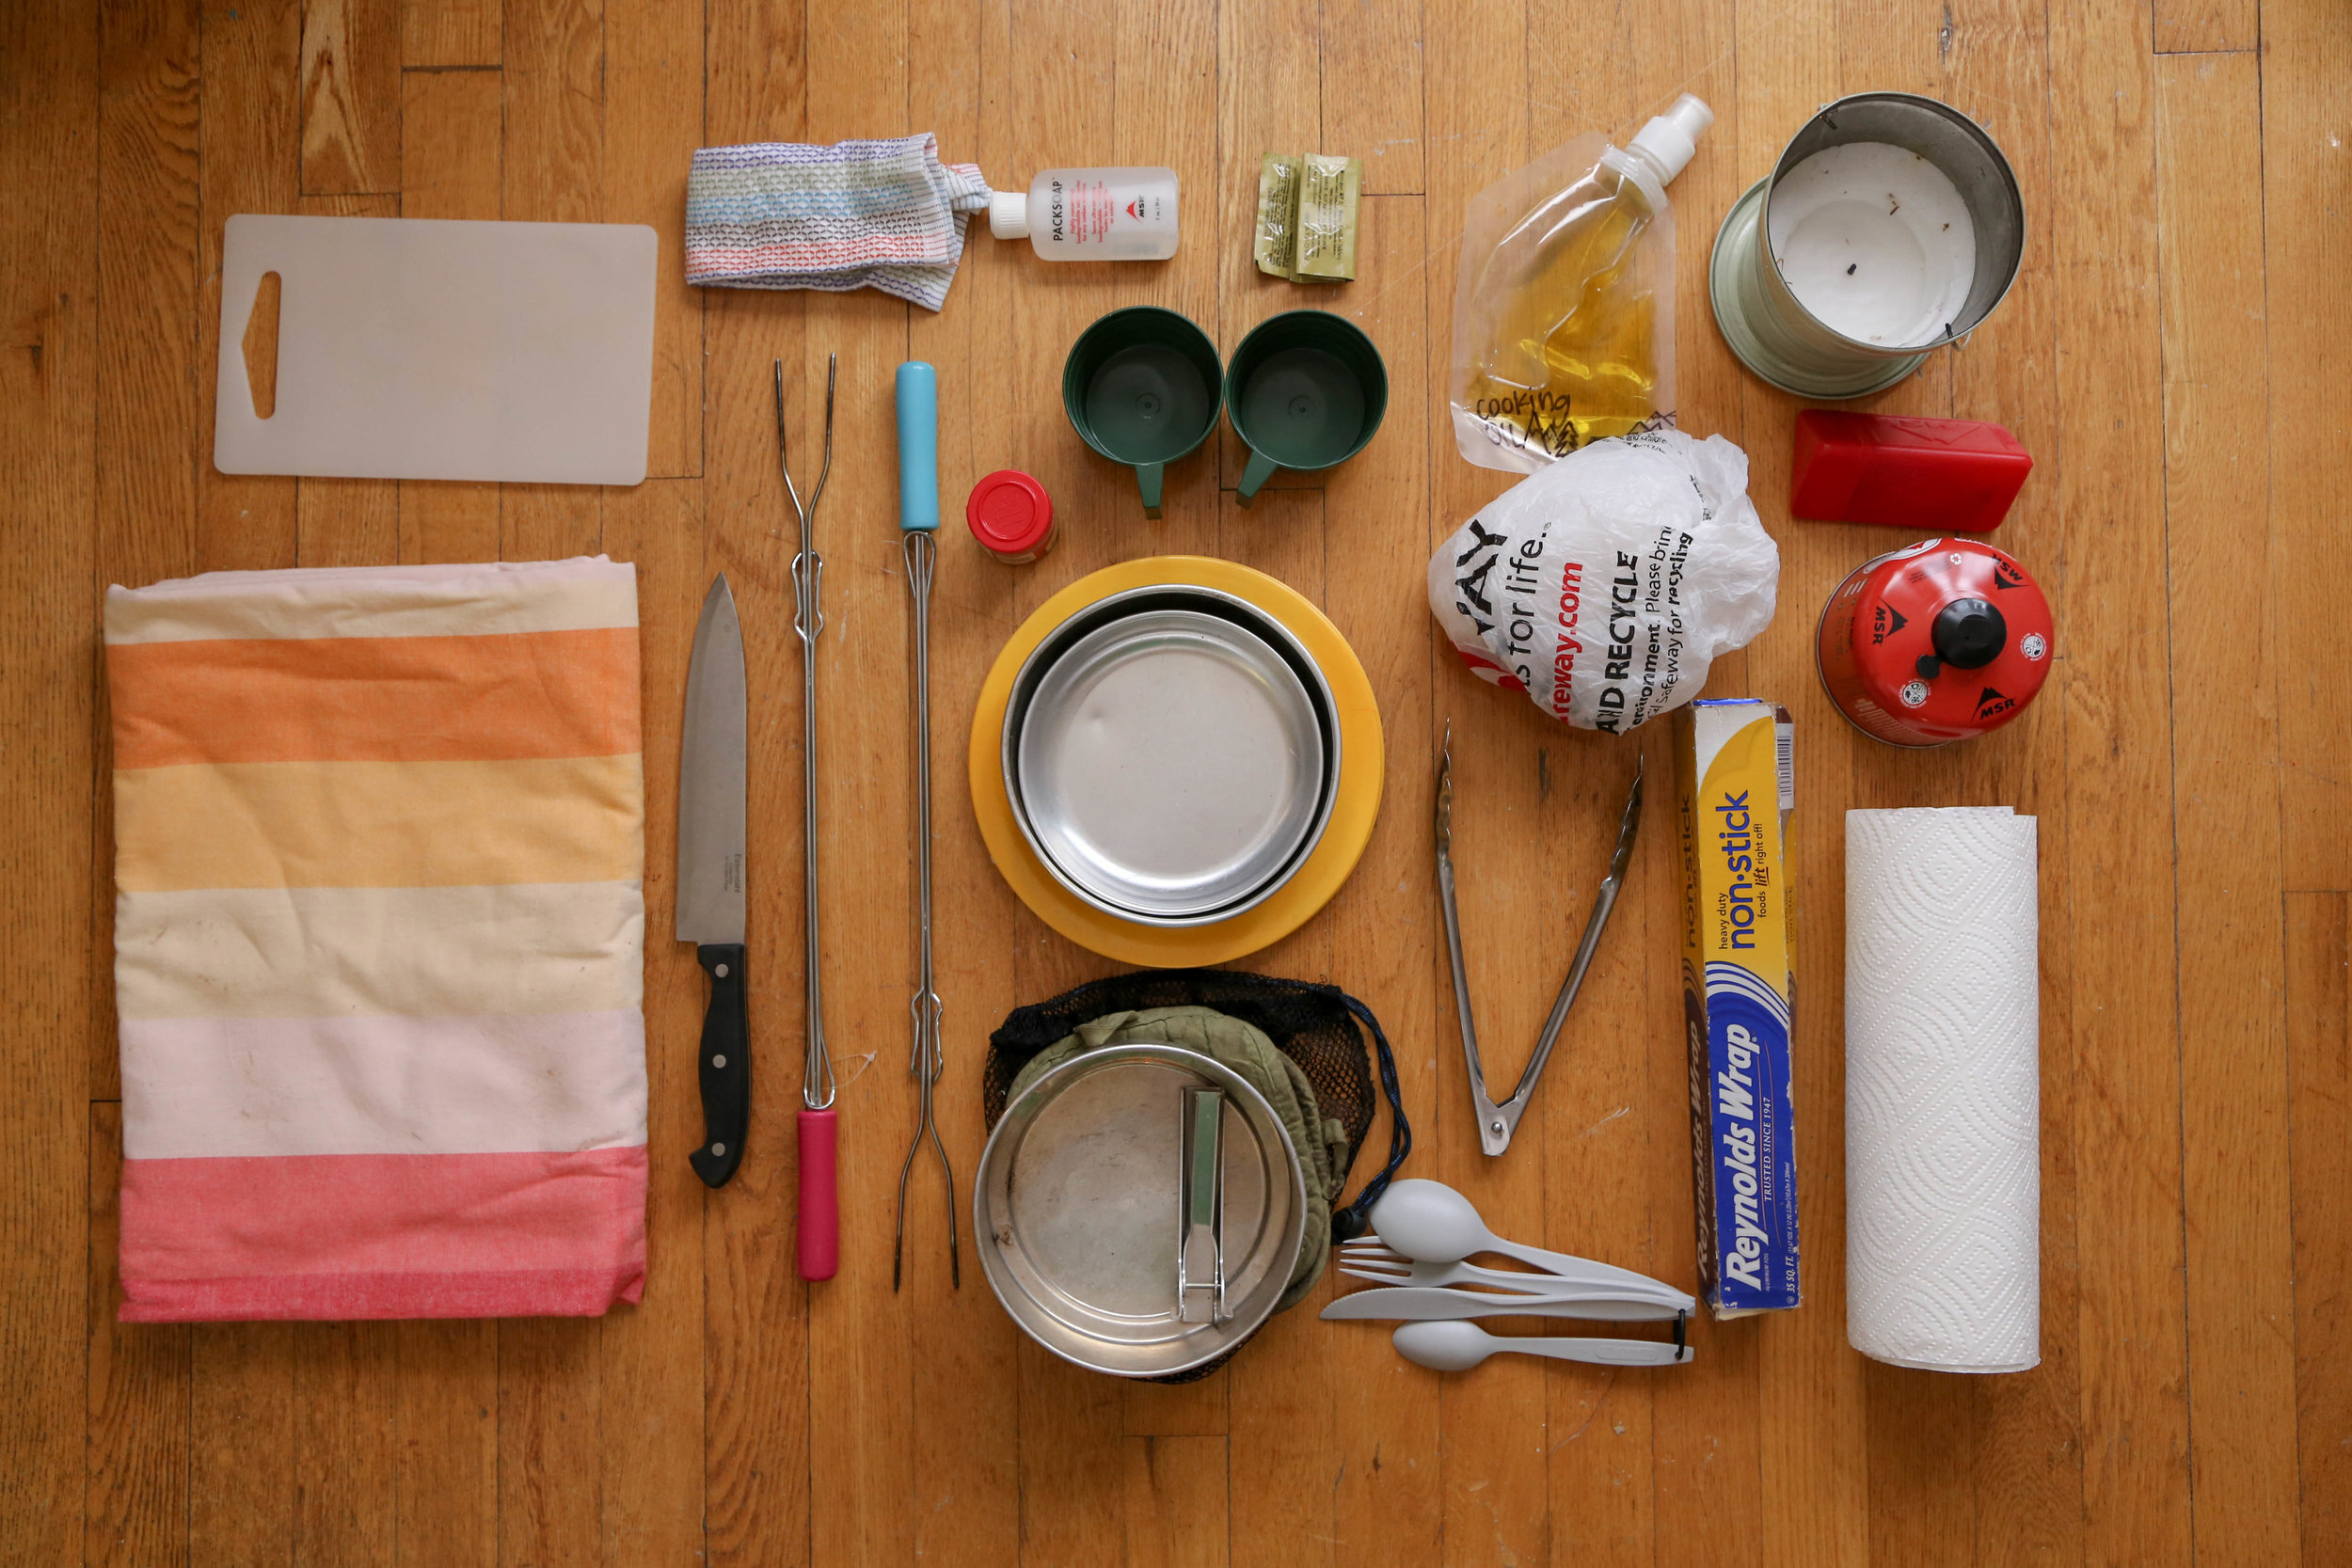
- Citronella candle - it keeps all the bugs away while you're getting your food together.
- You can't forget the kitchen necessities - paper towels, tin foil, grocery sacks, dish soap, and a hand towel. I like using grocery sacks as opposed to trash bags because they're smaller and easier to manage.
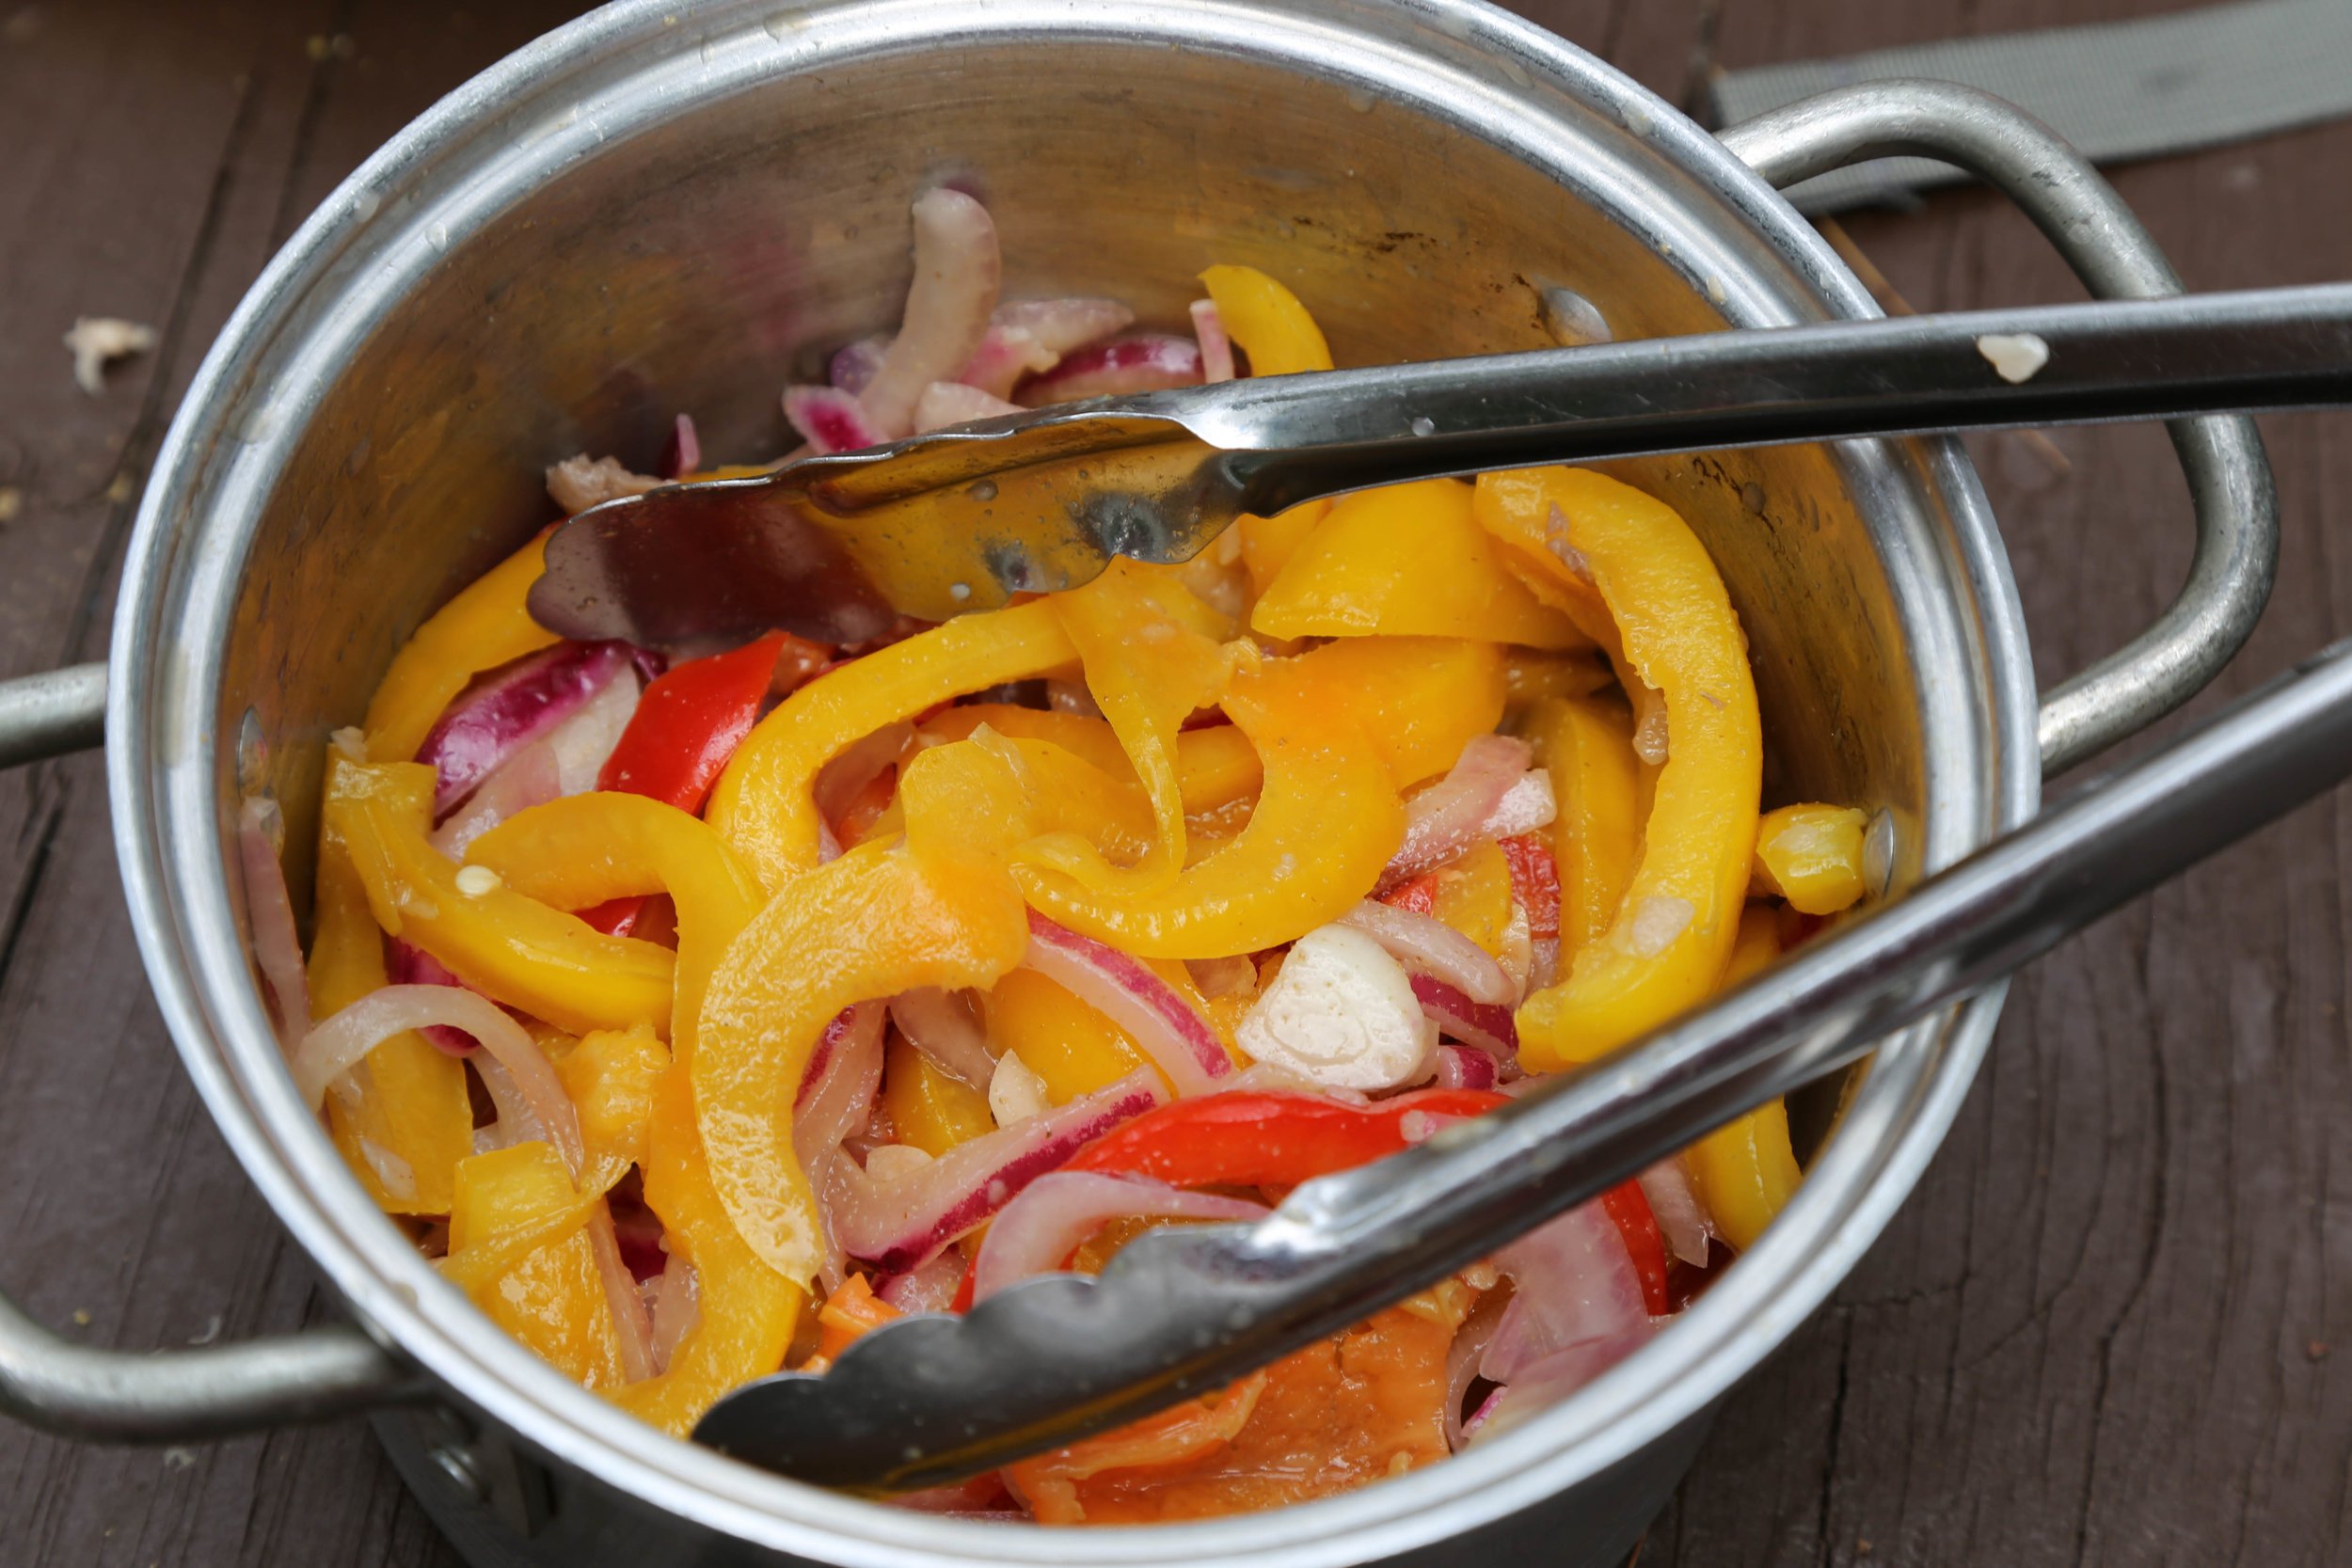
- Pots, pans, dishes, utensils, a big-all purpose knife, tongs - You're going to want a pot that you don't care gets all black and nasty once you use it over the open flame. I found a great one at a thrift store. You want to look for something compact with a lid!
- Tablecloth - sometimes the campsite tables aren't the cleanest, and it makes your campsite so cute!
- Montreal seasoning and olive oil. Montreal is good on everything and can help kick that campfire meal up a notch. Everything sticks more when it's cooked over an open flame so you'll have to use more oil than you normally do. I just keep some in our camping kit just incase we forget seasonings
- Cutting board - you'll thank me later for this tip. It's so nice to have a clean solid workspace
- Camp stove (optional) - comes in handy if you're trying to cook something that will take a long time over the fire, like in the morning when you want coffee and want it now, it's a great way to boil water without having to have the fire going.
All of that is in this awesome reusable grocery sack that my dear friend Stephanie sent me.... Pack it up in order of how you're going to use it. Make sure the table cloth is on the top!

Step Three: The Clothing Options

When we first started camping, I OVERPACKED. Like I seriously overpacked, and it was miserable. Now I'm down to the essentials.
- You need a pair of sandals and a pair of tennis shoes (I always wear those the first day because they're so bulky).
- Bring some long warm socks for night and some normal socks
- 2 clean pairs of unmentionables - an extra just in case you decide to walk across a stream and fall in - yep, that's happened.
- An extra shirt - JUST ONE, don't try to bring your whole closet.
- Warm pajamas - I always go with leggings and a long sleeve shirt - no matter what the weather.
- For the second day I generally stick with a fishing shirt and running leggings they're both great in any weather and if you decide to go into a small town for lunch/shopping or anything, they're cute and outdoorsy.
- If it's winter, don't forget a heavy sweatshirt, and check the forecast for rain!
So I guess that's about it for the packing situation. Remember to stay organized, keep everything that goes together, together. The little bivy sacks from REI are your best friend and it really makes setting up a lot easier. Make a list (even if you're not a list person), the least haphazard you are about packing, the better.
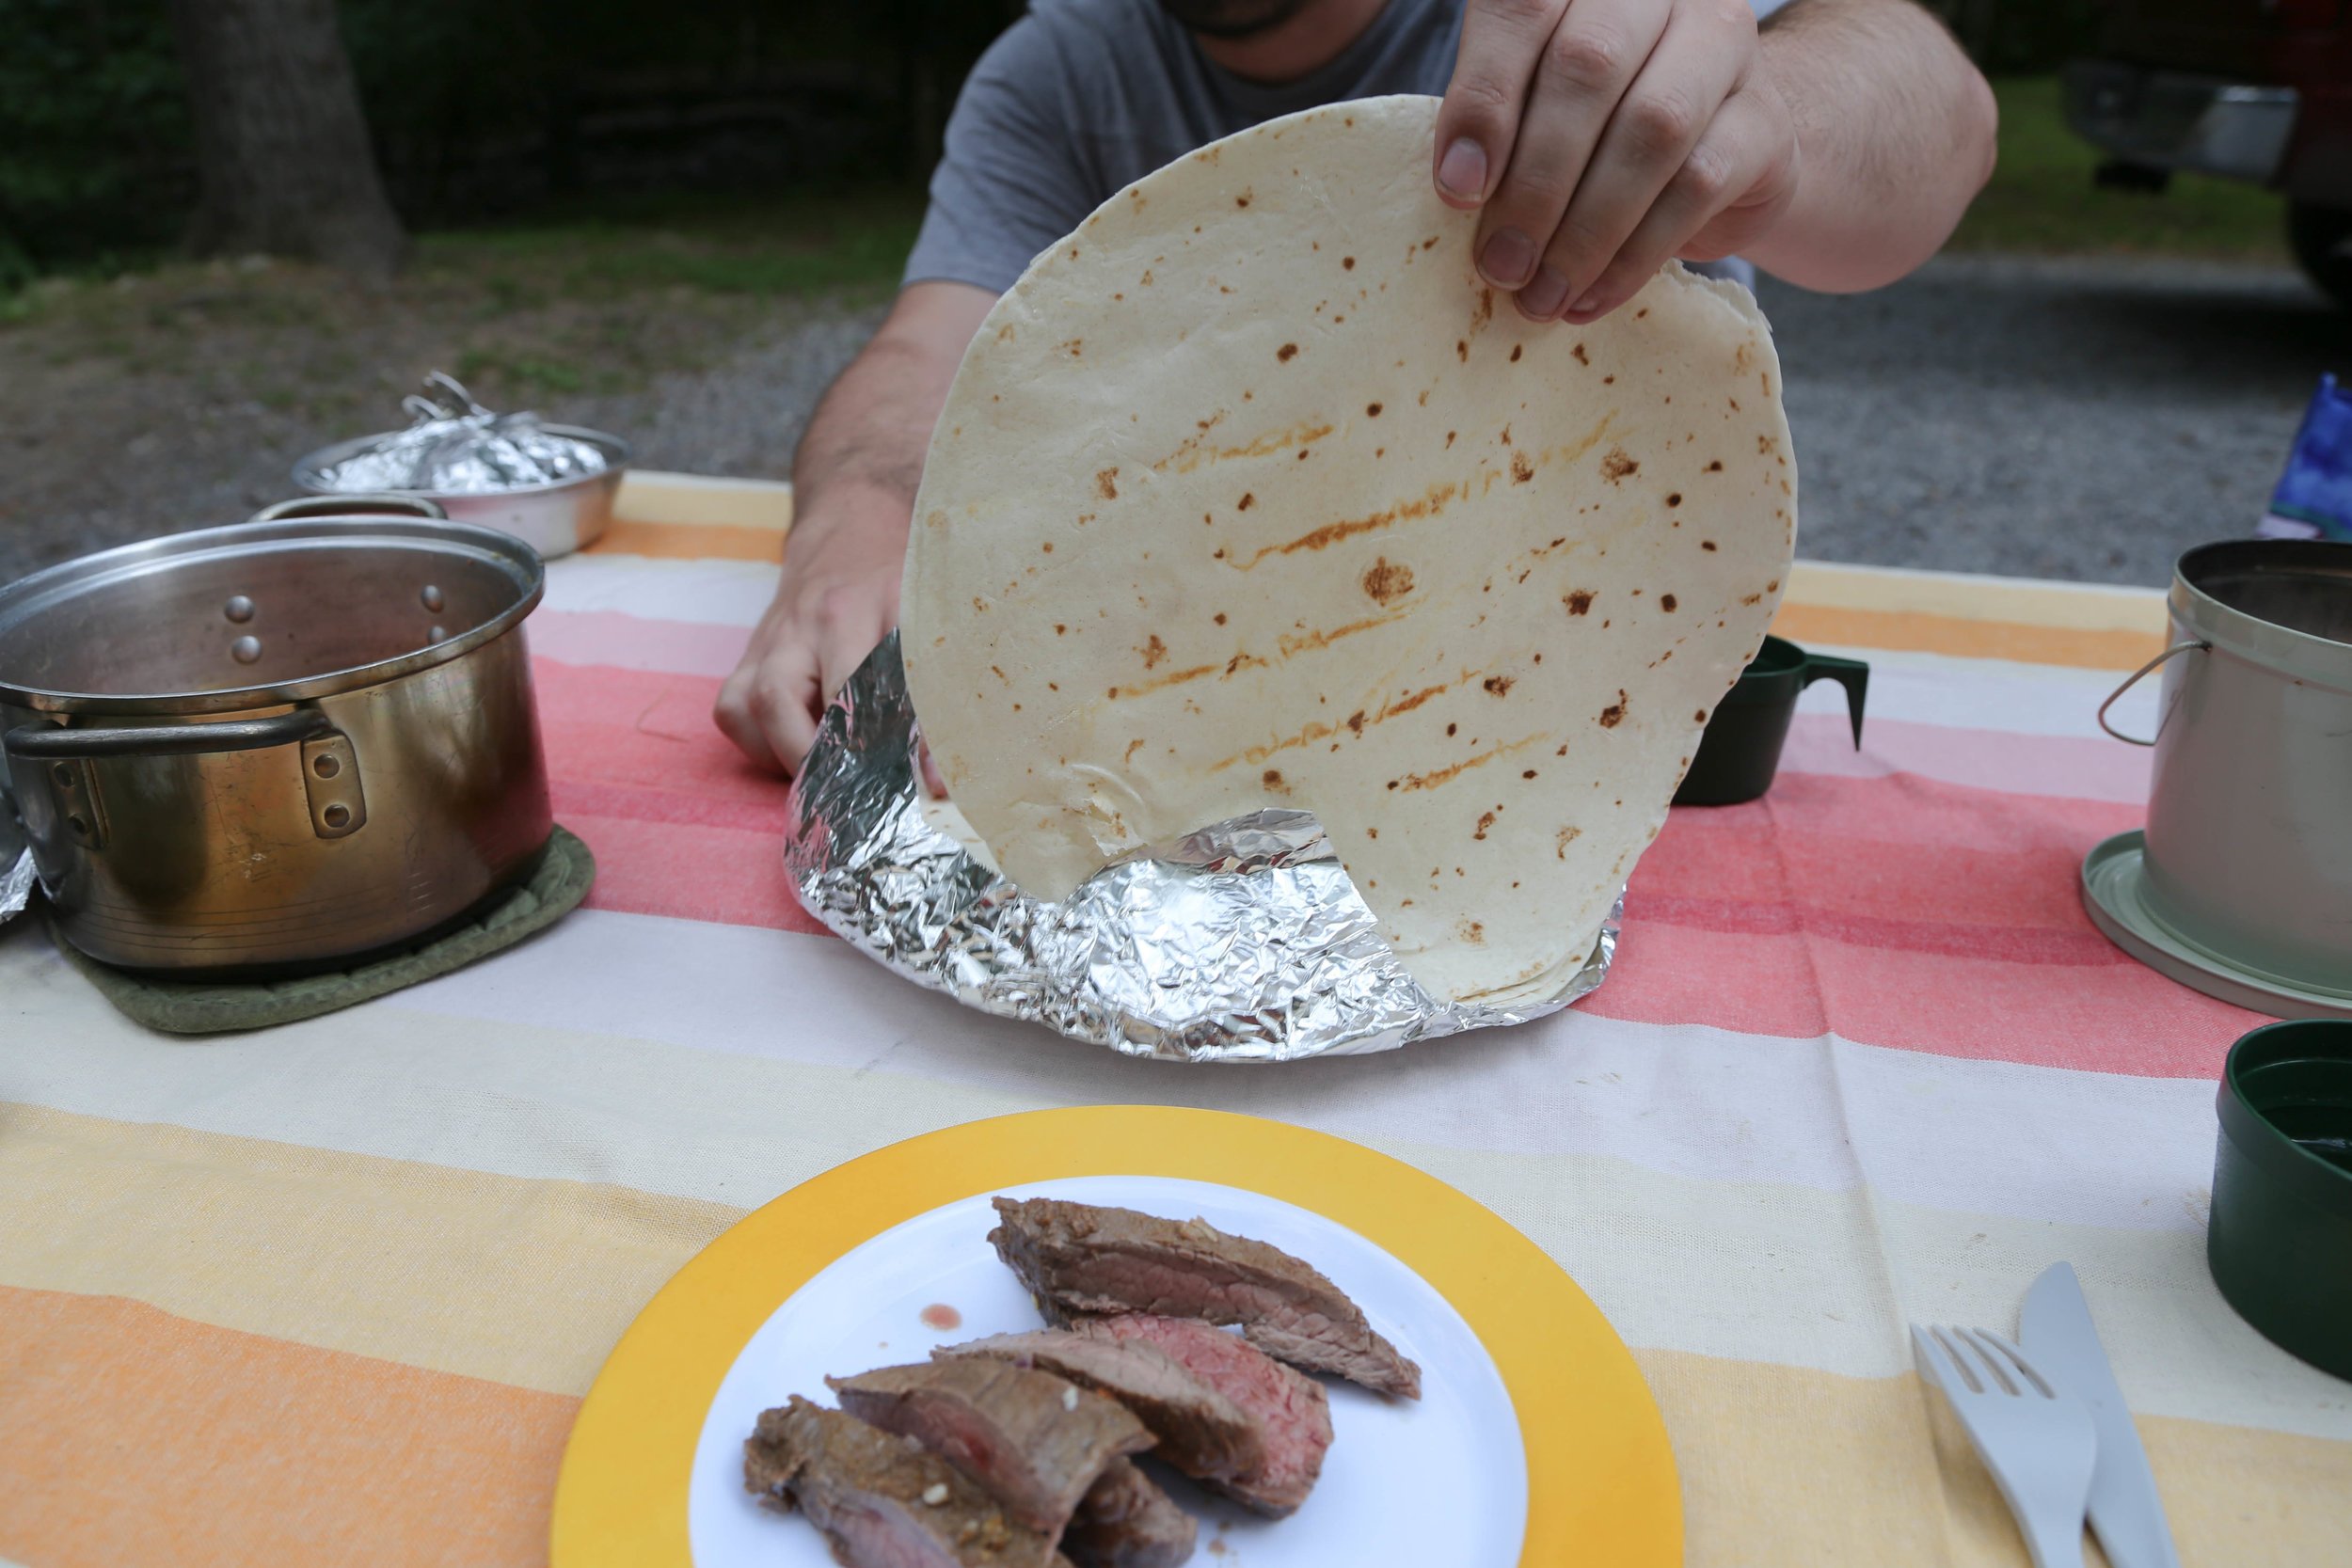
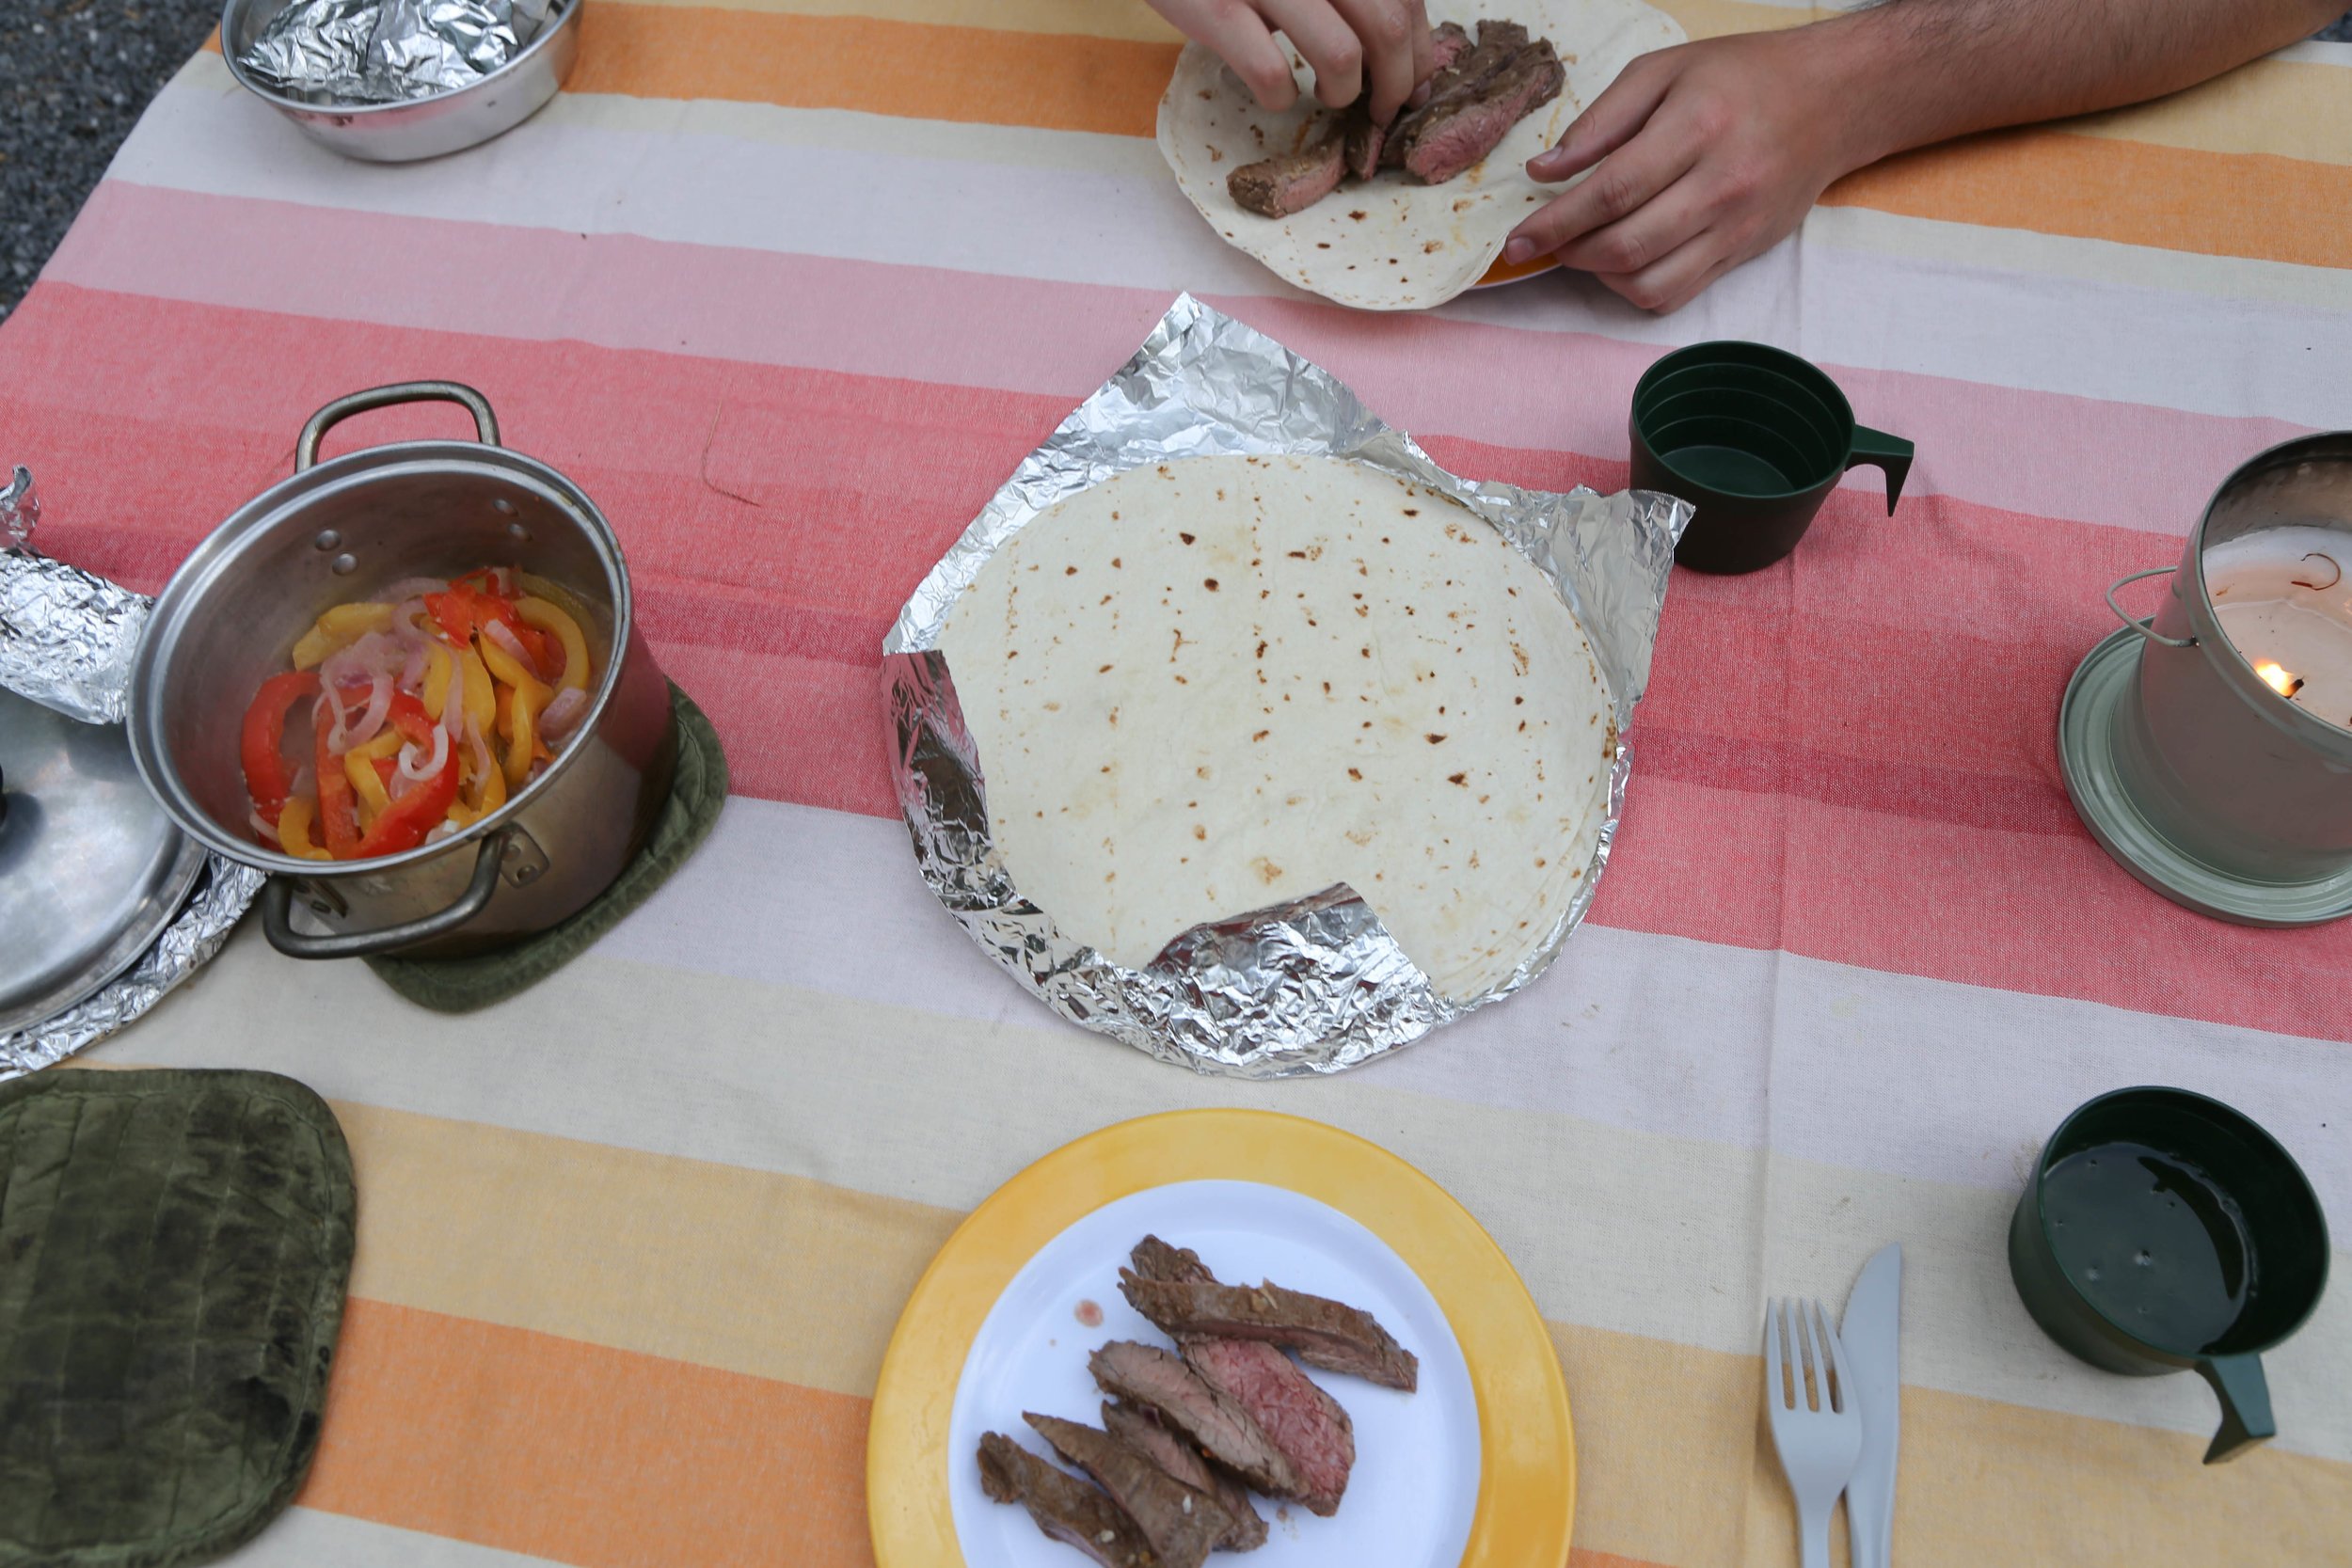
Tip:Decide before you go what you're going to have for dinner, dessert, to drink, what you're going to make for breakfast, what snacks you might want, what the weather's going to be like and what that means for the clothes situation. I would suggest for the first trip start with just making dinner over the fire, bring some granola bars for "breakfast" then go have brunch in a nearby town. Plus, it's really fun to just get up, pack the stuff, and explore small town America, and let's be honest, mimosas are always better than waiting for the fire to get hot enough to start cooking the bacon. (If you're in the Virginia area head on over to Harrisonburg, VA and try brunch at Clementines, it's wonderful!) If you insist on cooking breakfast, make it simple, I love making my cinna-biscuits, frying some bacon, and some scrambled eggs. The trick to cooking while camping is preparing everything beforehand, pack your cinna-biscuits in a throw-away pie pan you can bake in, bring your eggs already scrambled, and don't bring the whole package of bacon unless you're going to cook the whole package. I'll be sharing some more great recipes for dinner and breakfast in part two!
Once I get to the campsite, I start by putting the tablecloth on the table, lighting the citronella, getting out all our bags, and then building the tent while Tyler forages for wood. After all that's done, he gets the fire started, we get dinner going, we drink a beer and just talk and enjoy the quite and solitude... or we talk about the other people at the campsite and guess what their stories are... let's be really that's totally what we do.
Update: My dad's response to this post - "This is in response to recent blog. When I was young we camped because it was fun and affordable as we got more and more experienced we added to the equipment collection until it required a small trailer and an army of 6 to unload and set up. At some point my mother said enough we just need to eat sleep and be merry. Now that I'm older I have decided to change the spelling of " a roughing it vacation " to a simpler abbreviation RV . I have not needed a shovel or balance to leave nothing behind from my behind since. This is an older adults revelation and will take some time for a younger person to realize that the back ache from sleeping on a blow up pad or hammock can be avoided, but for now there is nothing more rewarding and invigorating then a night in the woods with some bear spray beside you. Love, Your old mountain man. Father"


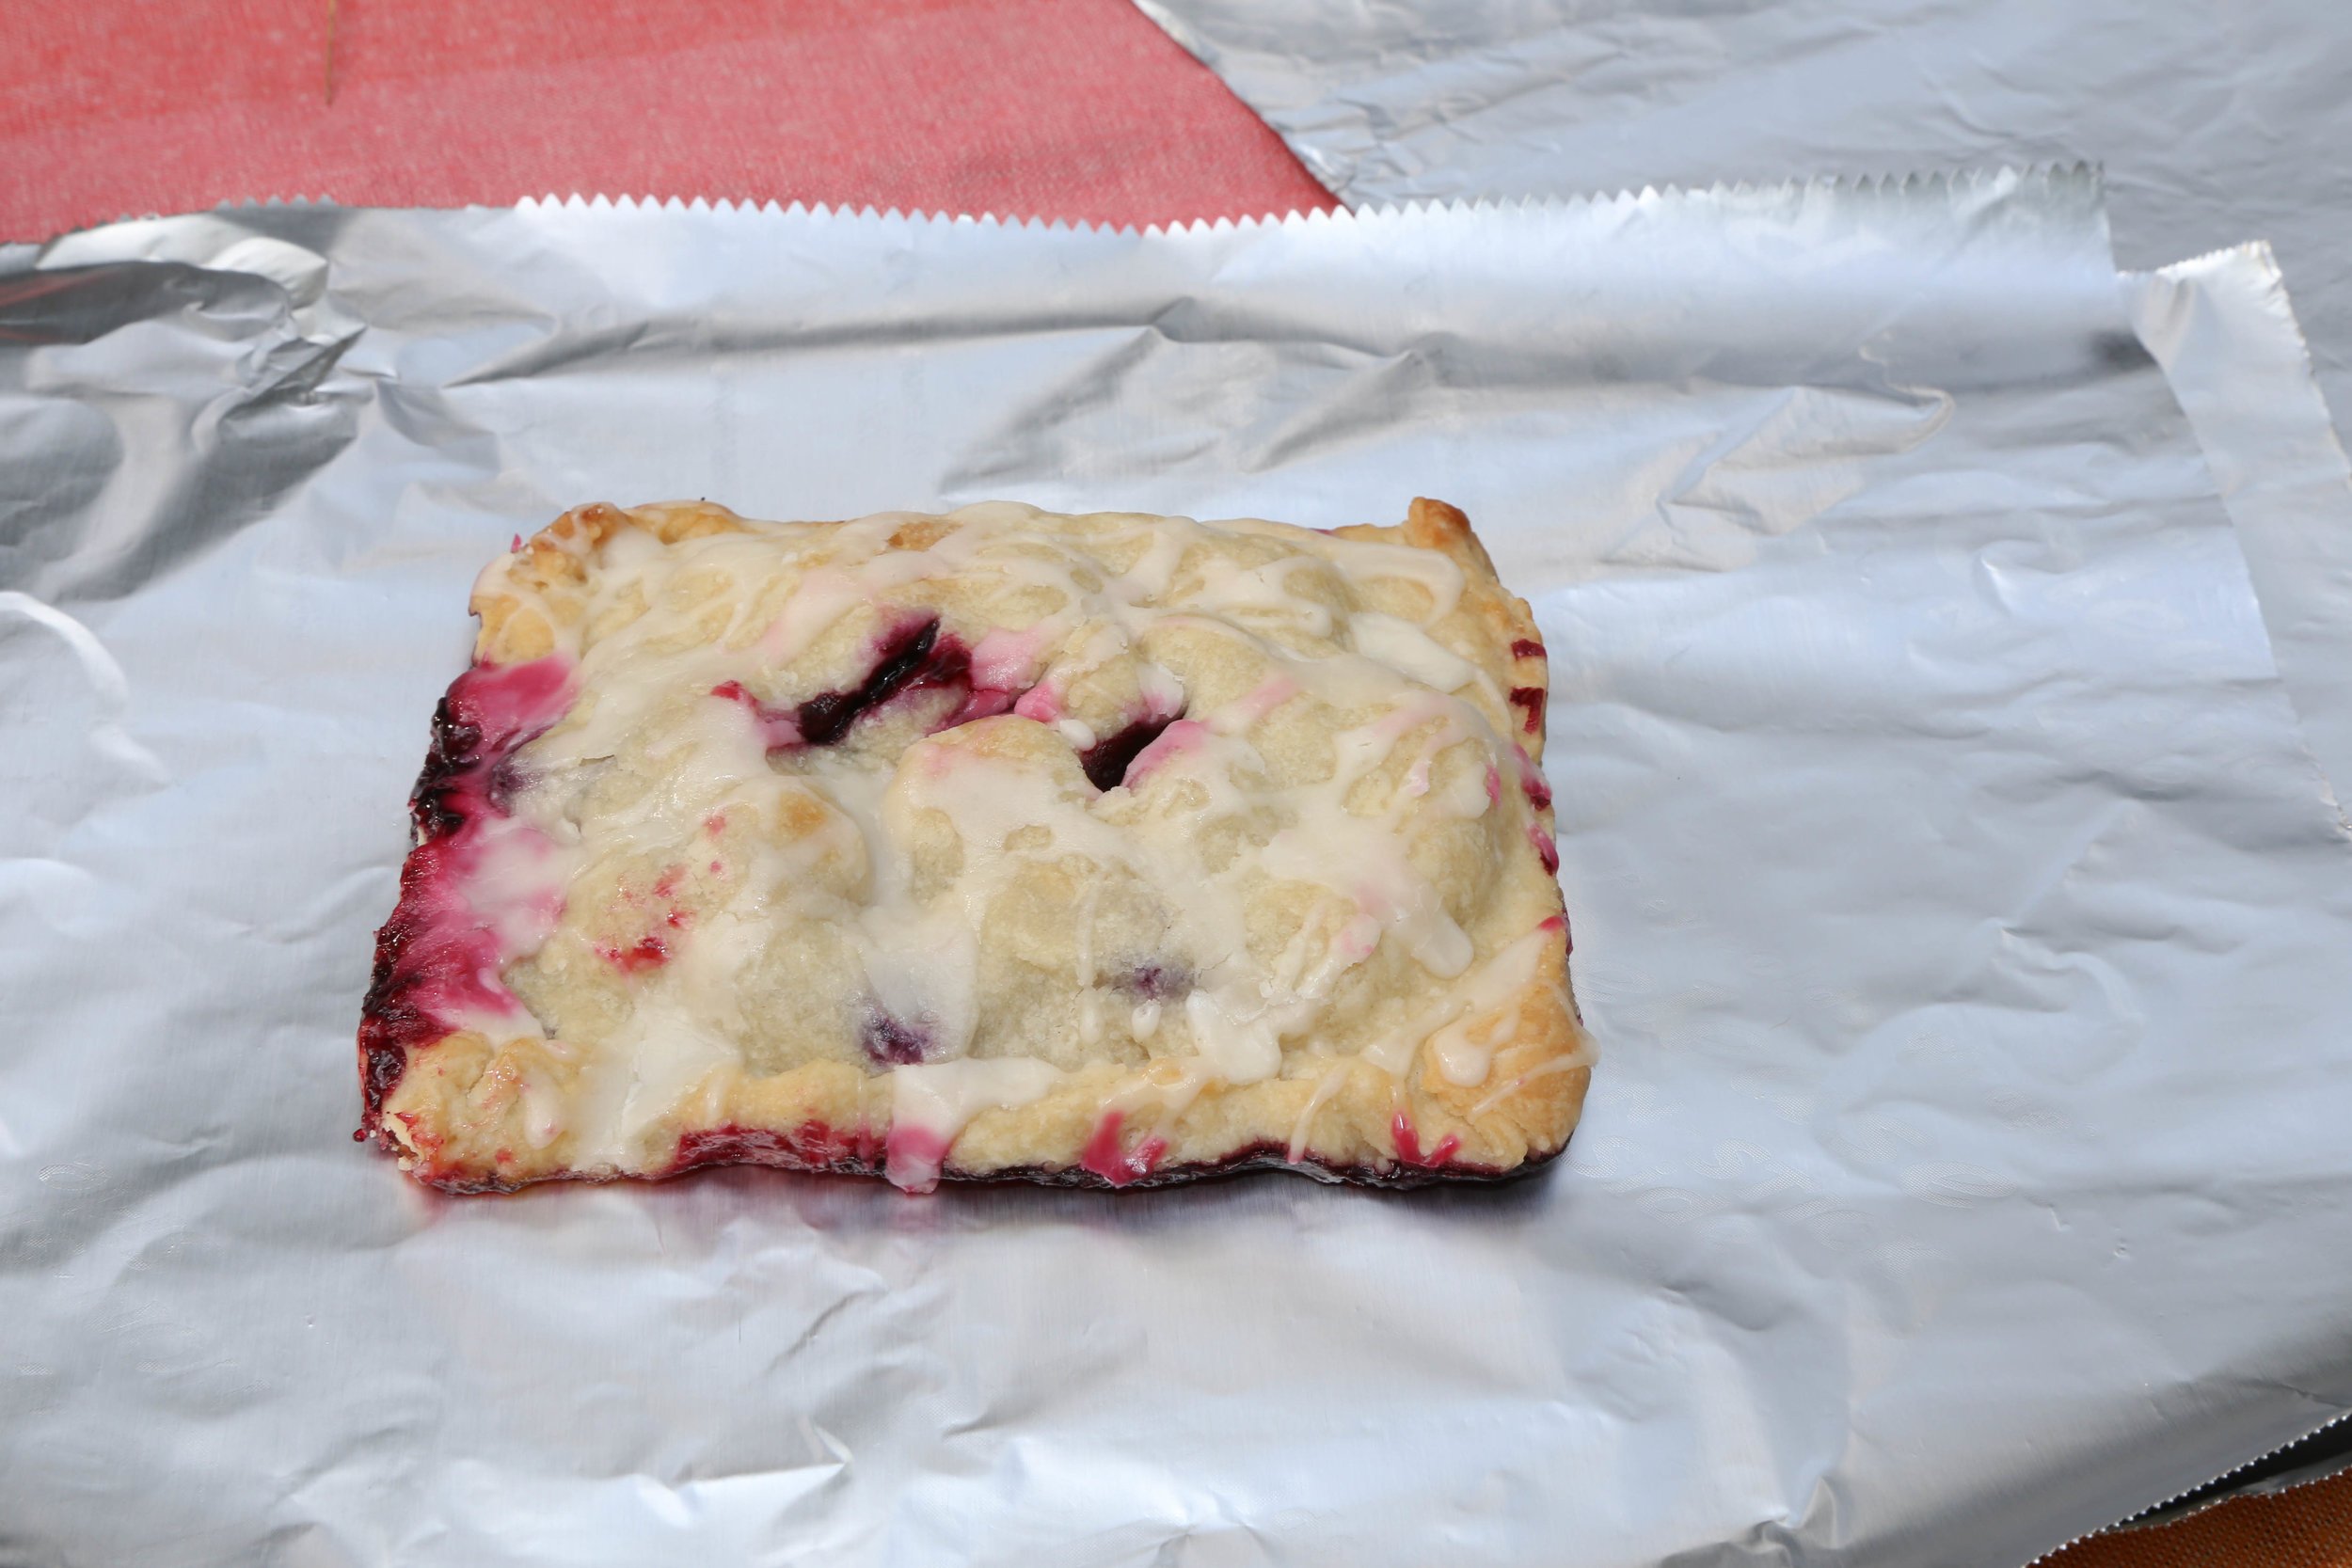
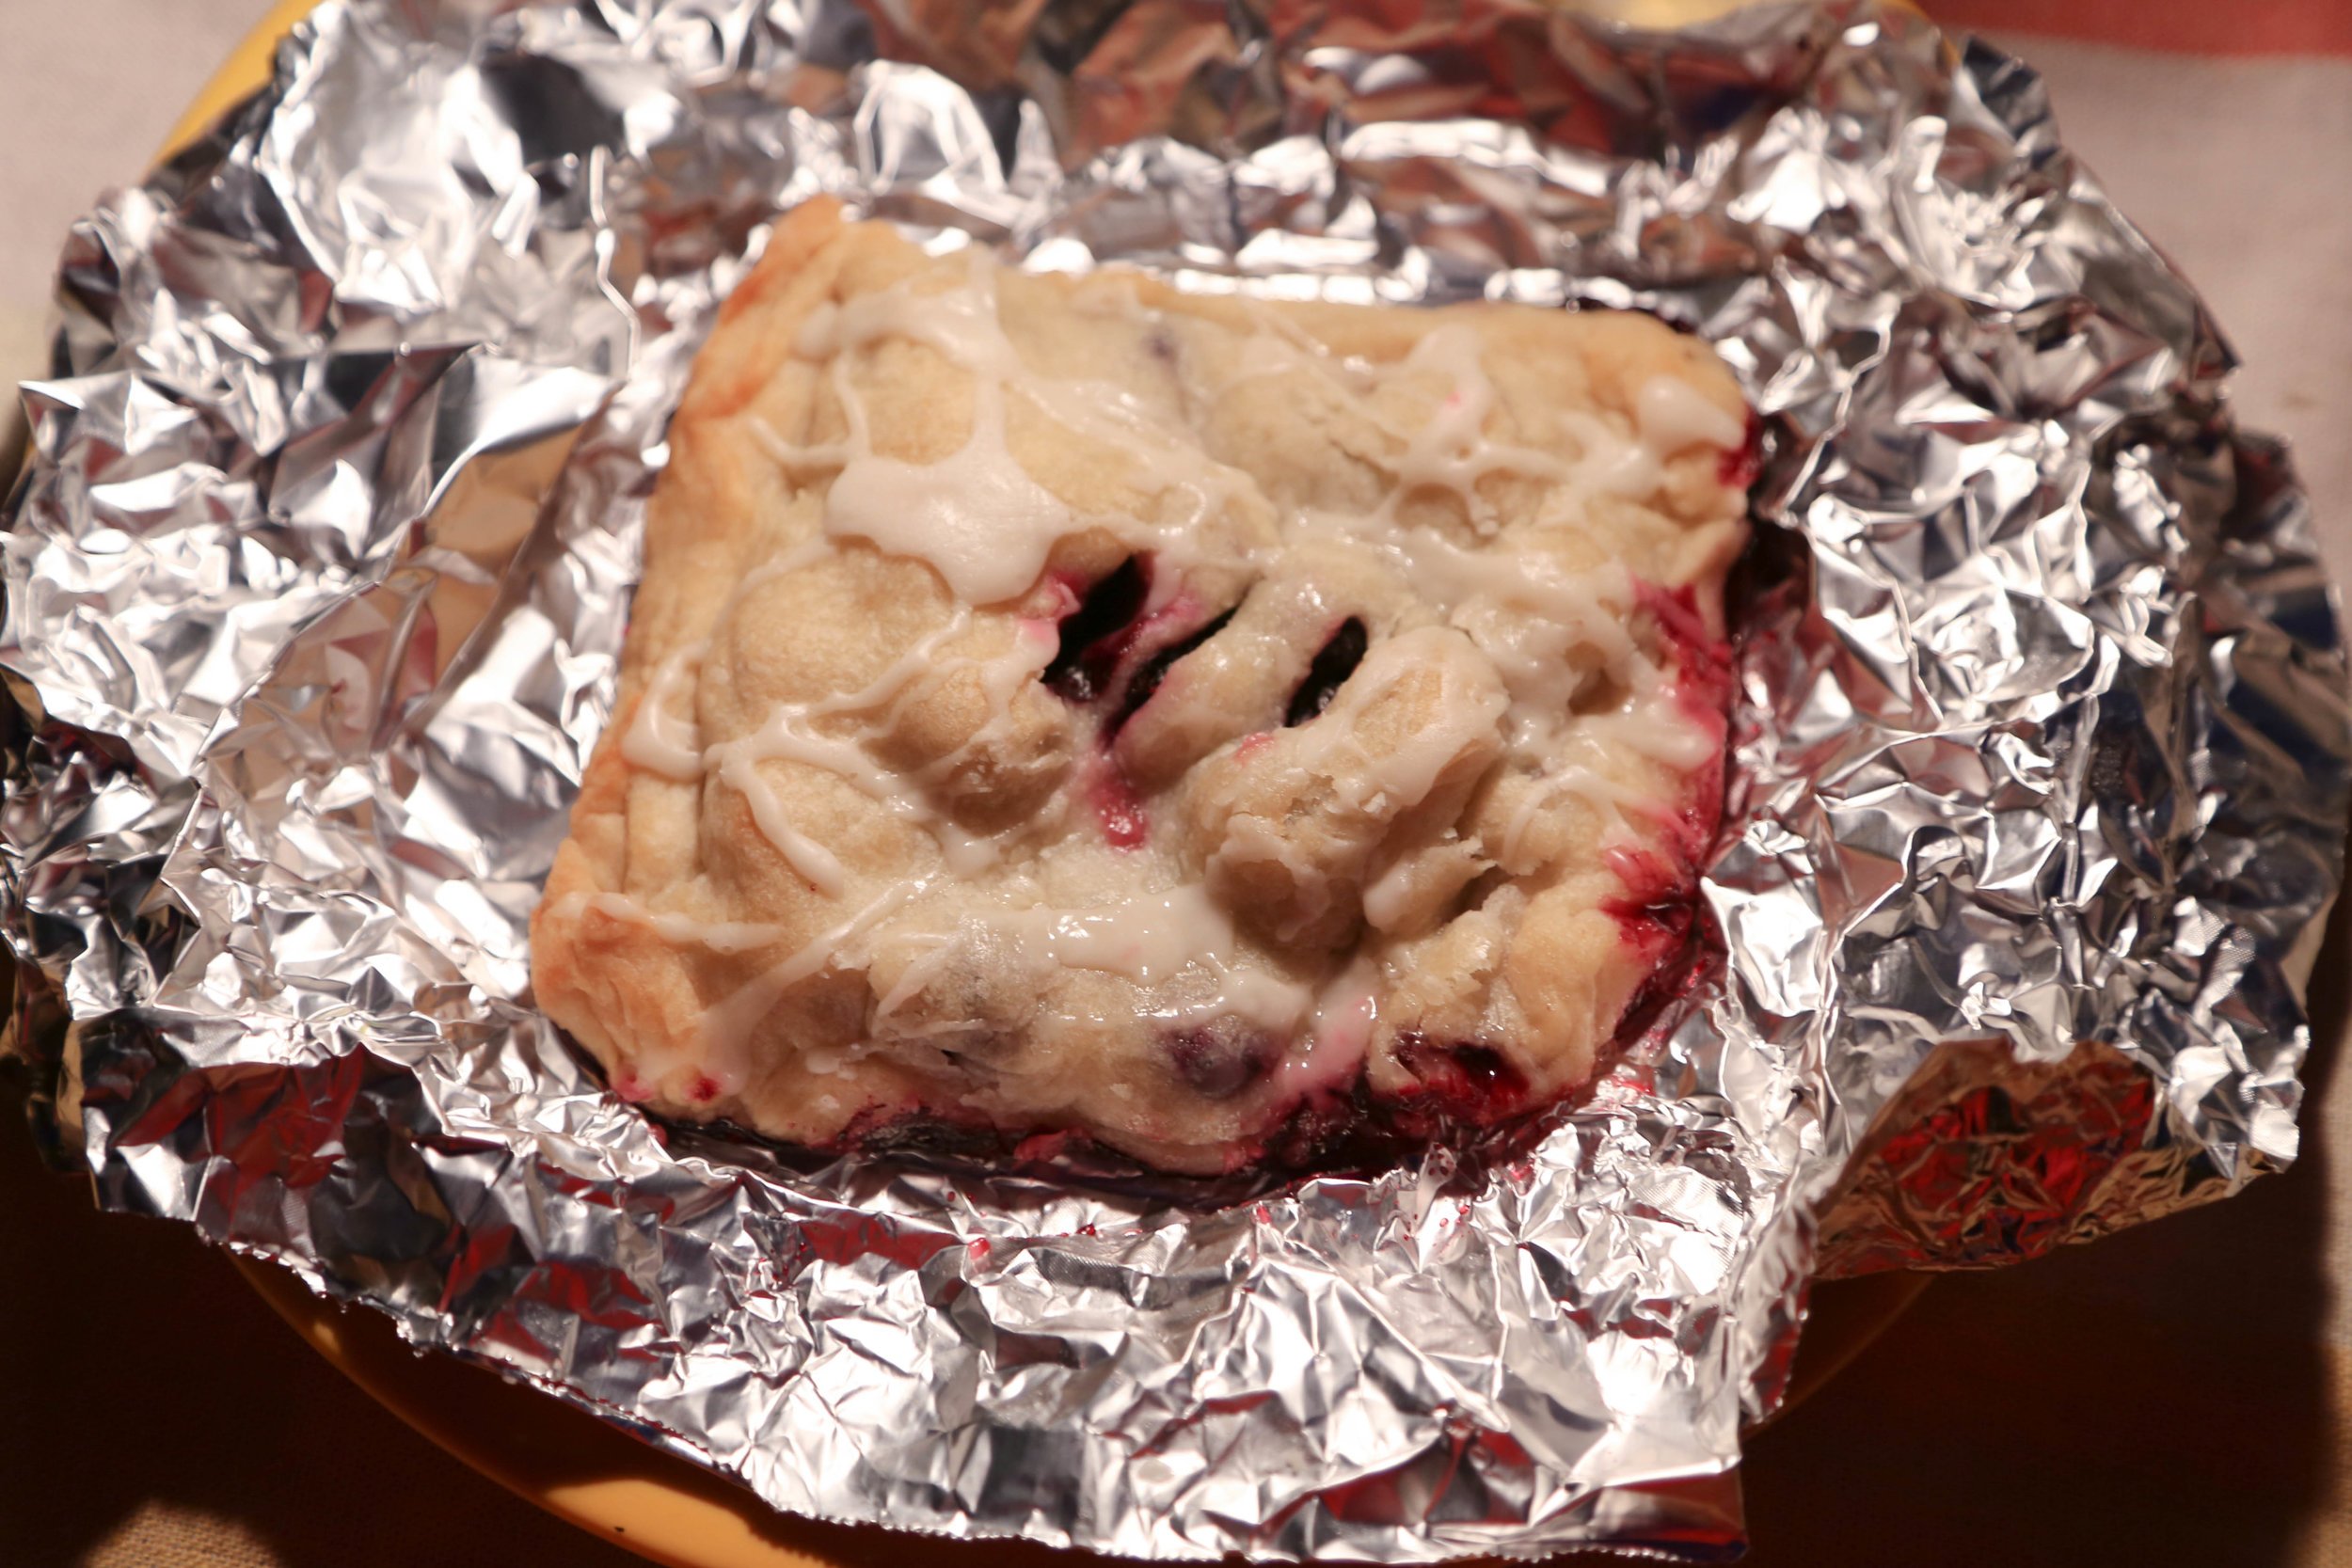
After dinner has settled a little, I normally start dessert. Now obviously there's the go to - s'mores - but sometimes I like to mix it up a little and make something special. One of my favorite campfire desserts is a blueberry hand pie with brown sugar crust and lemon glaze. They're easy to make and they pack great! The nice thing about this recipe is that if you're more of the dinner party type than the outdoorsy type, it makes a beautiful crostata! I made some hand pies and a mini crostata, if you ask me that's the perfect combo, especially if there's just two of you. You can always par-bake and freeze the hand pies and reheat them later, so you can take them out one or two at a time!
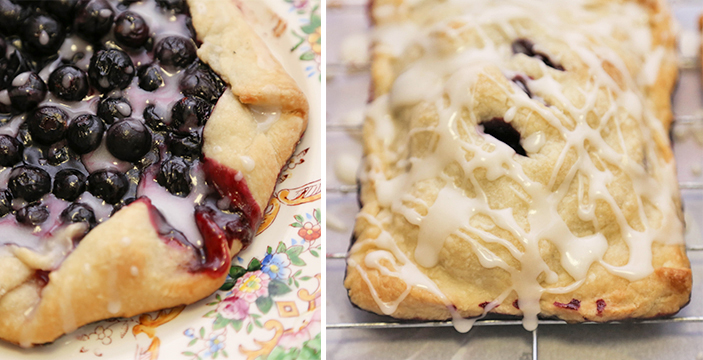
Blueberry Hand Pies/Crostata with a Brown Sugar Crust and Lemon Glaze
Ingredients
brown sugar pie crust
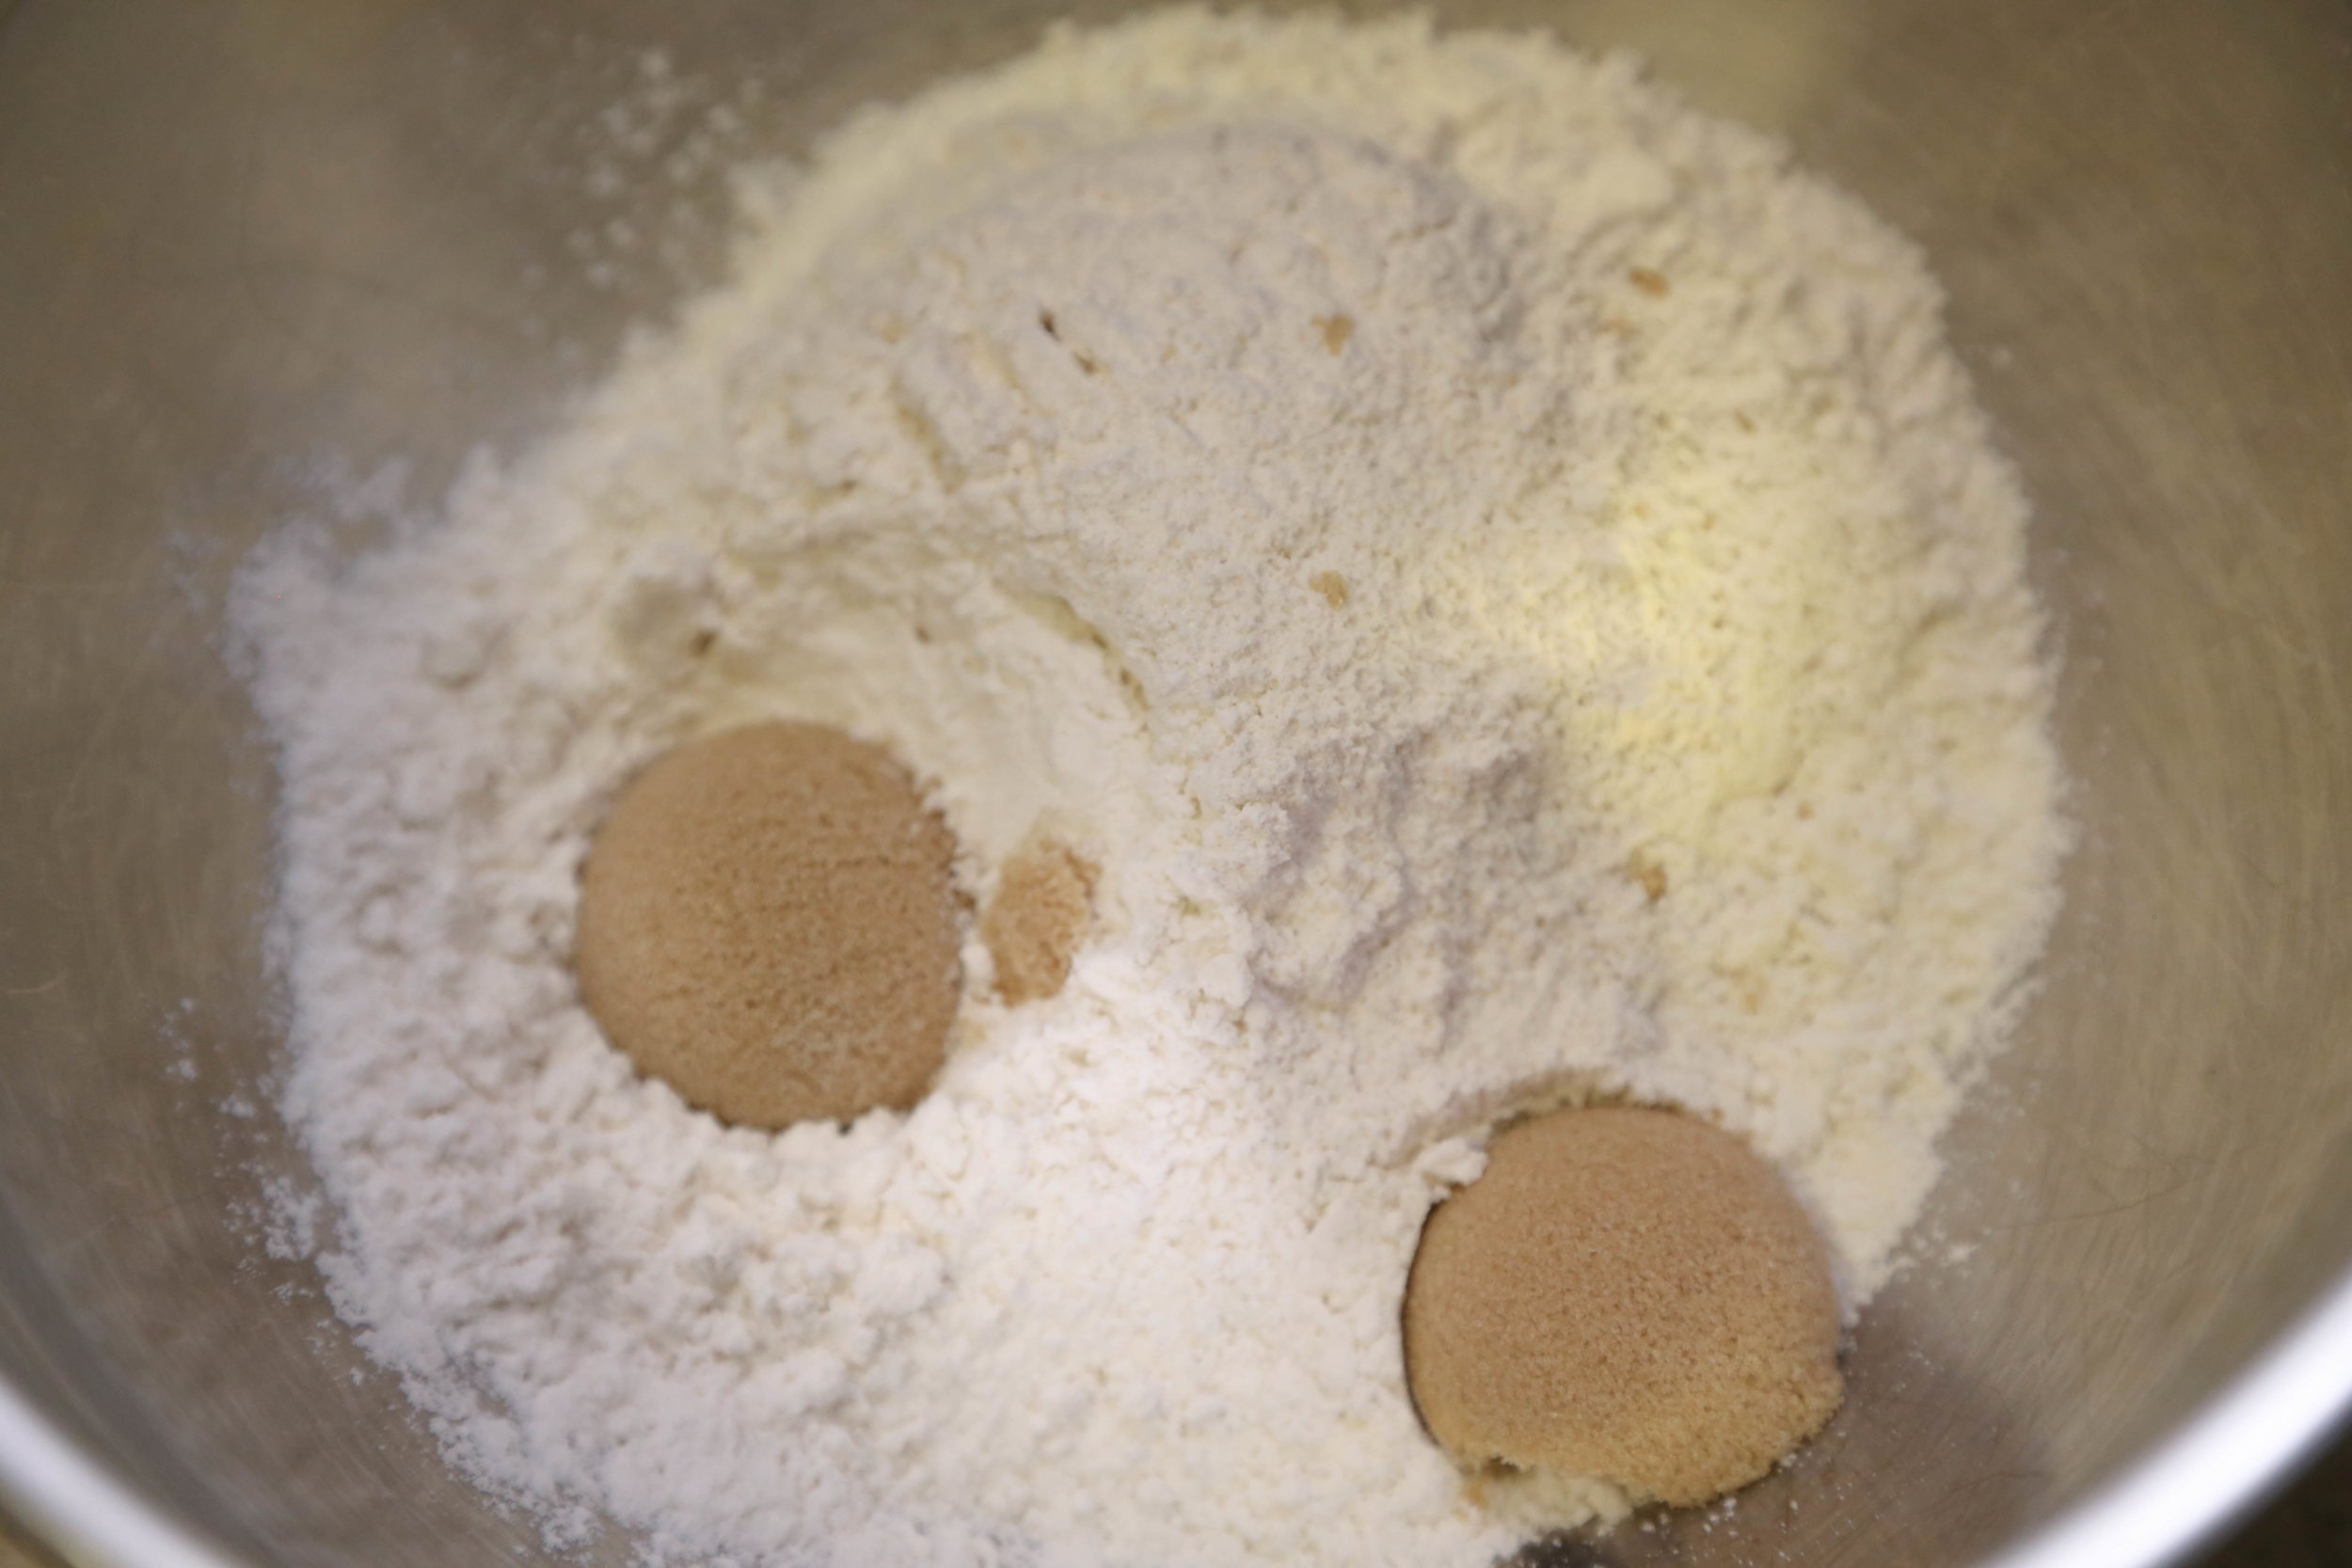
- 1 1//4 cup flour
- 1 1/2 tablespoon brown sugar
- 1/8 teaspoon salt
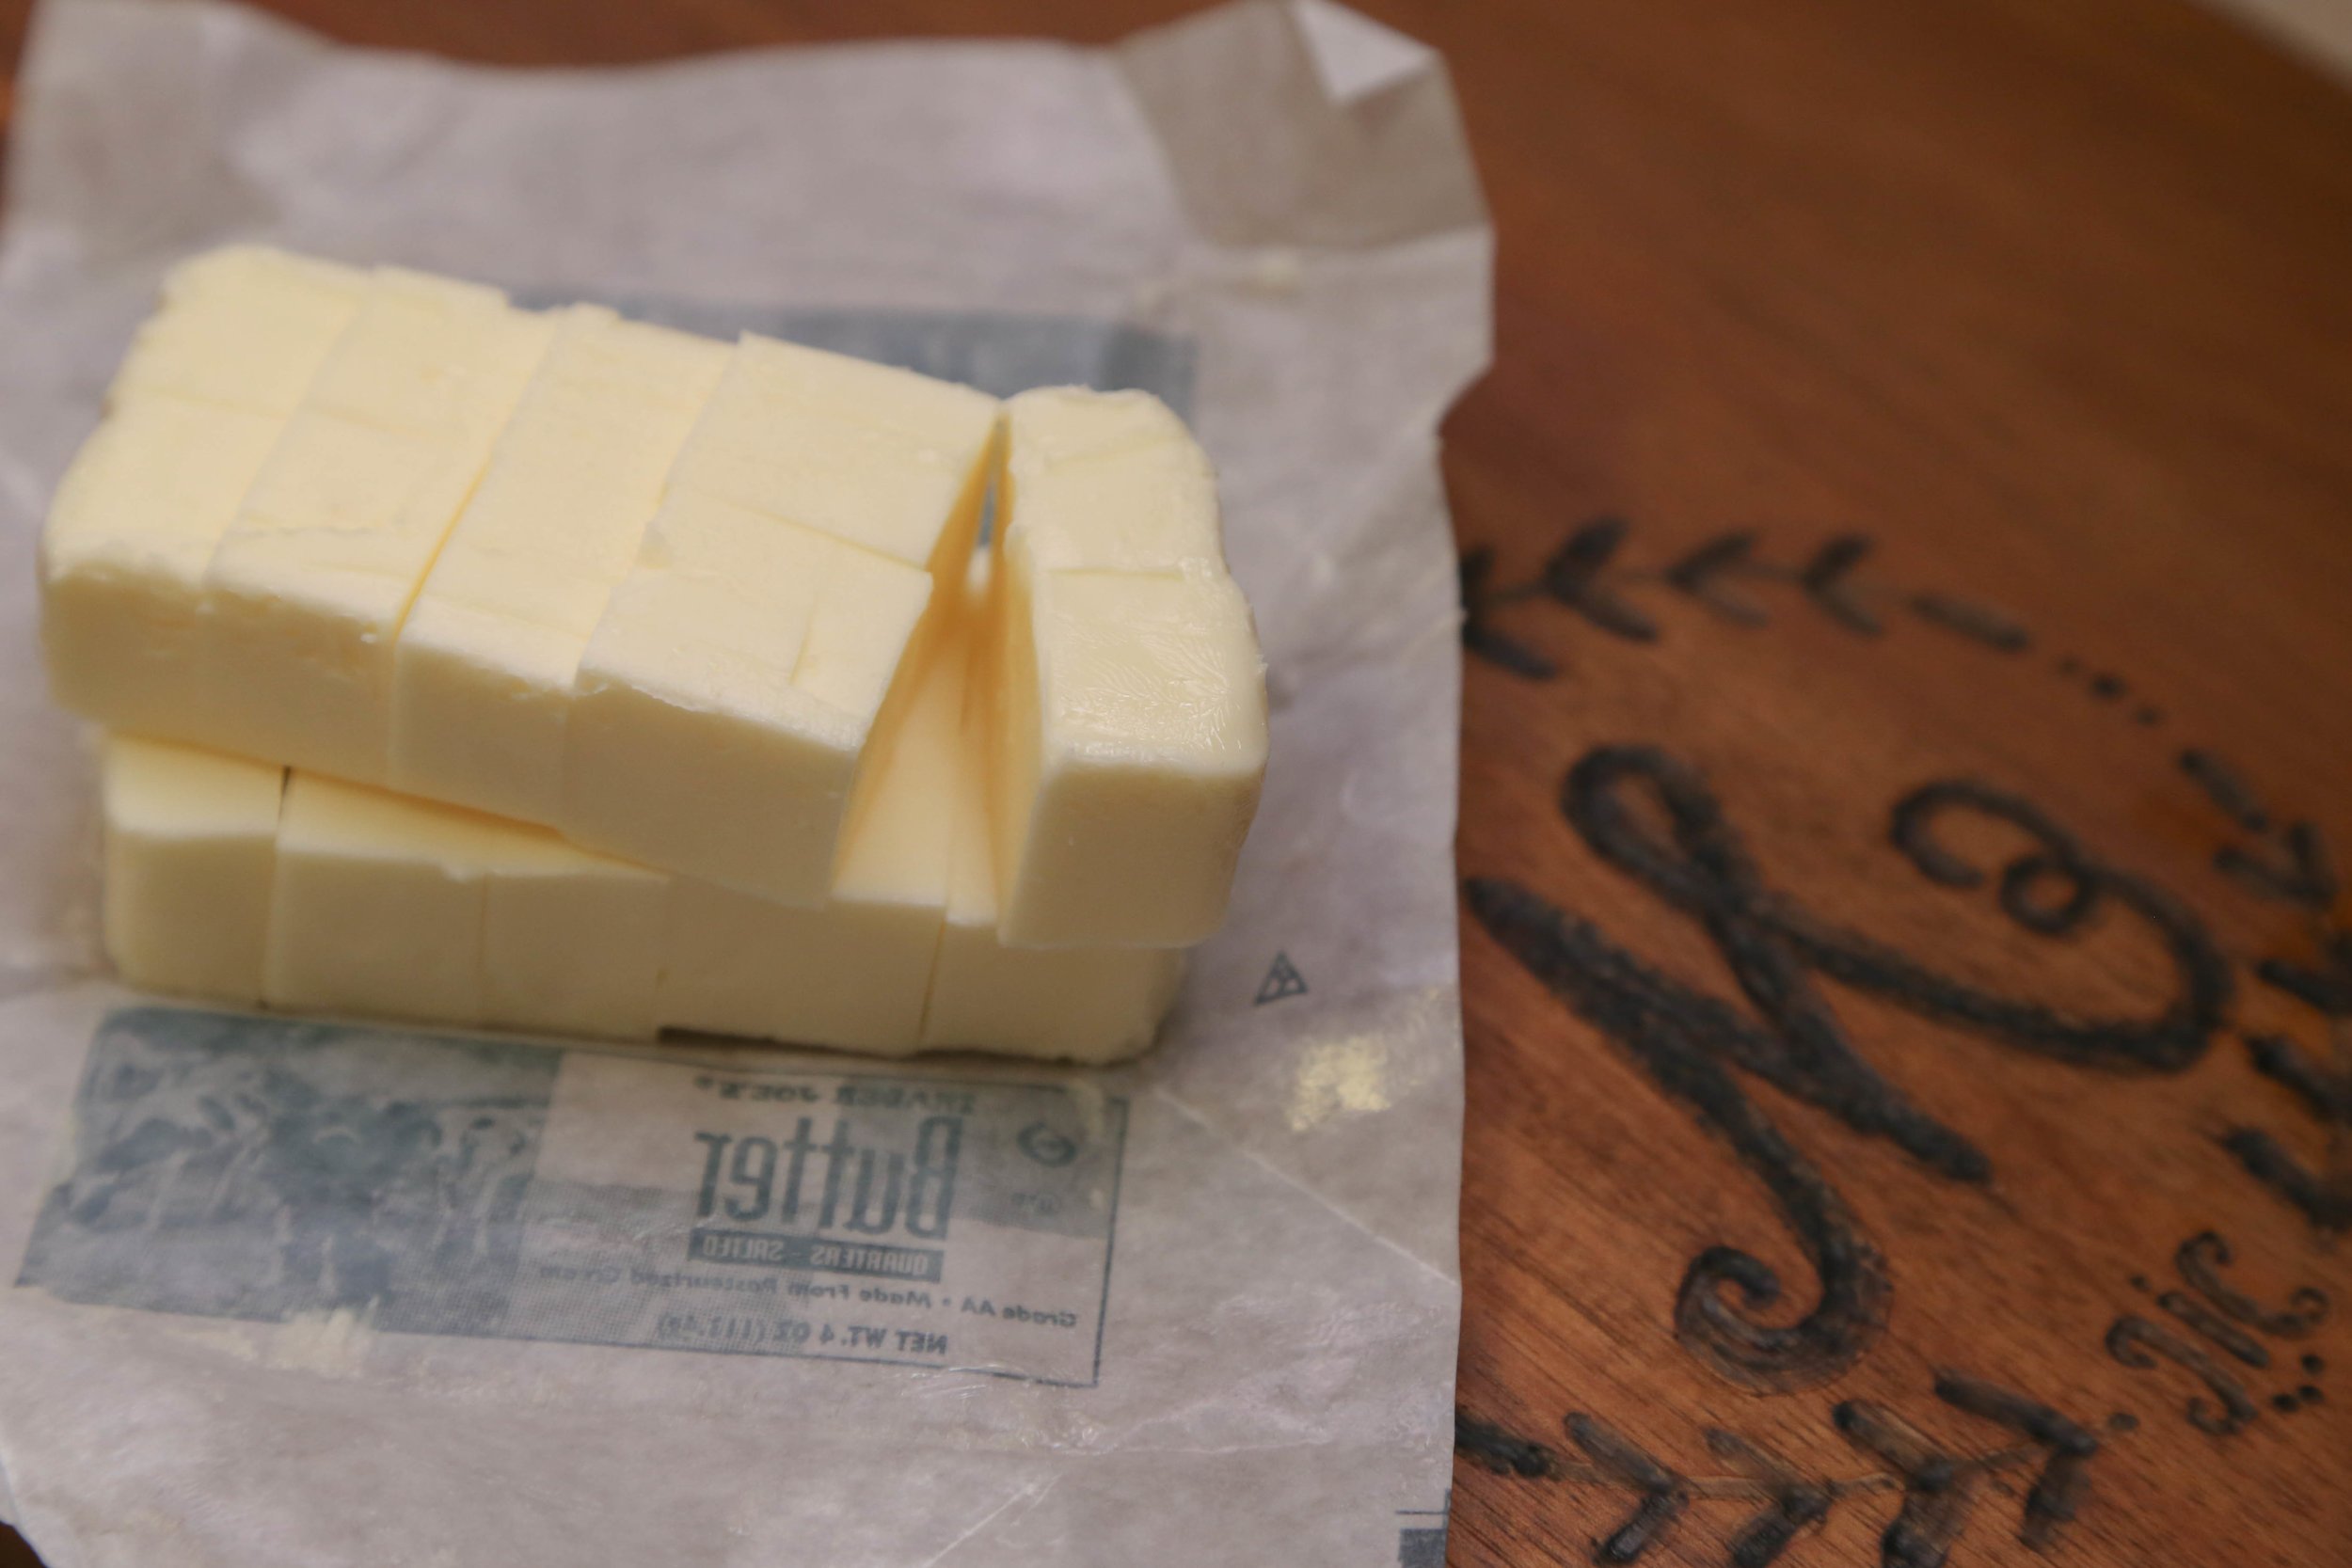
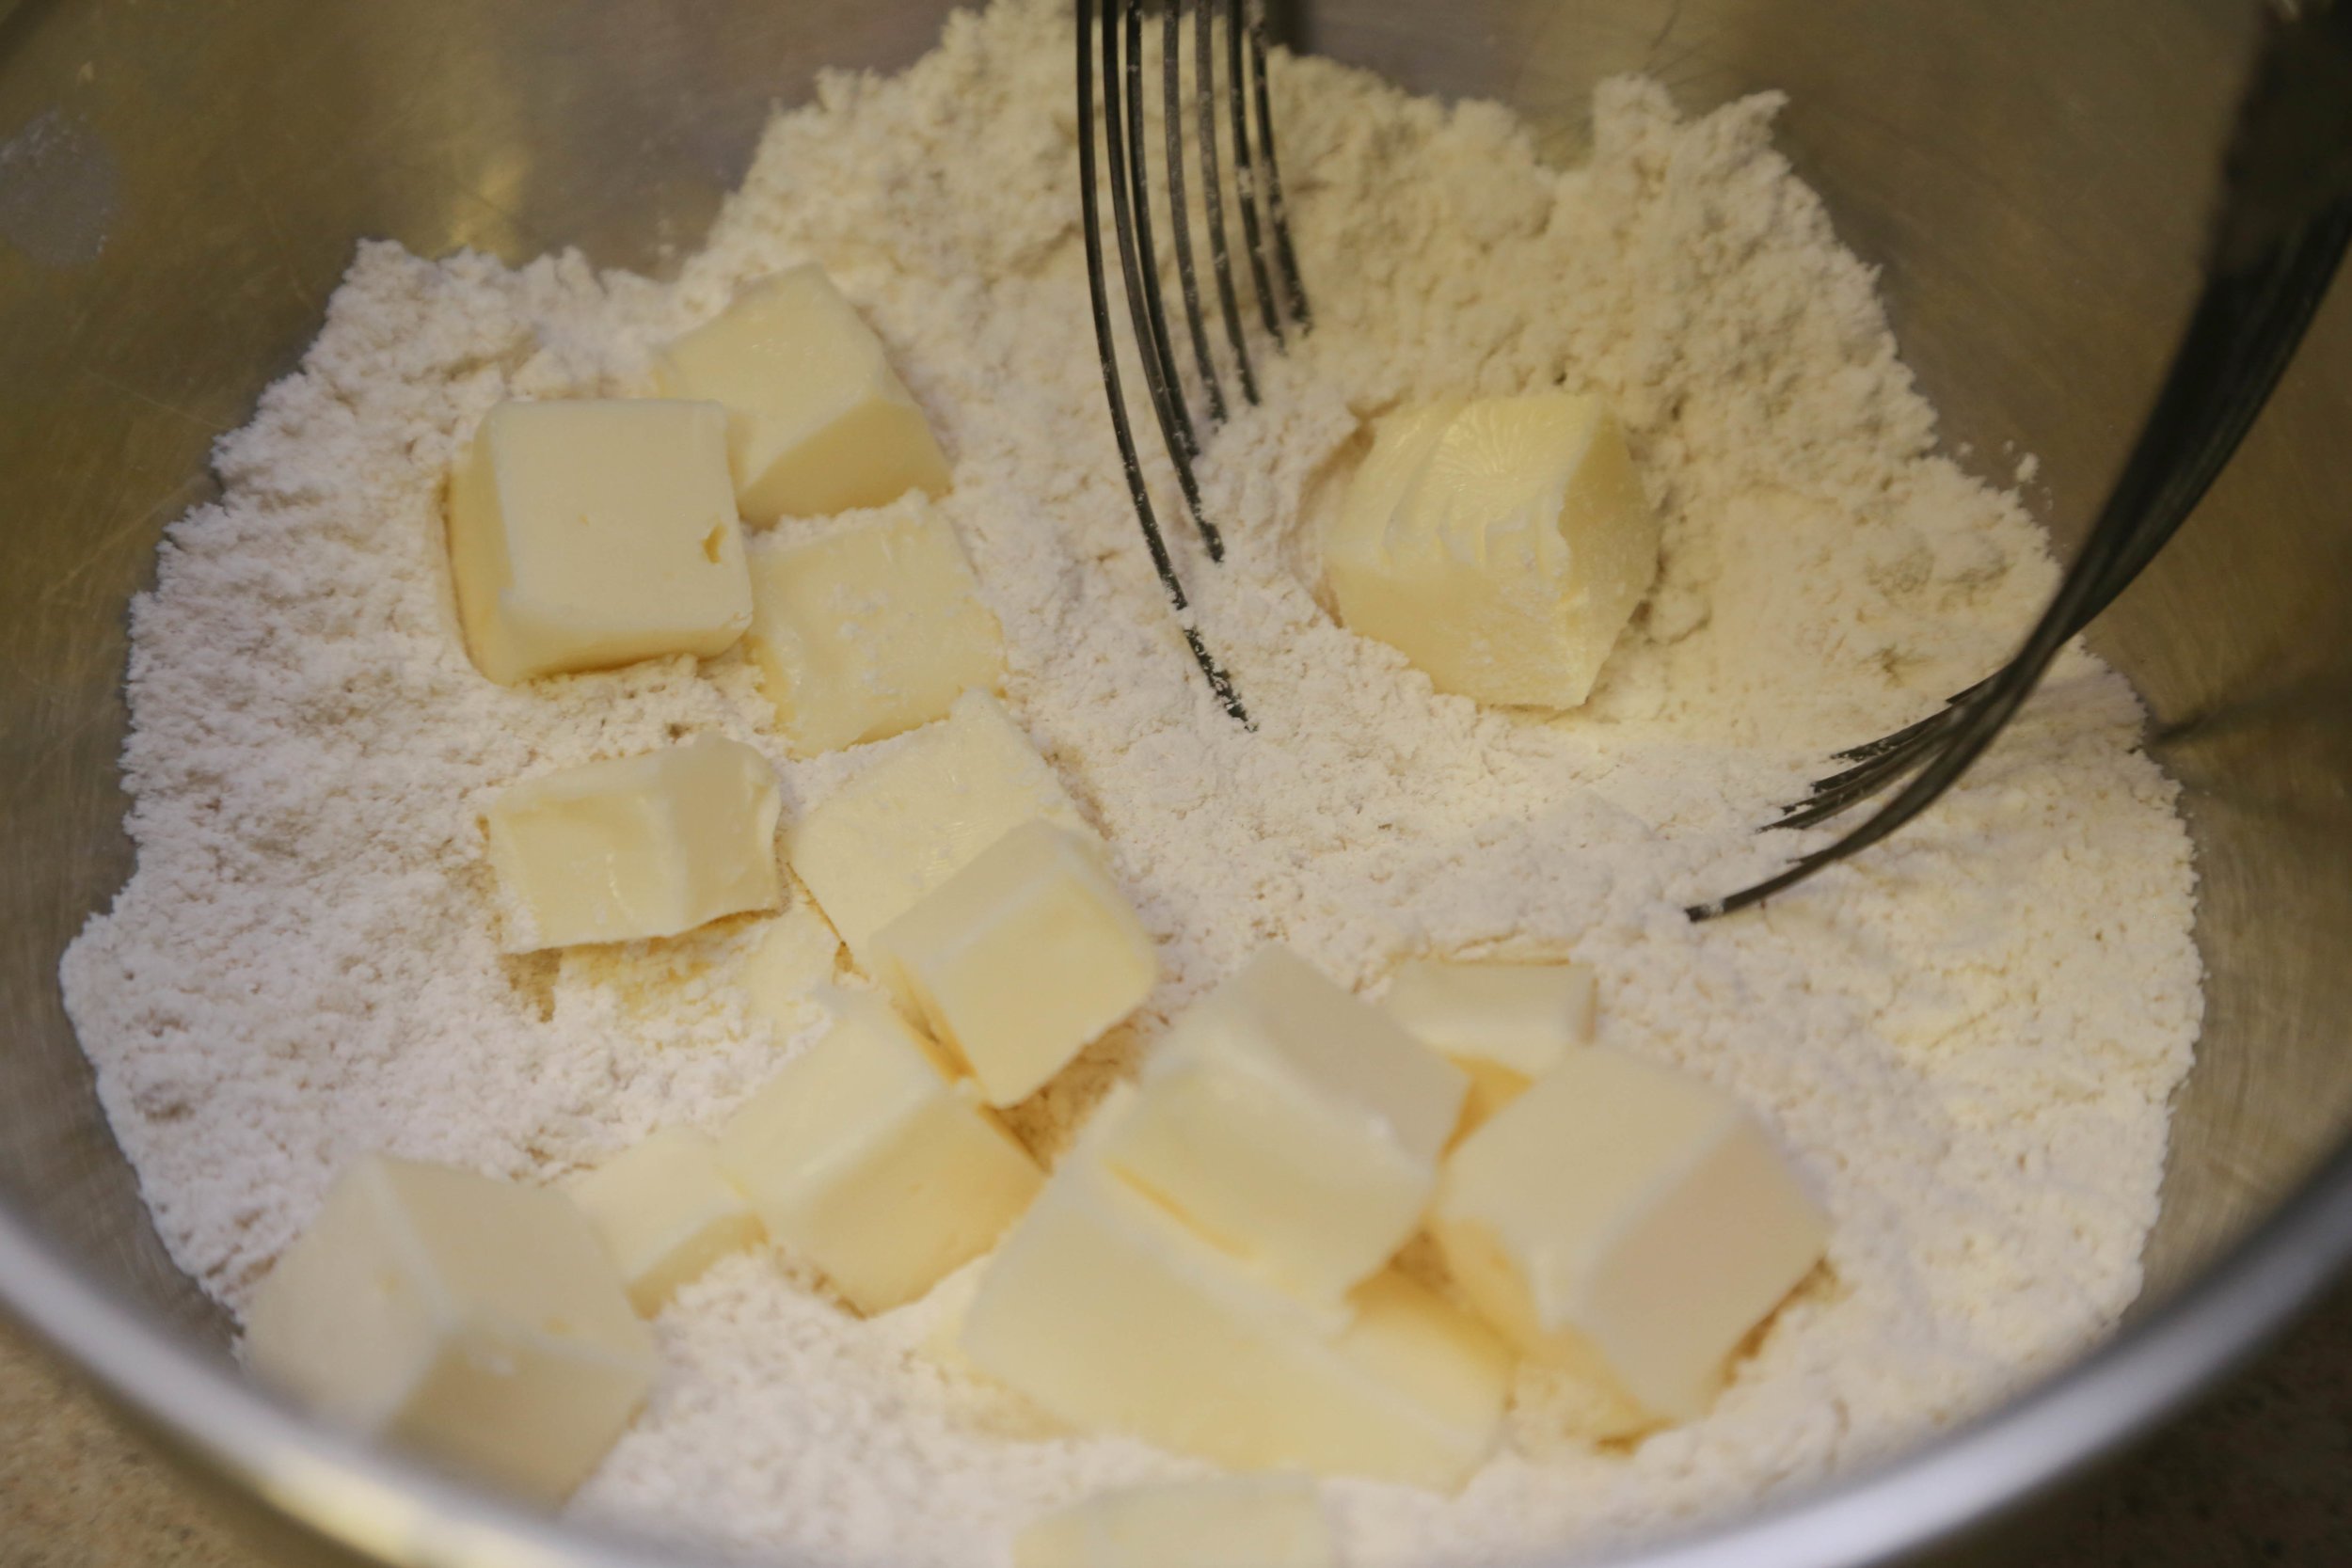
- 8 tablespoons butter (cold and cubed) - no one said this was healthy
- 1/4 cup water
blueberry filling
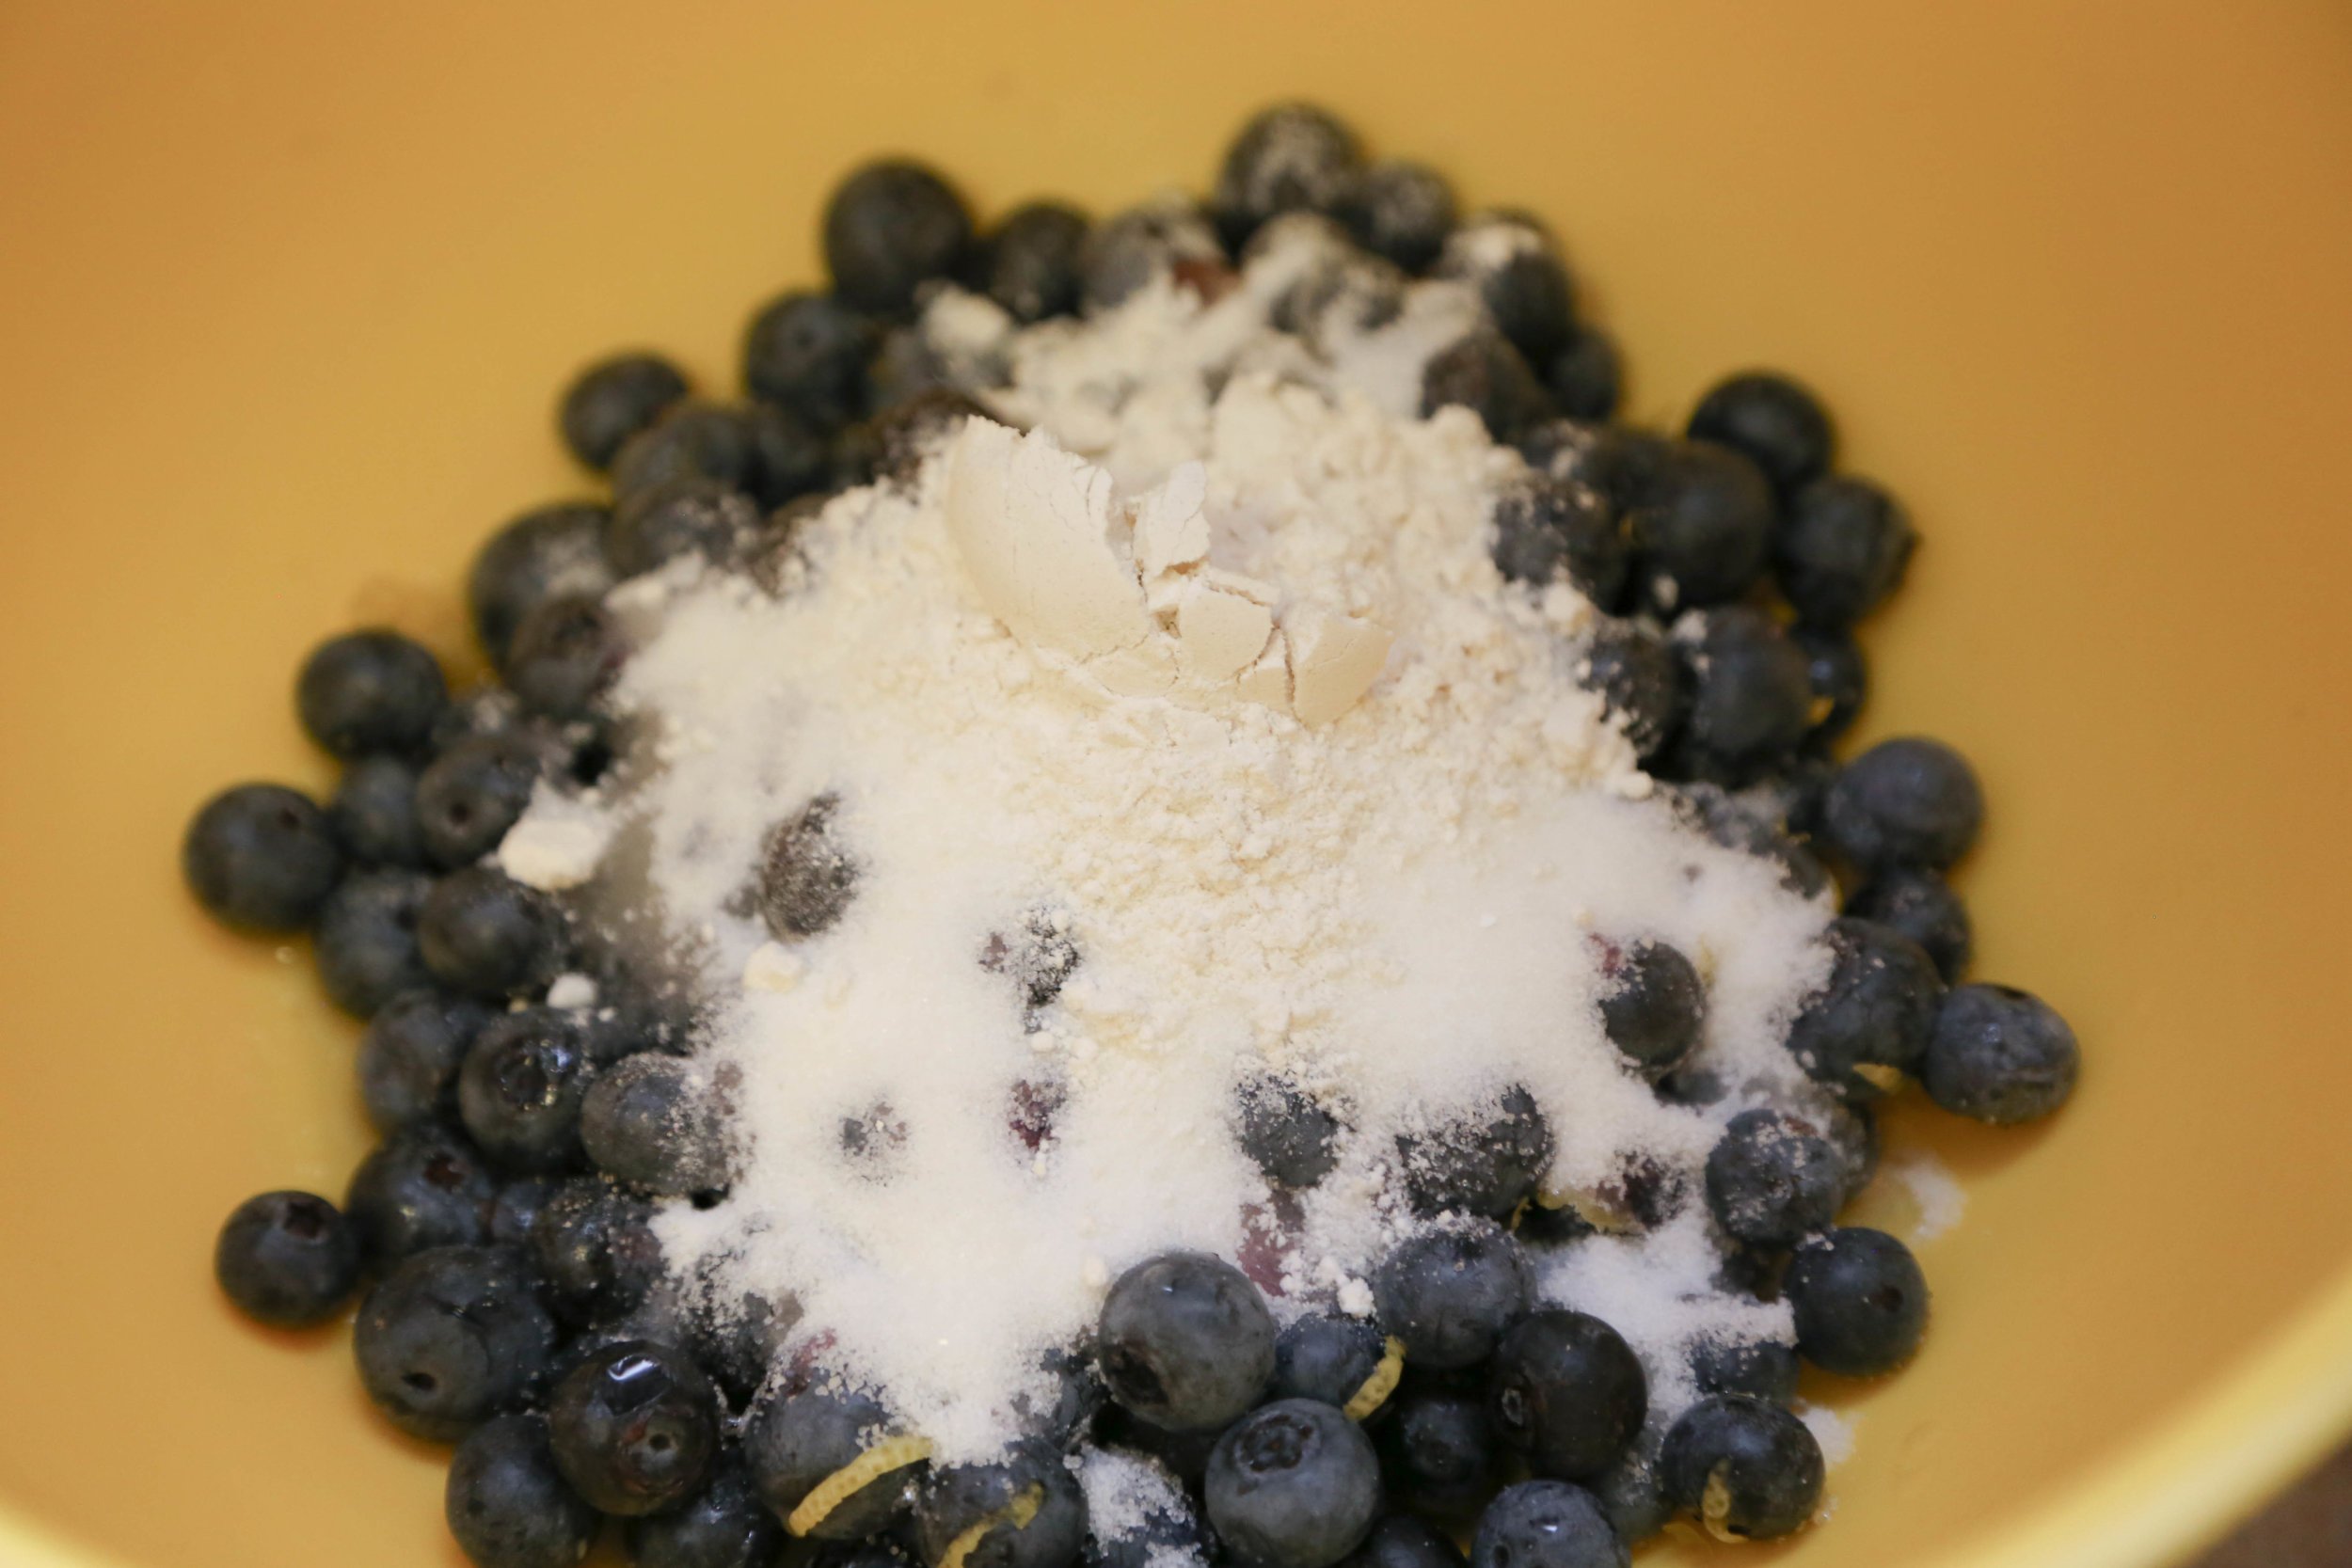
- 2 cups blueberries
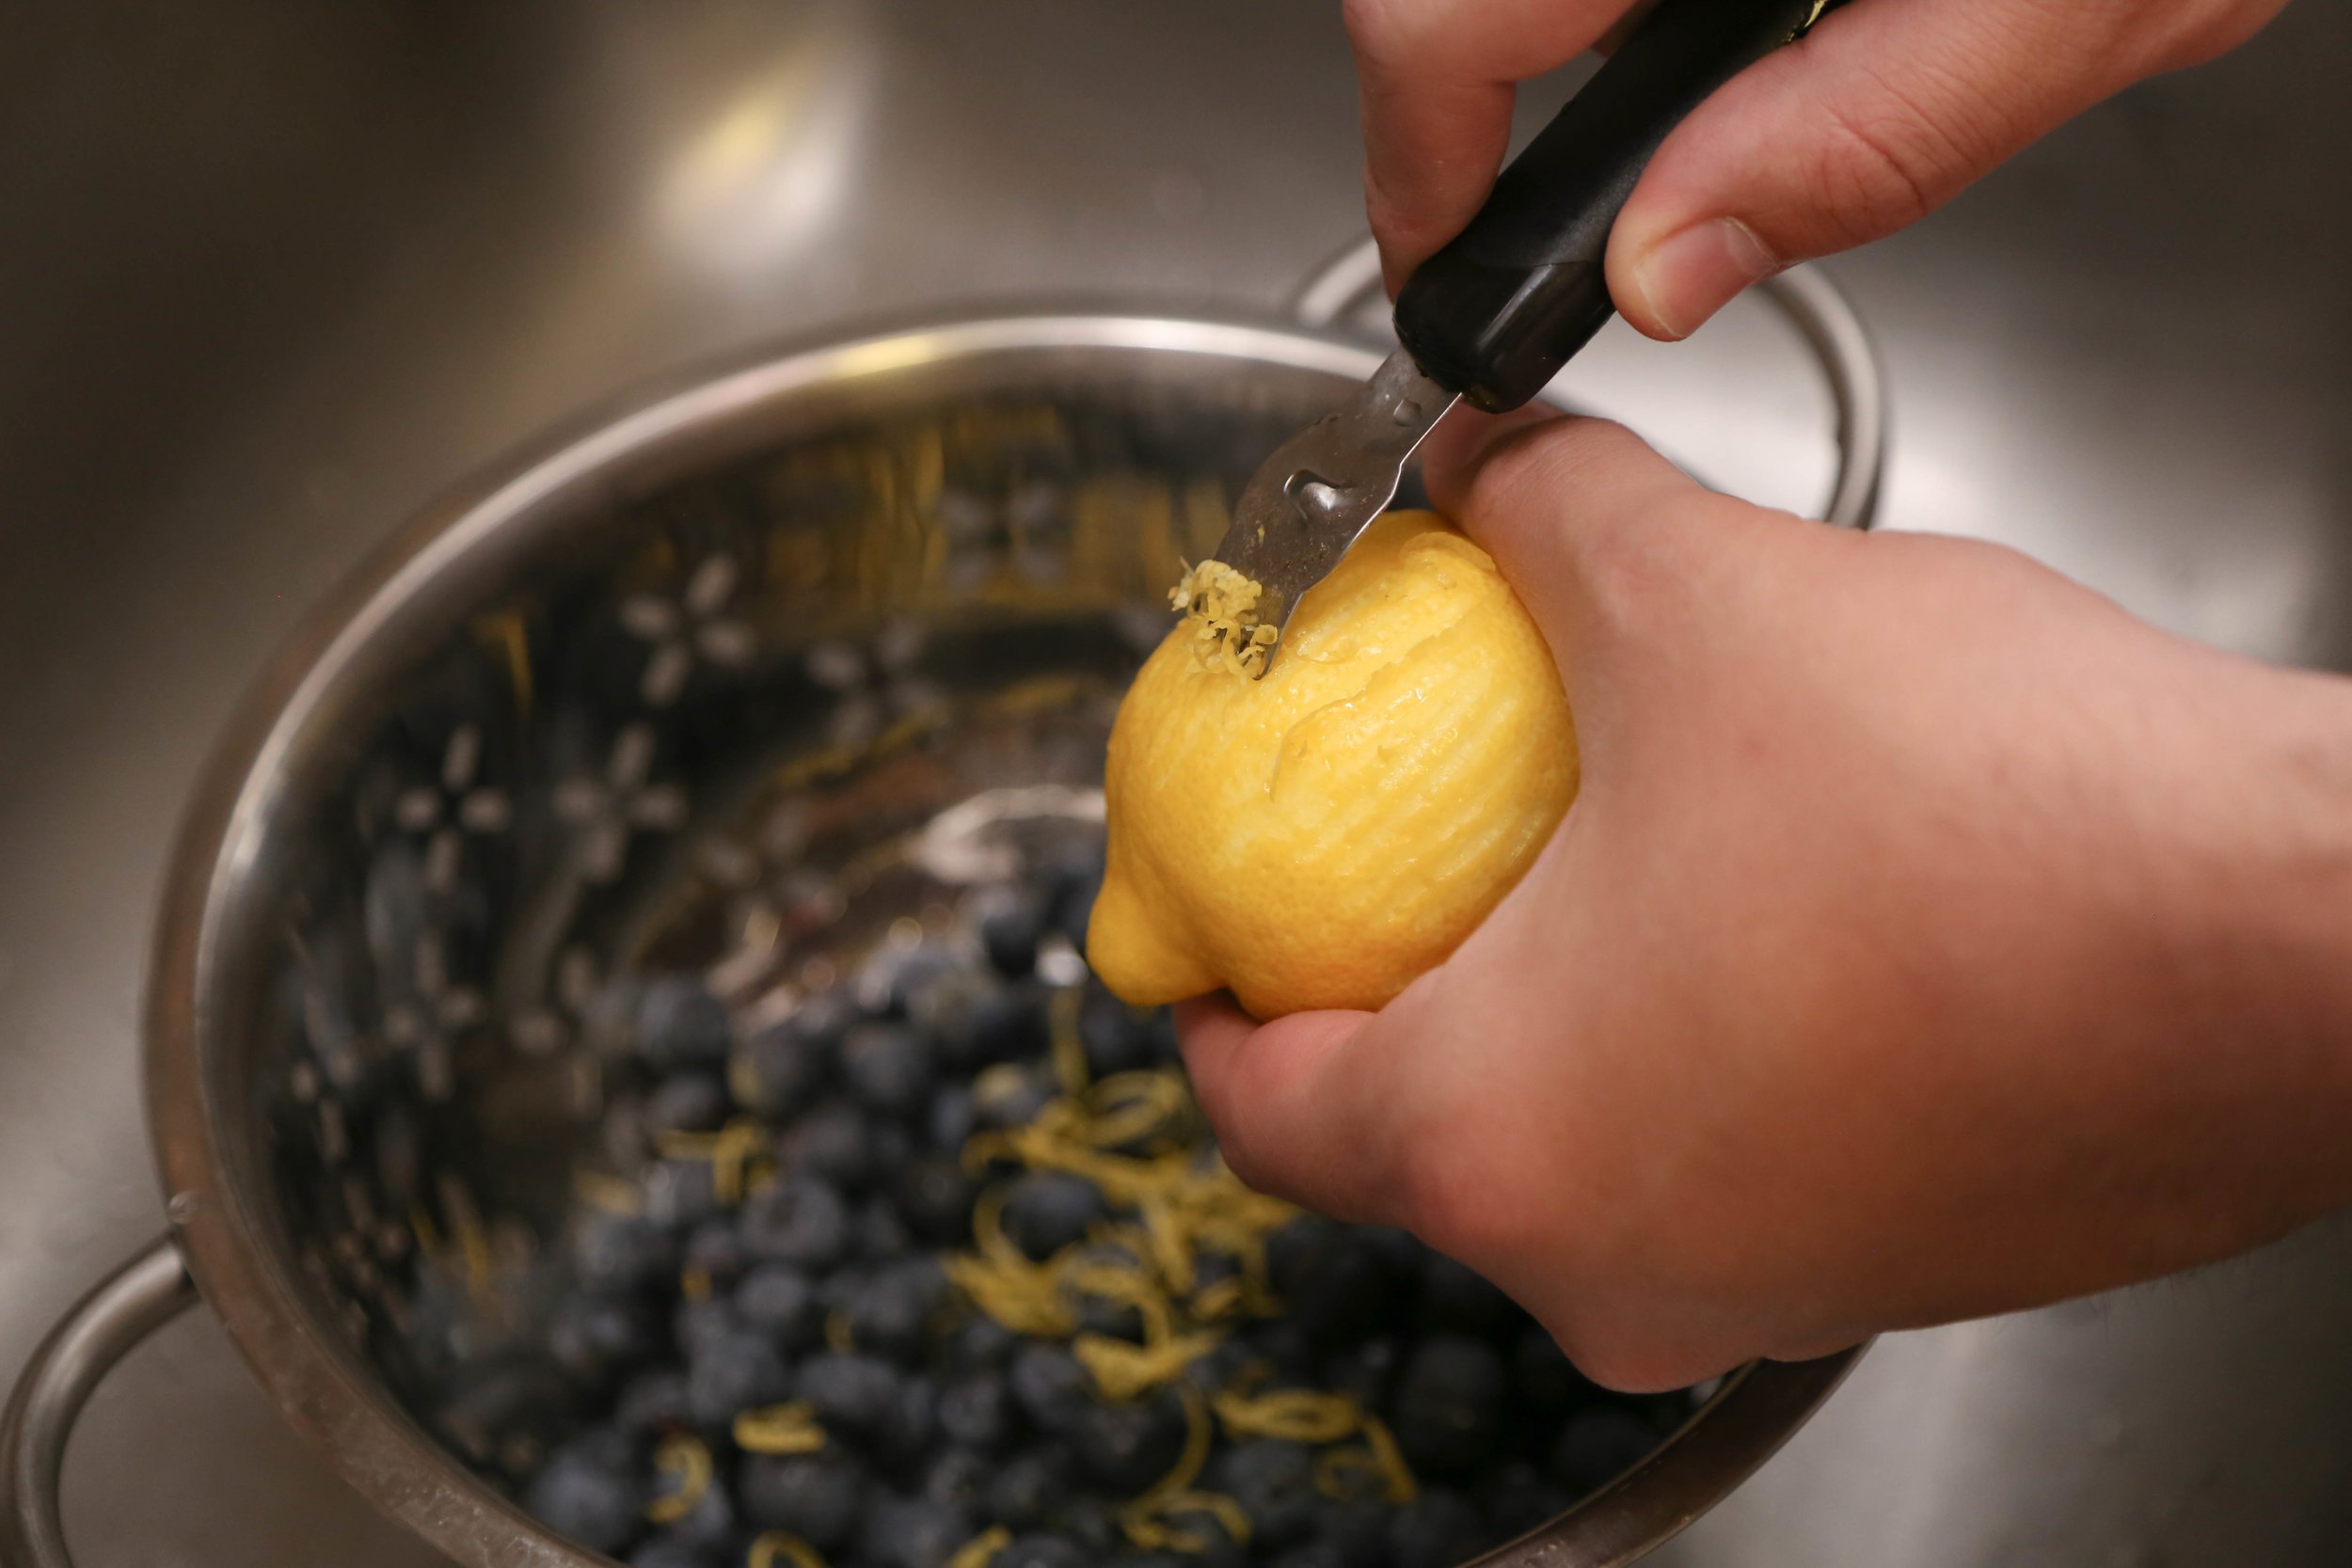
- lemon zest from one lemon
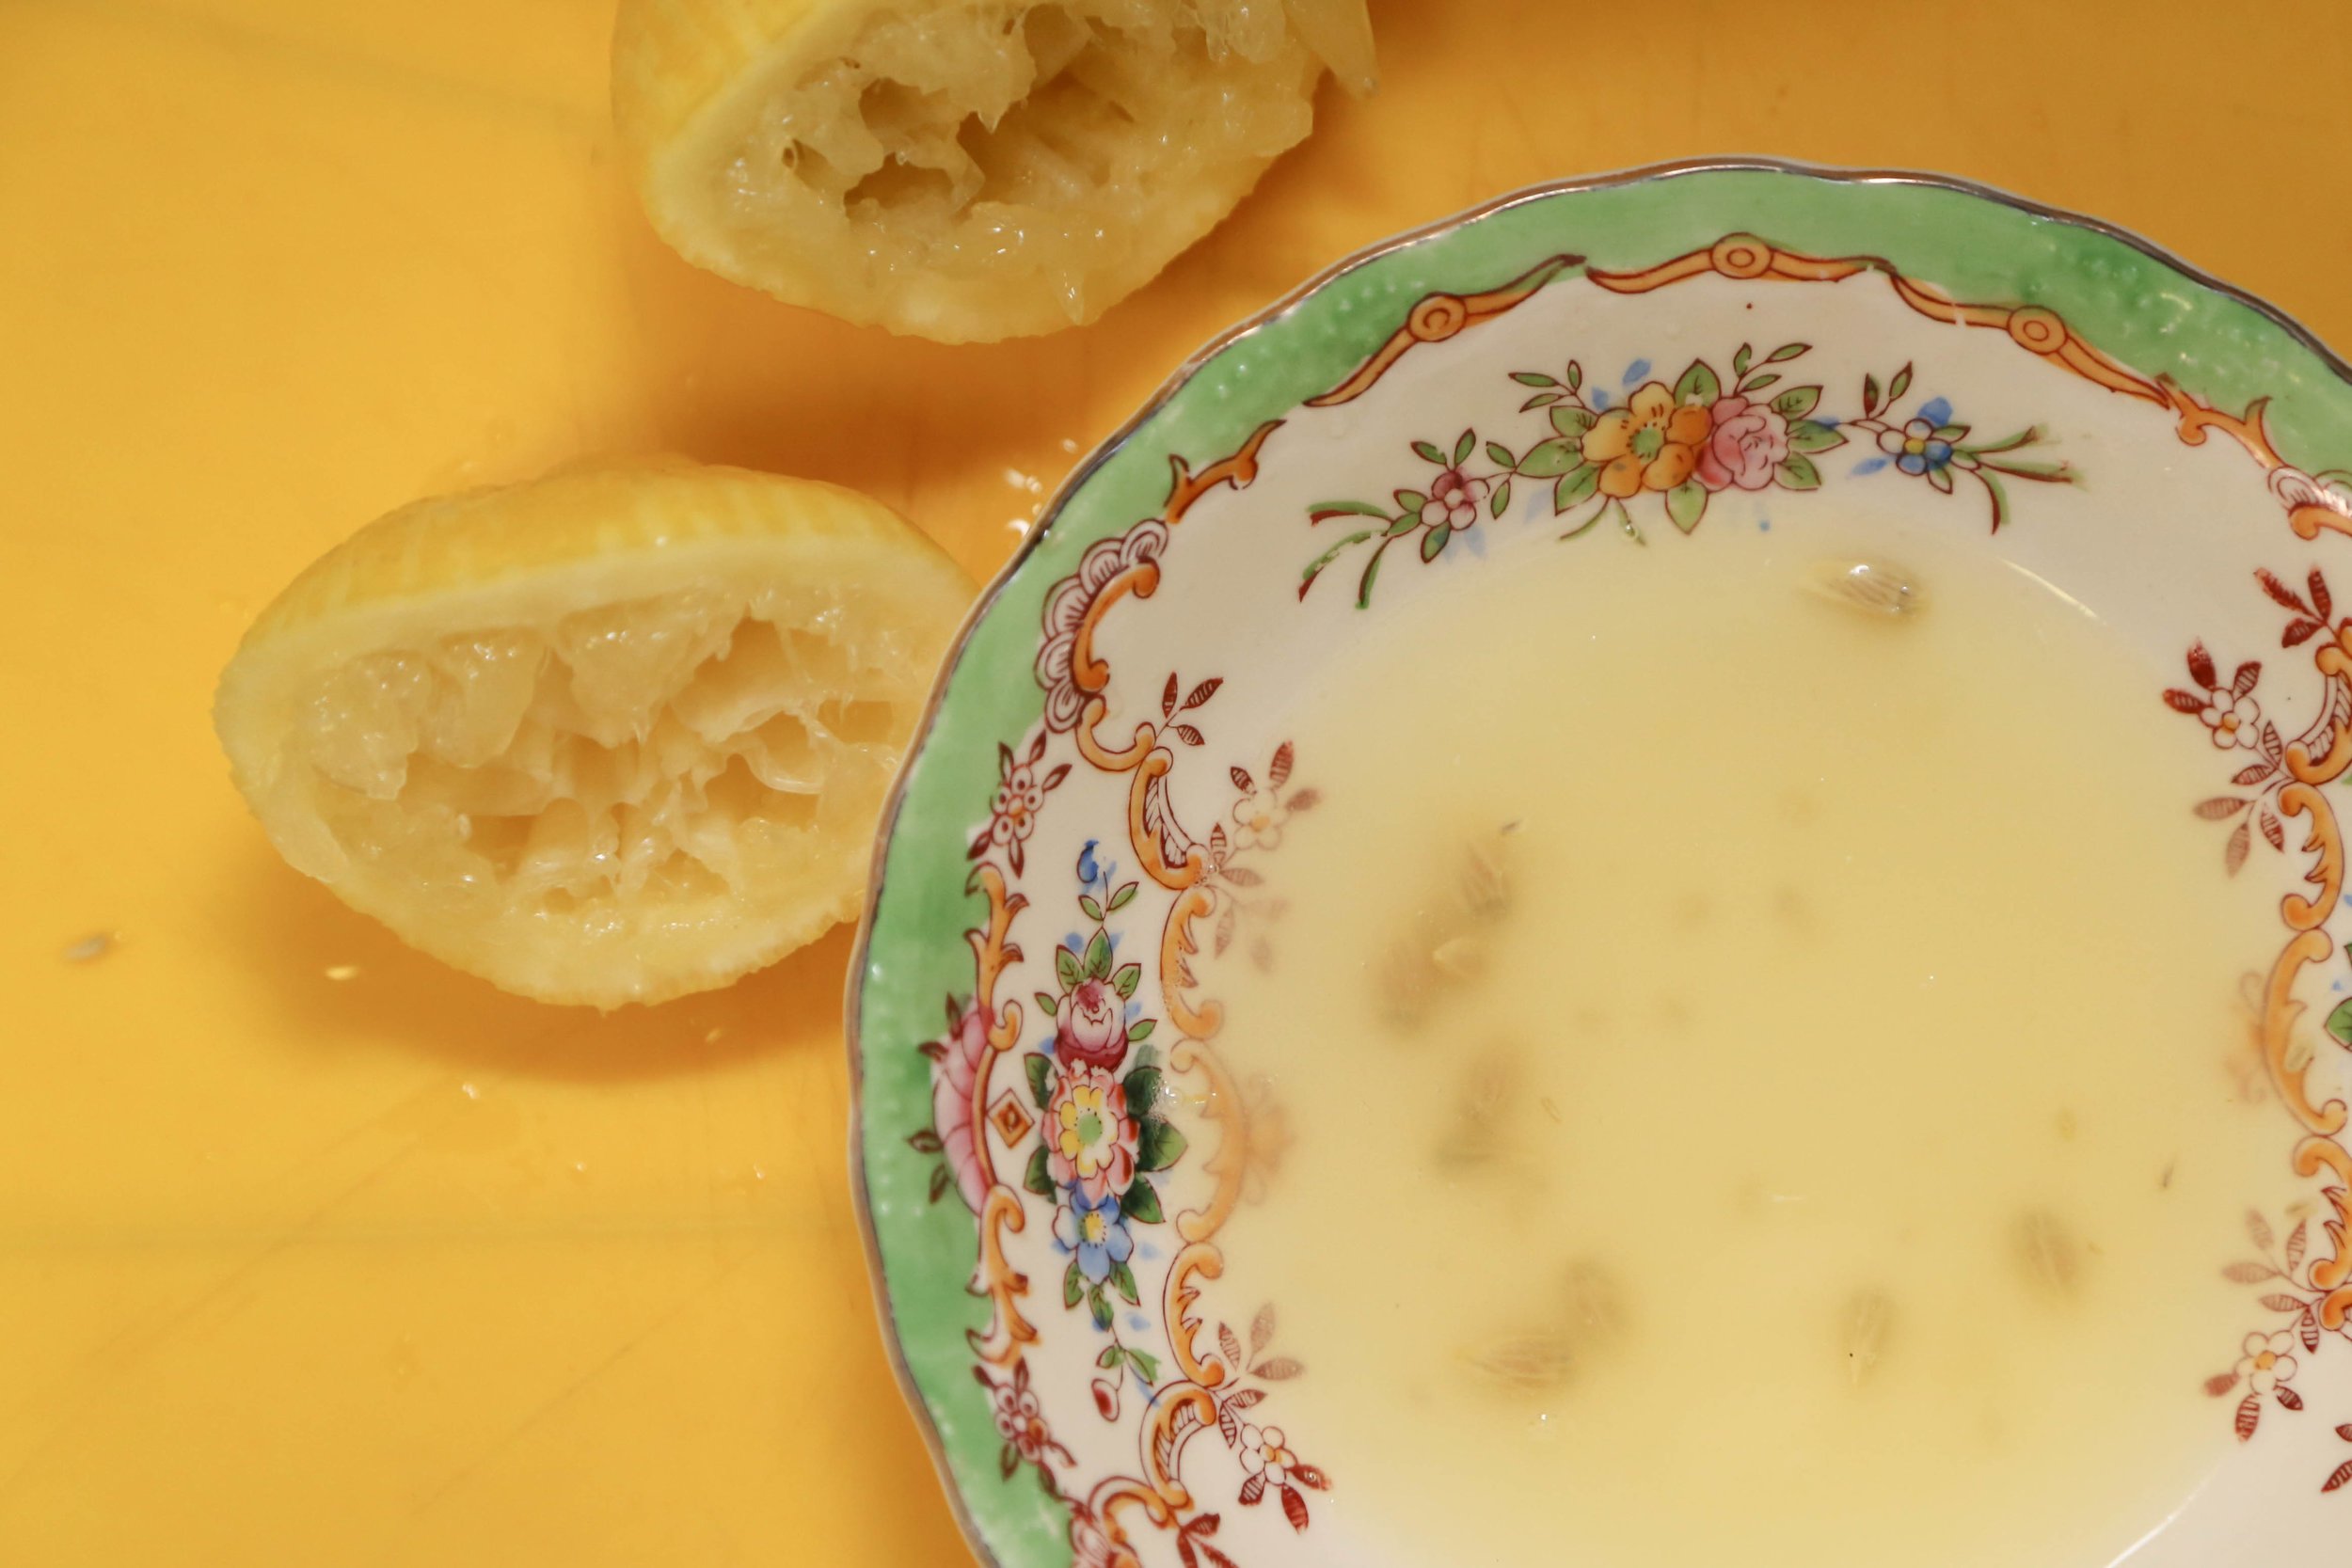
- 1 tablespoon lemon juice
- 1/4 cup sugar
- 1/4 teaspoon salt
- 1 tablespoon flour
lemon glaze
- 3/4 cup powder sugar
- 2 teaspoon vanilla
- 3/4 tablespoon lemon juice
- 1/4 water - if necessary for consistency
- 1 teaspoon cream of tarter (optional - but it helps the glaze set)
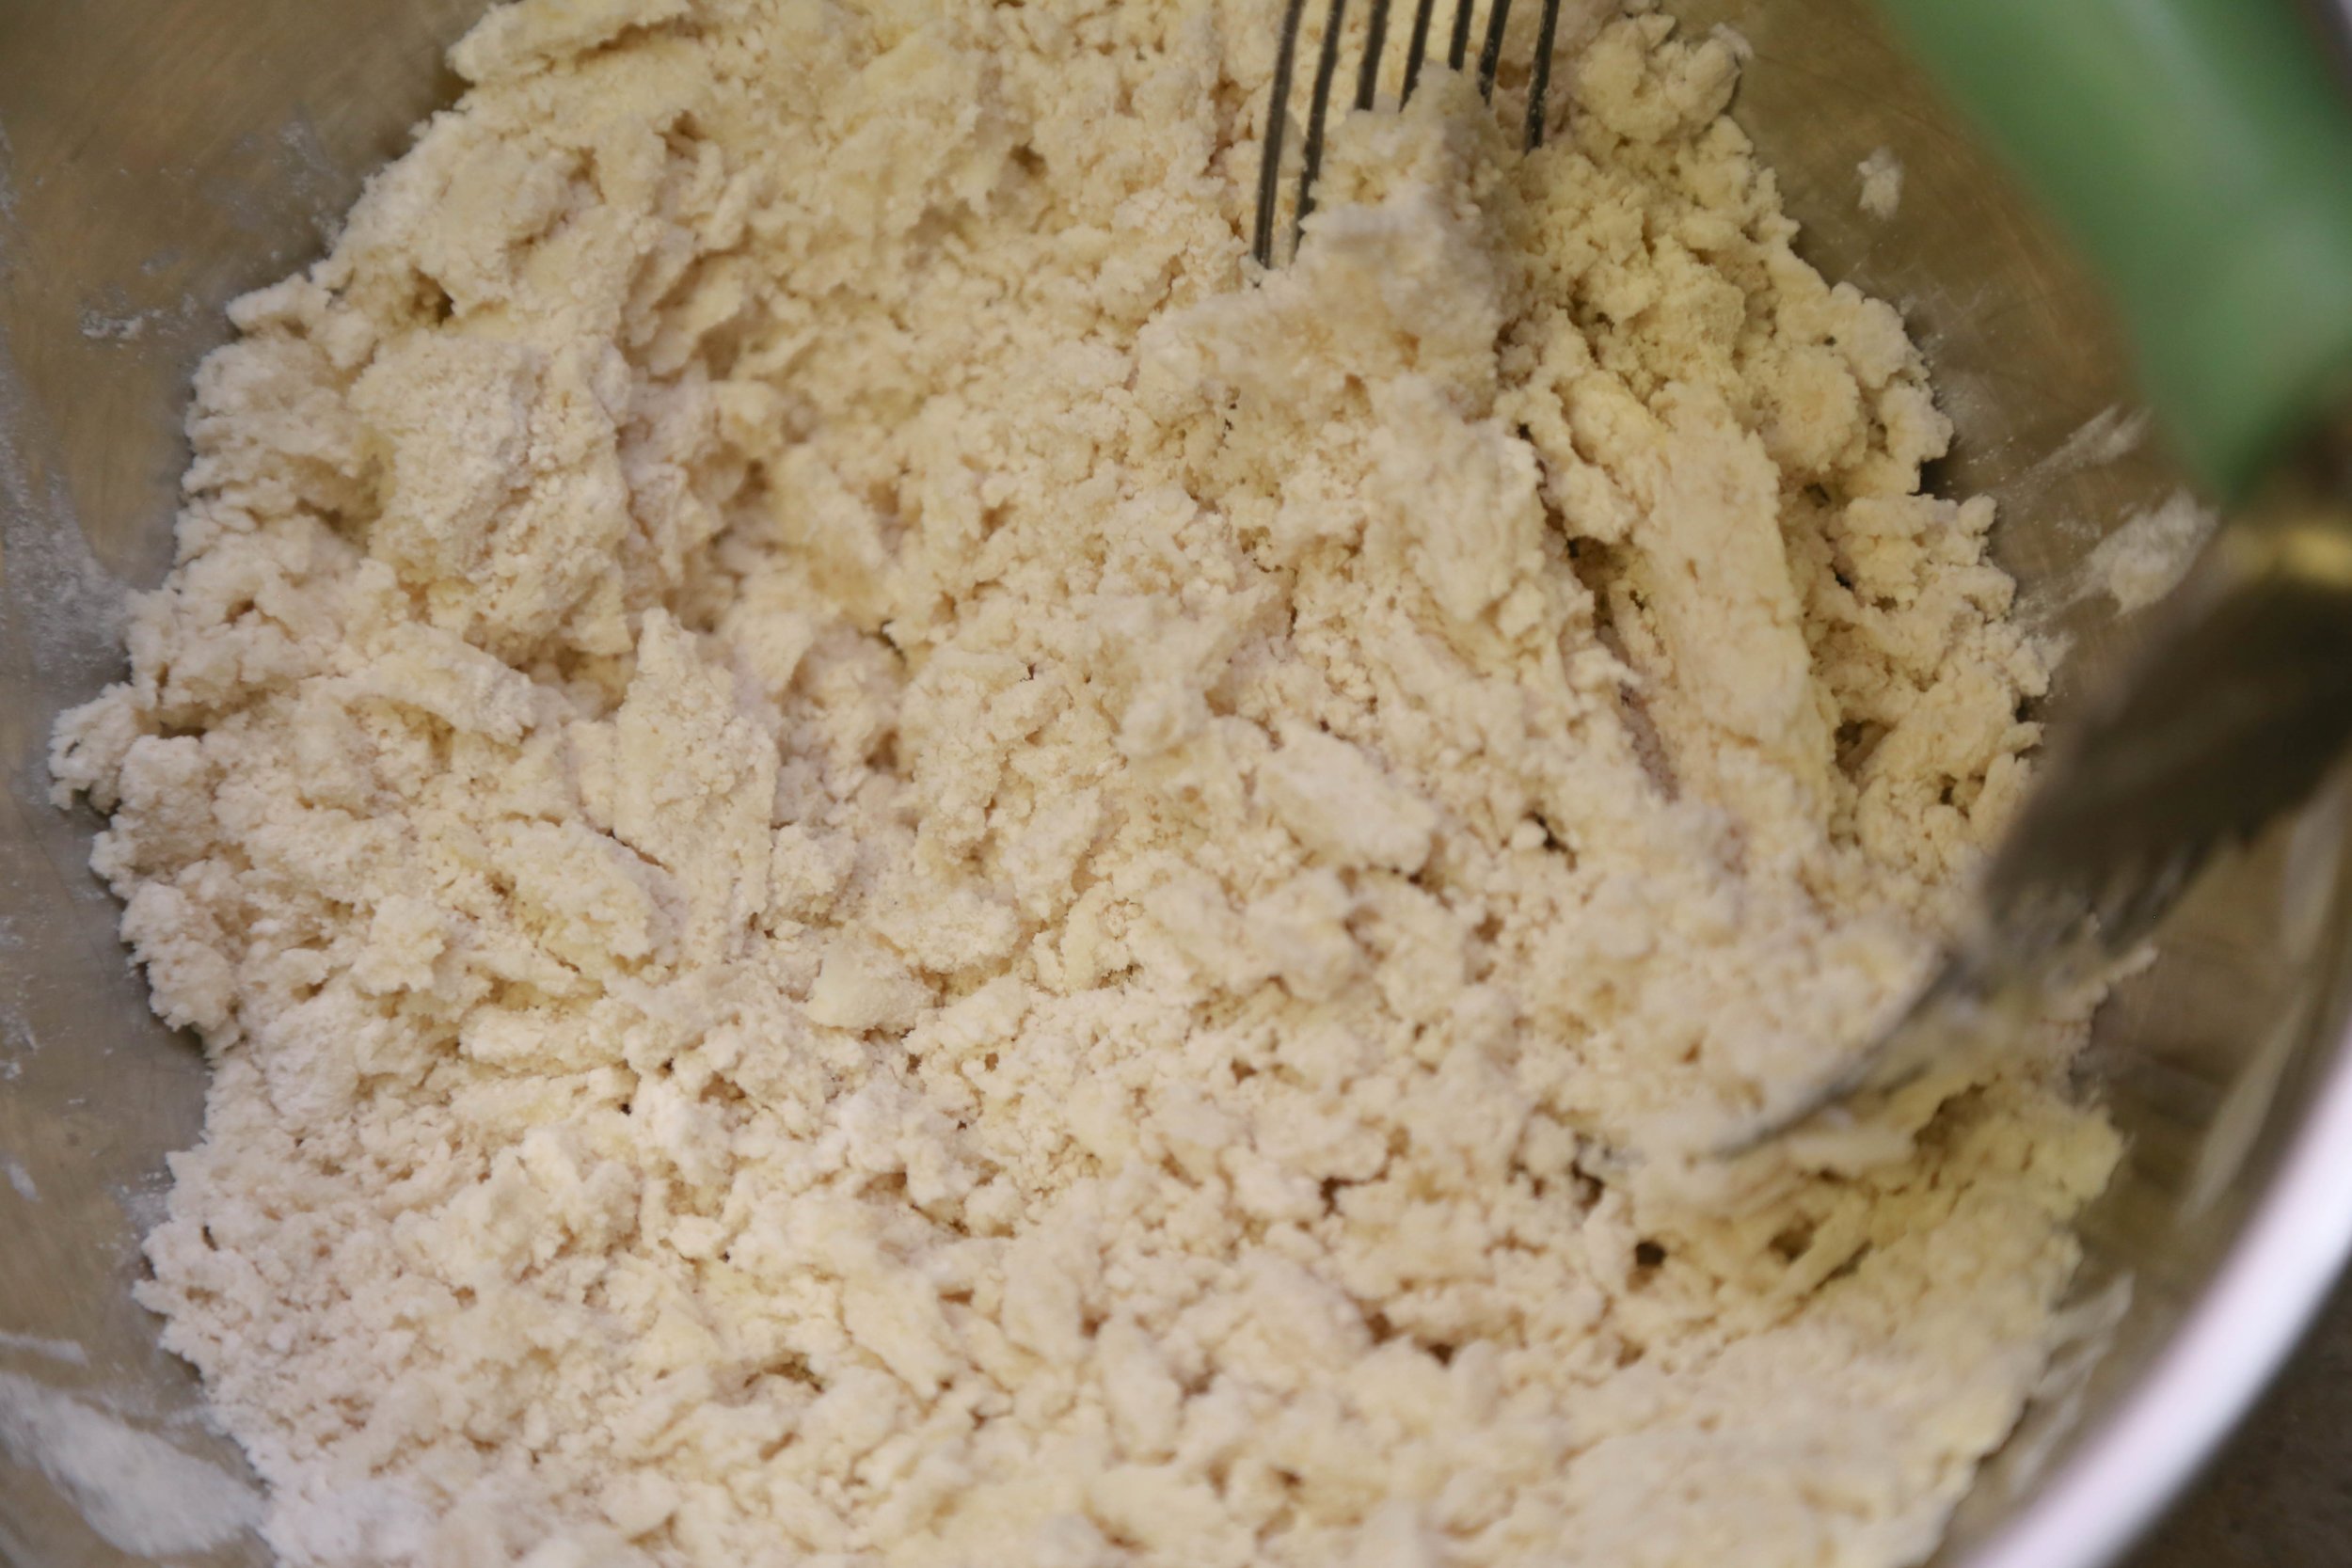
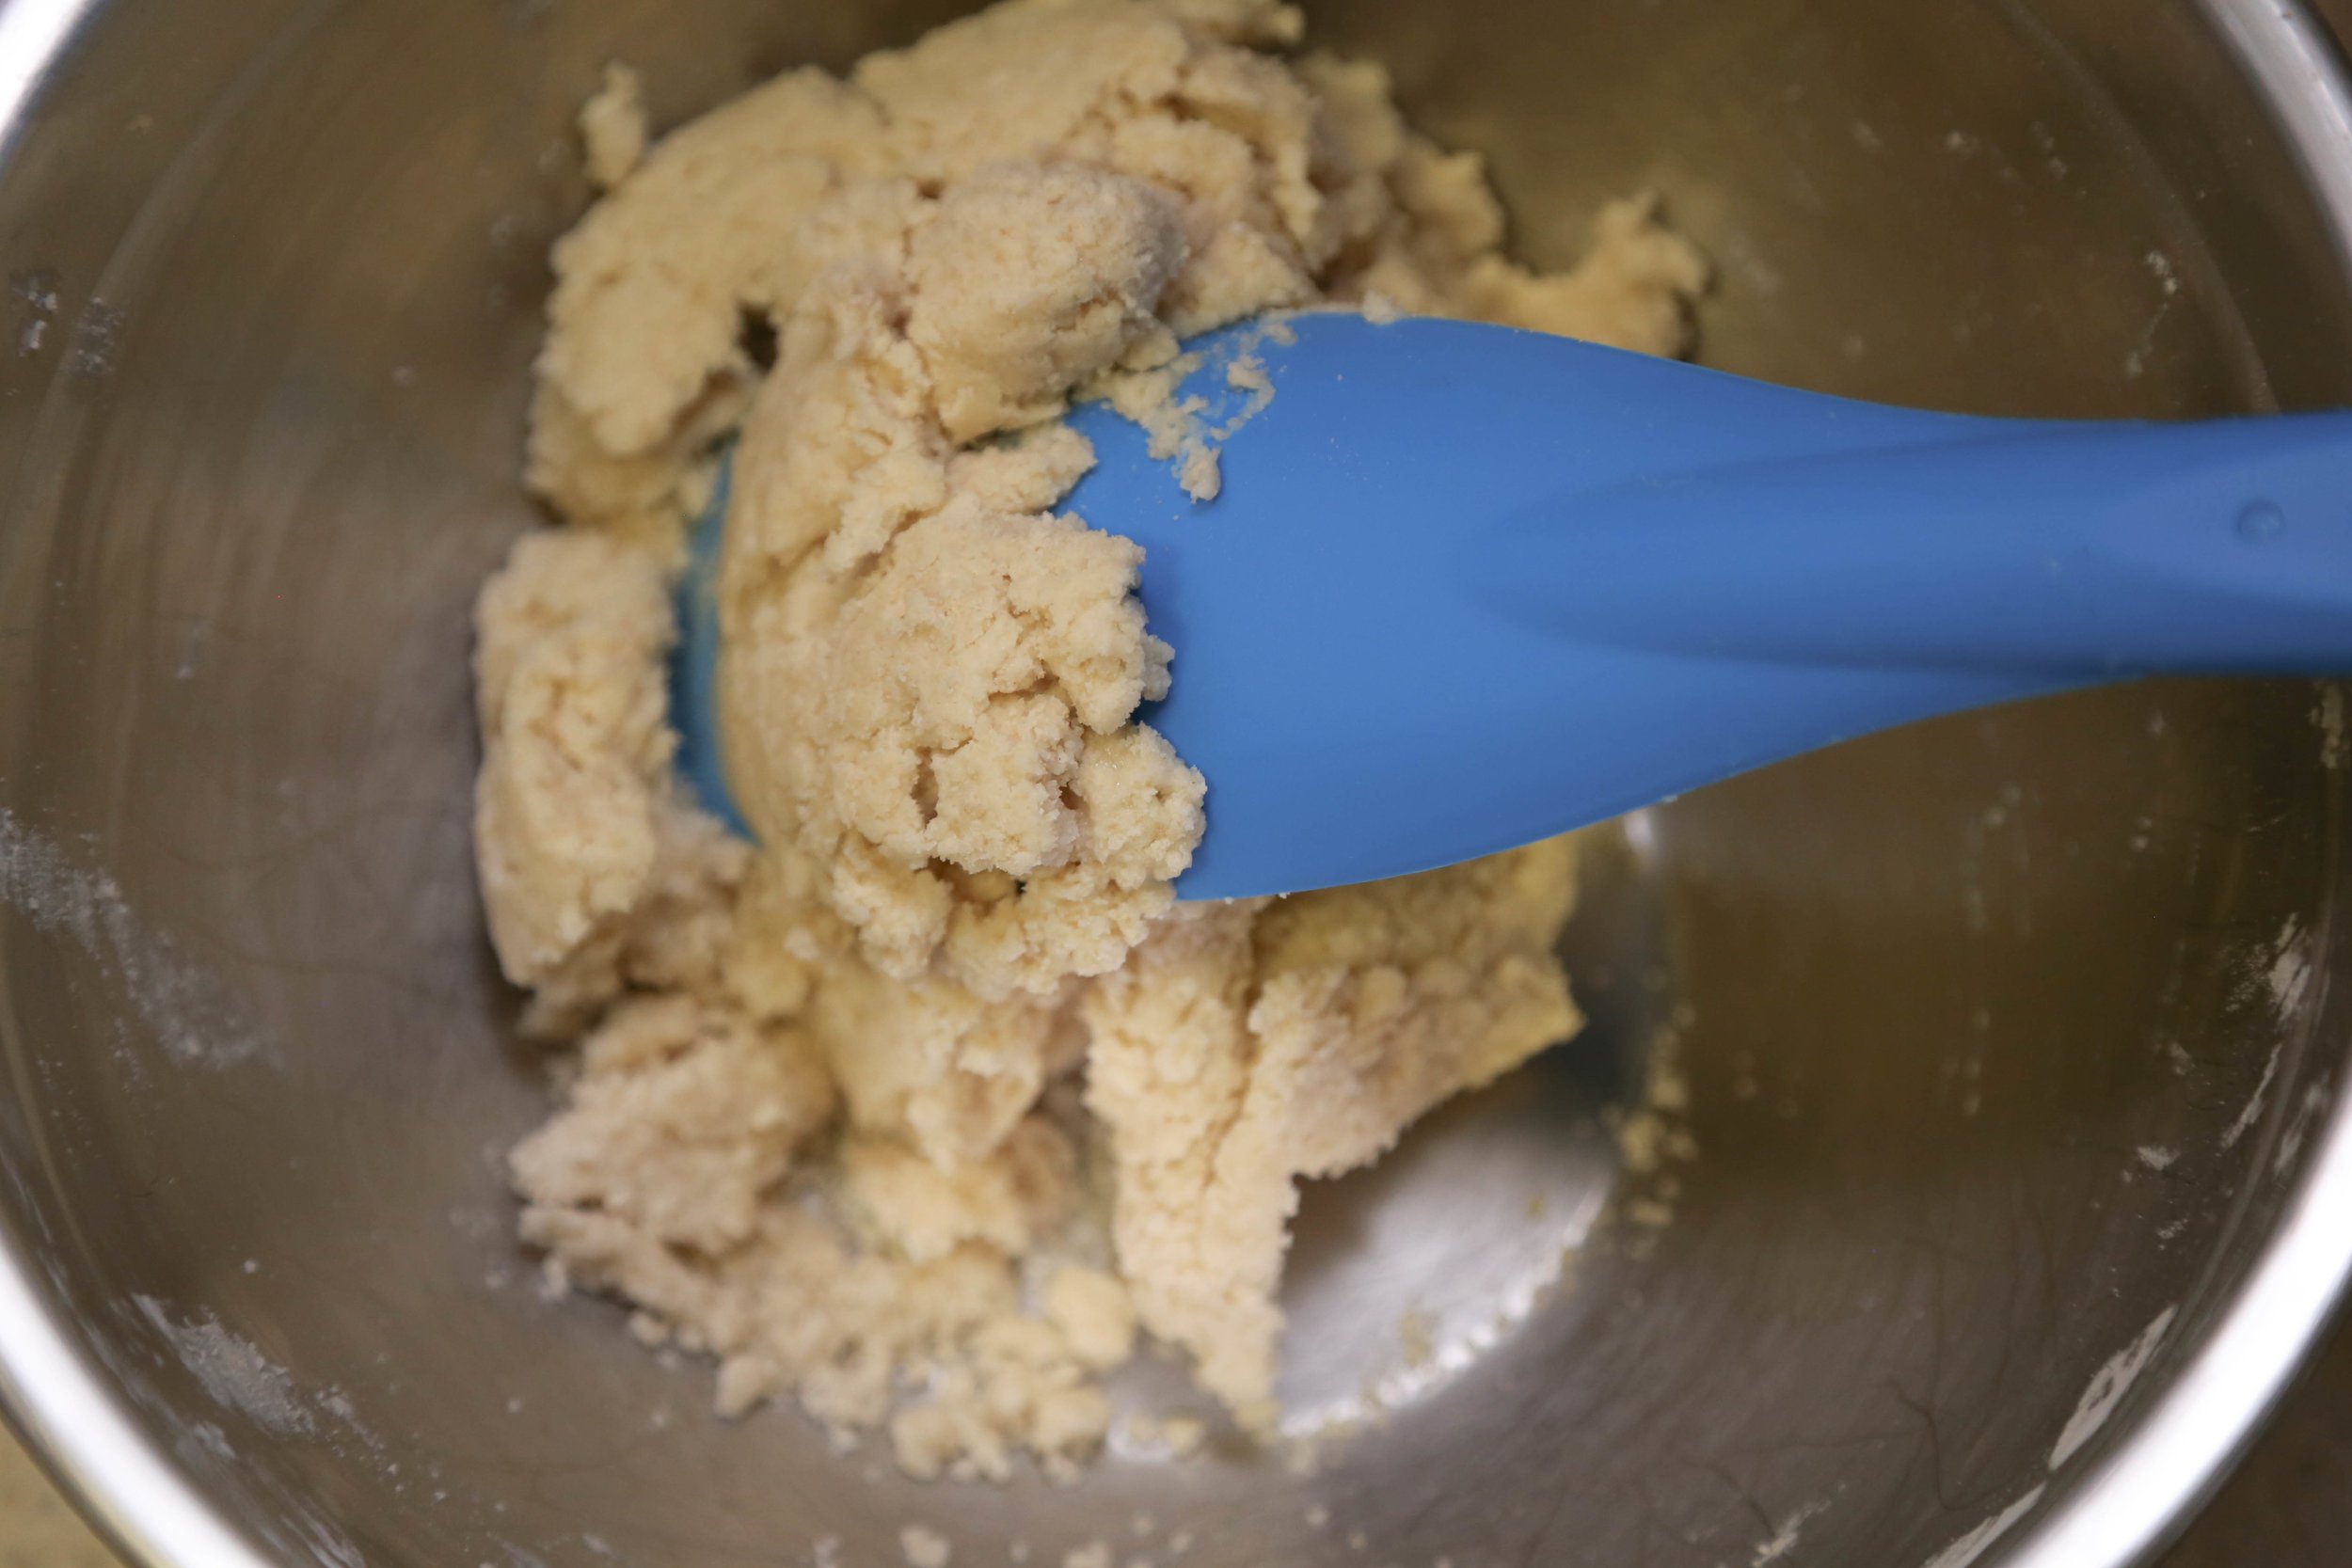
Make your crust - mix the dry ingredients, cut in the COLD butter, add your water, bring it together, wrap it up and refrigerate...

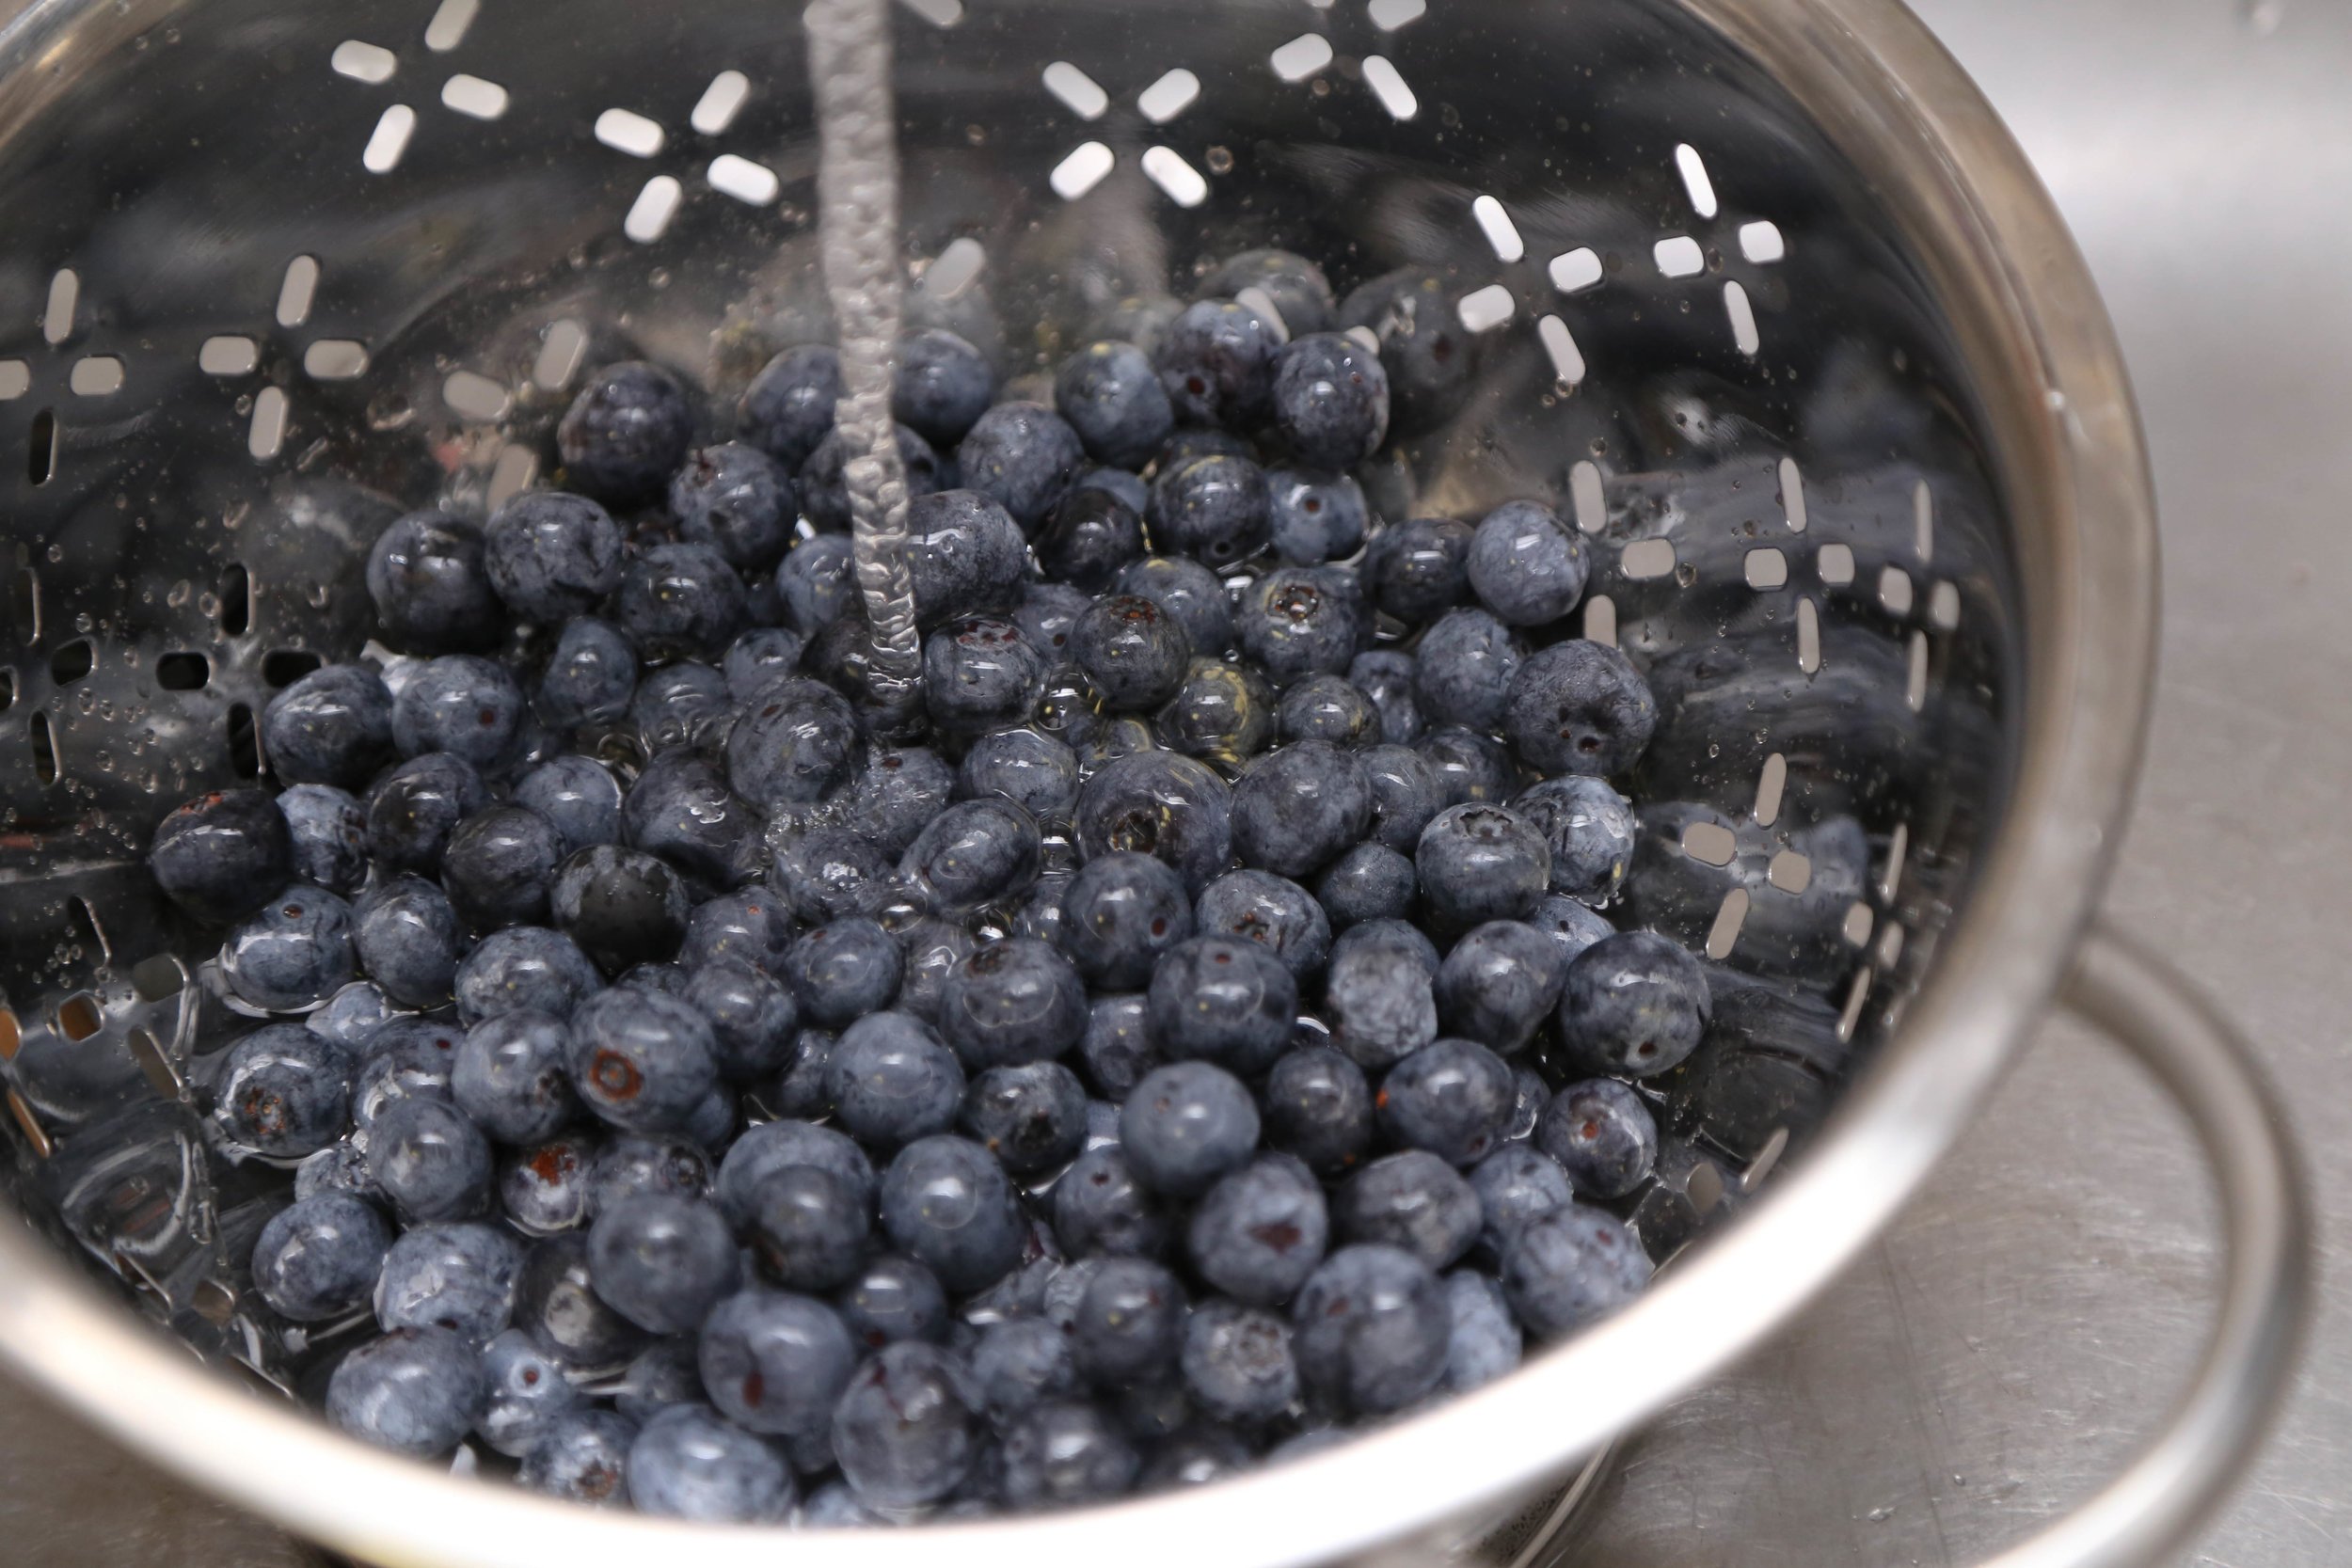
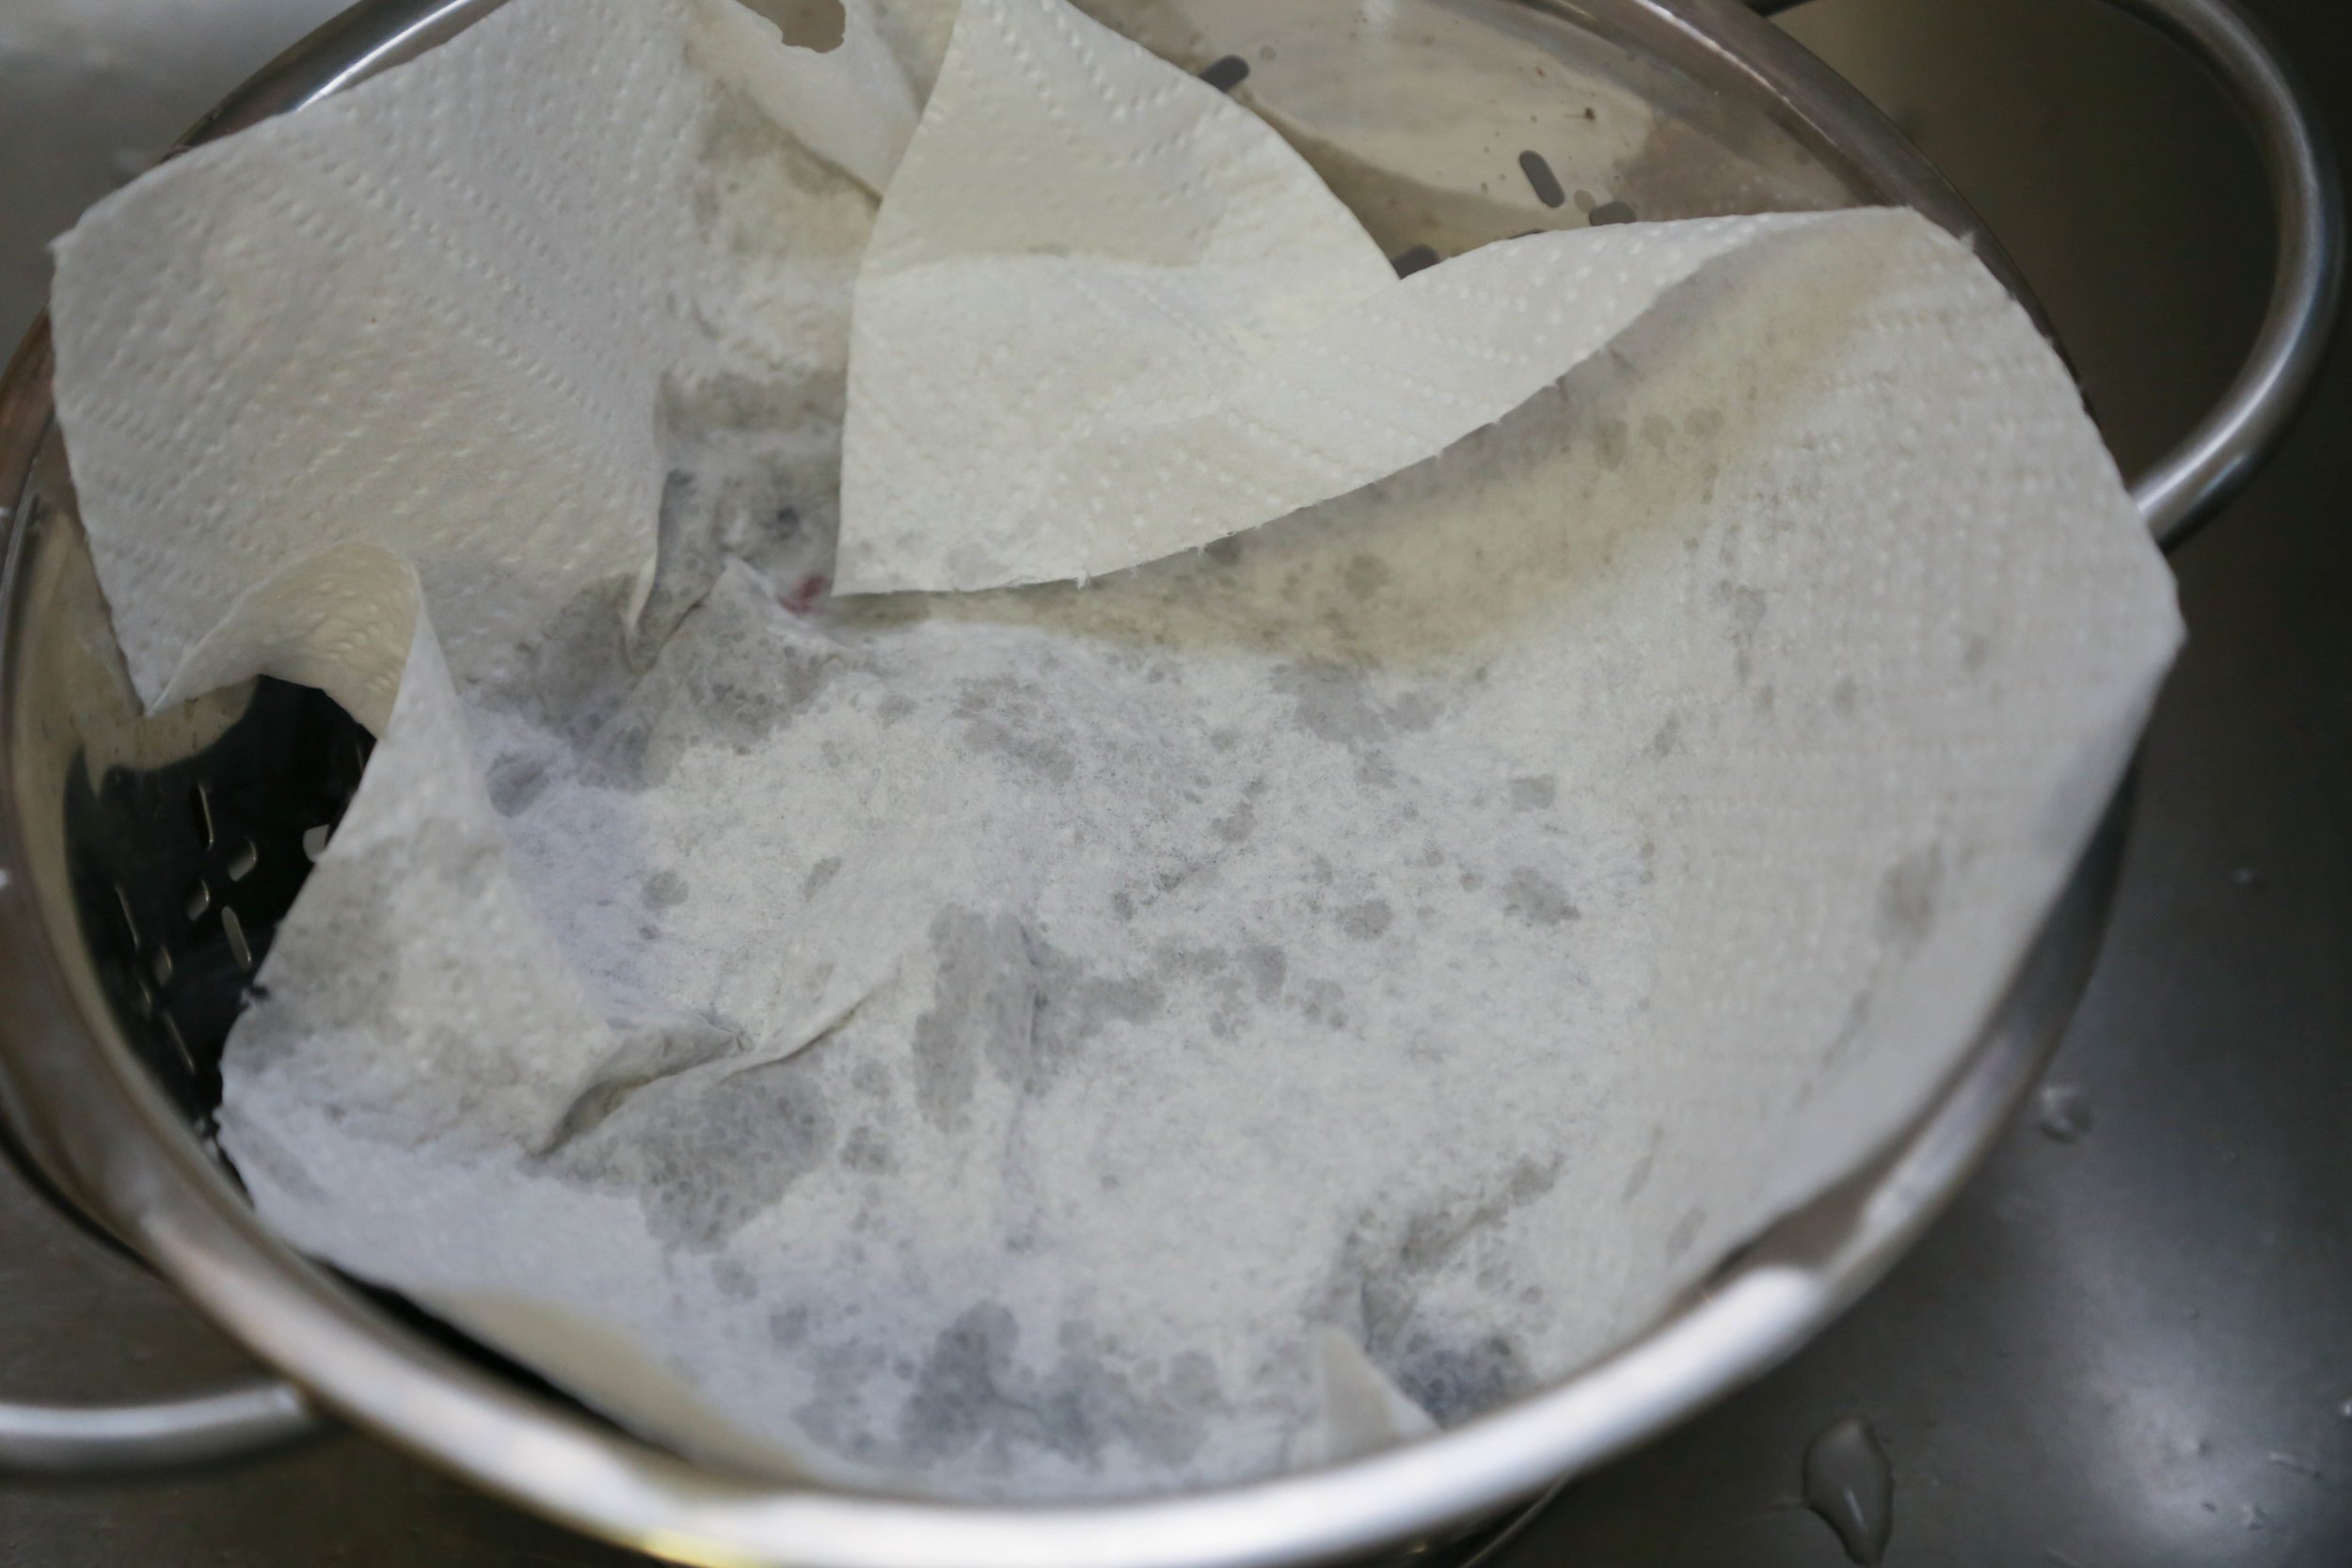
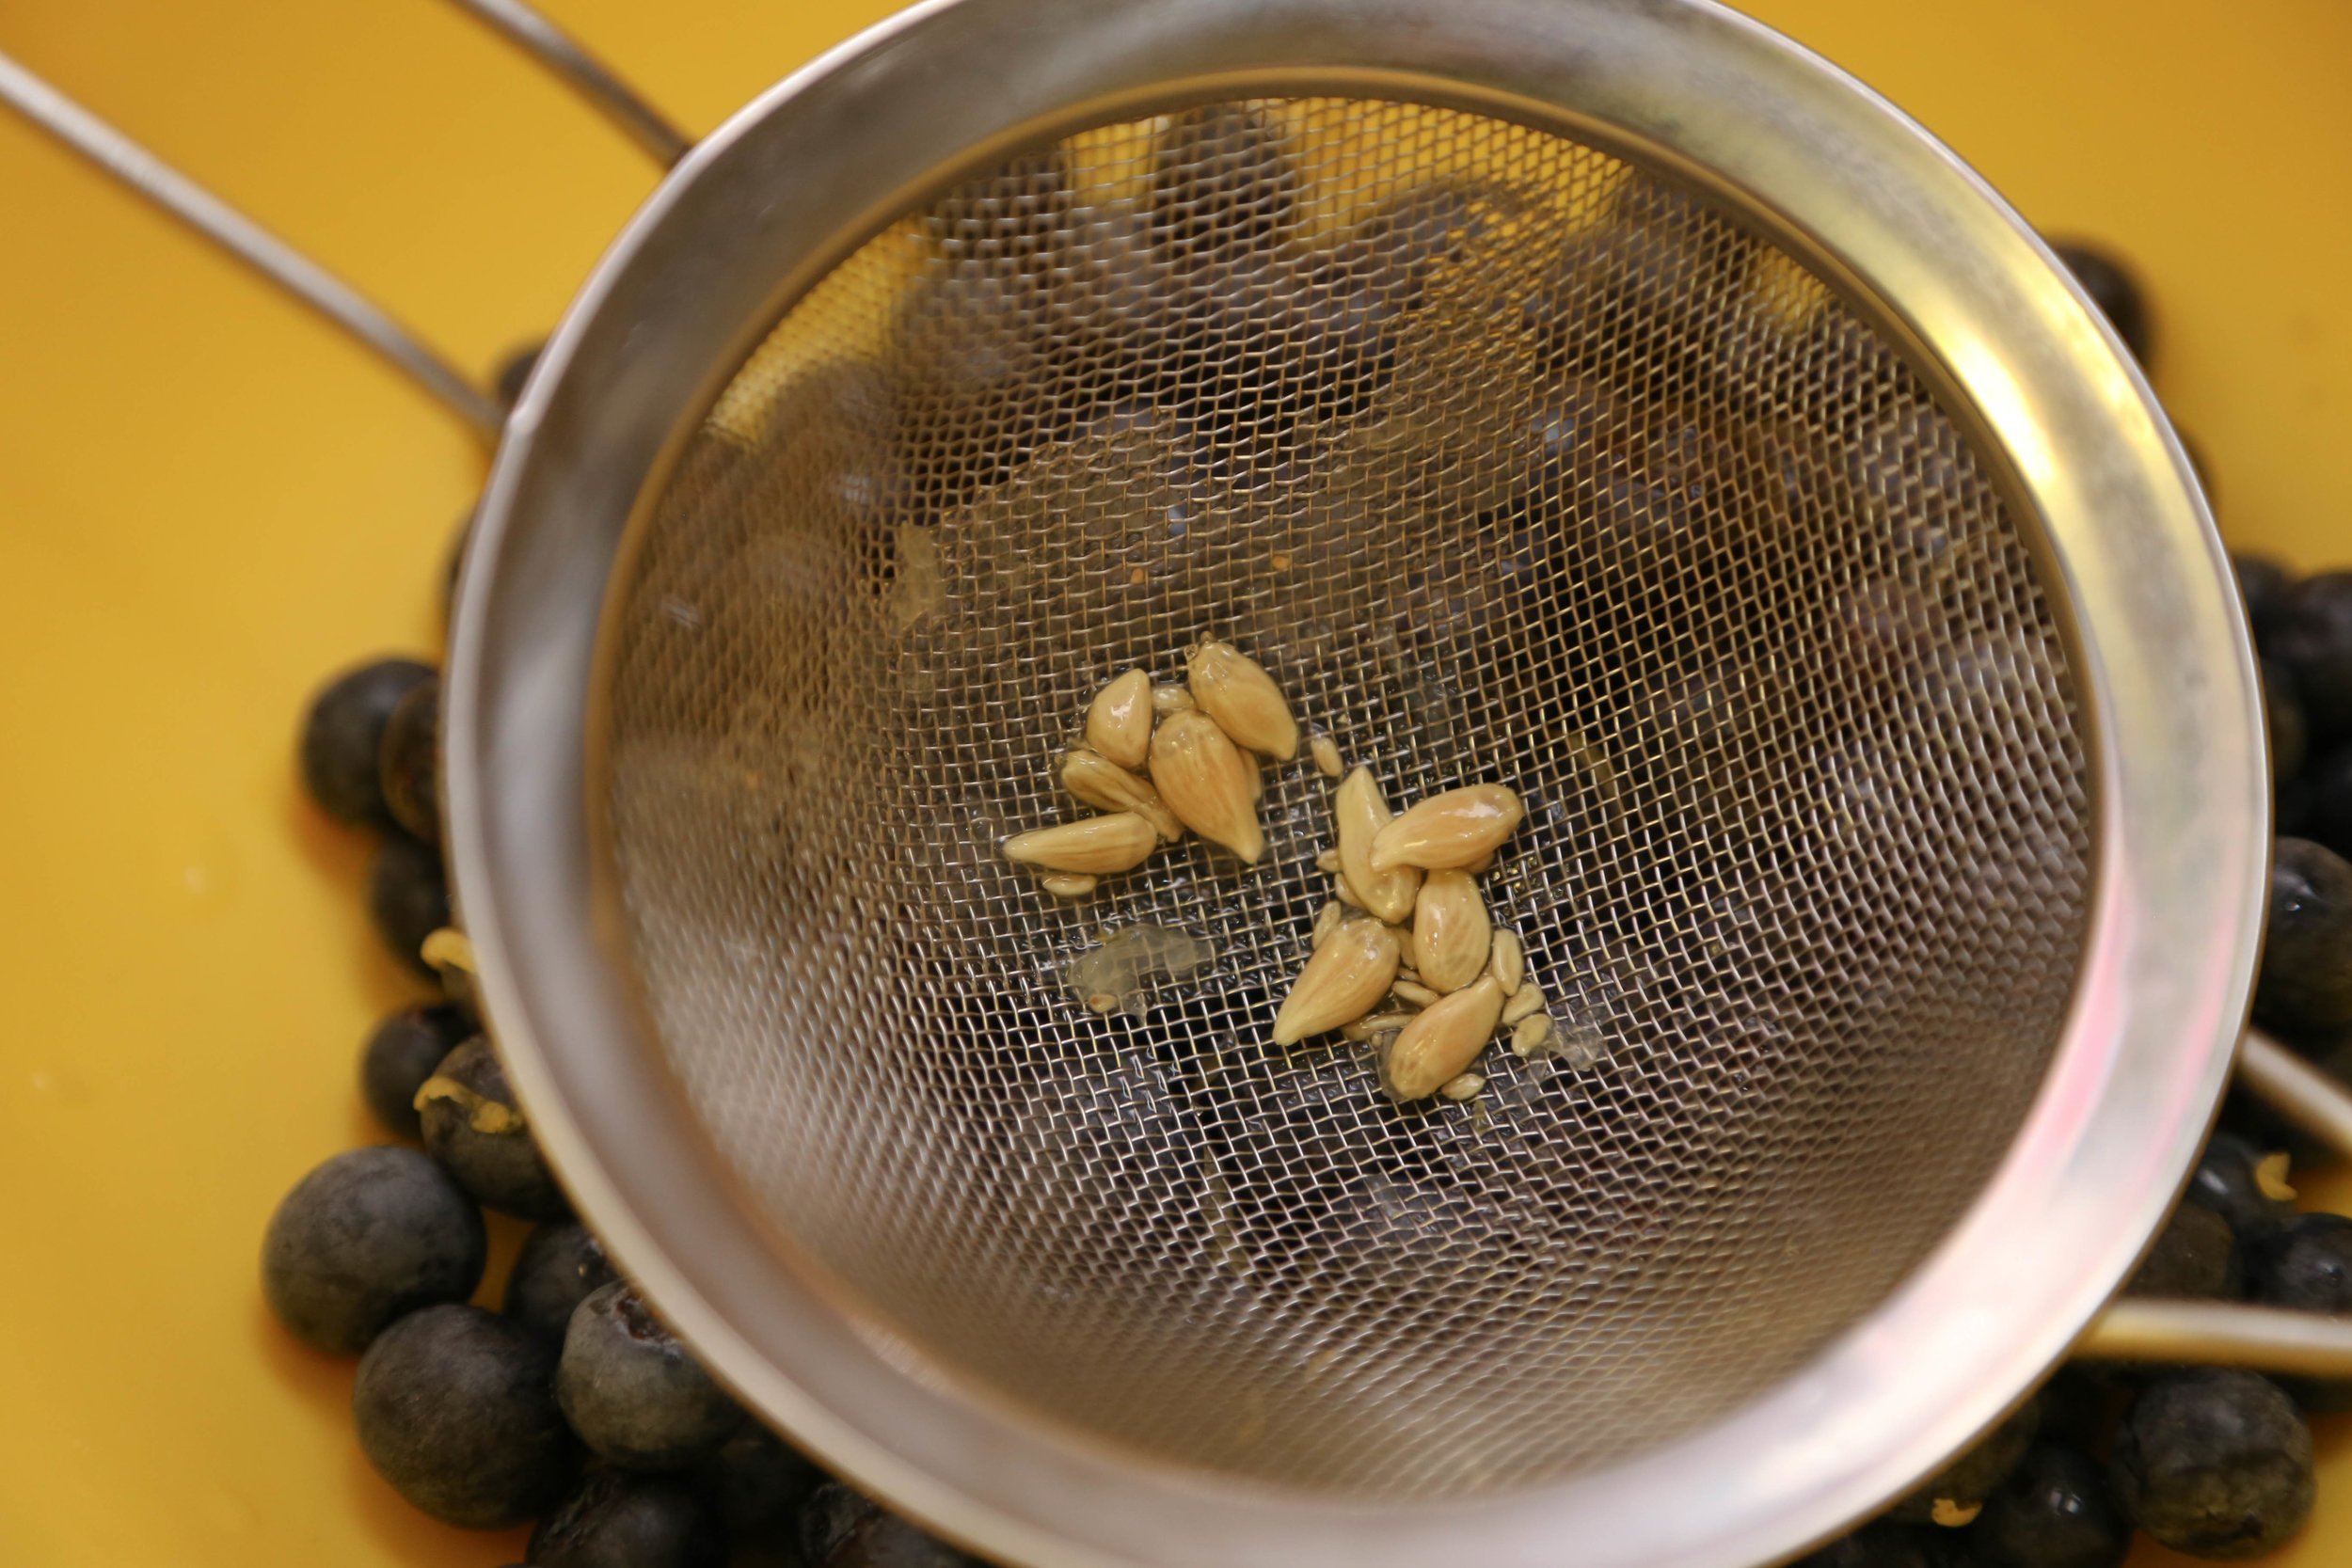
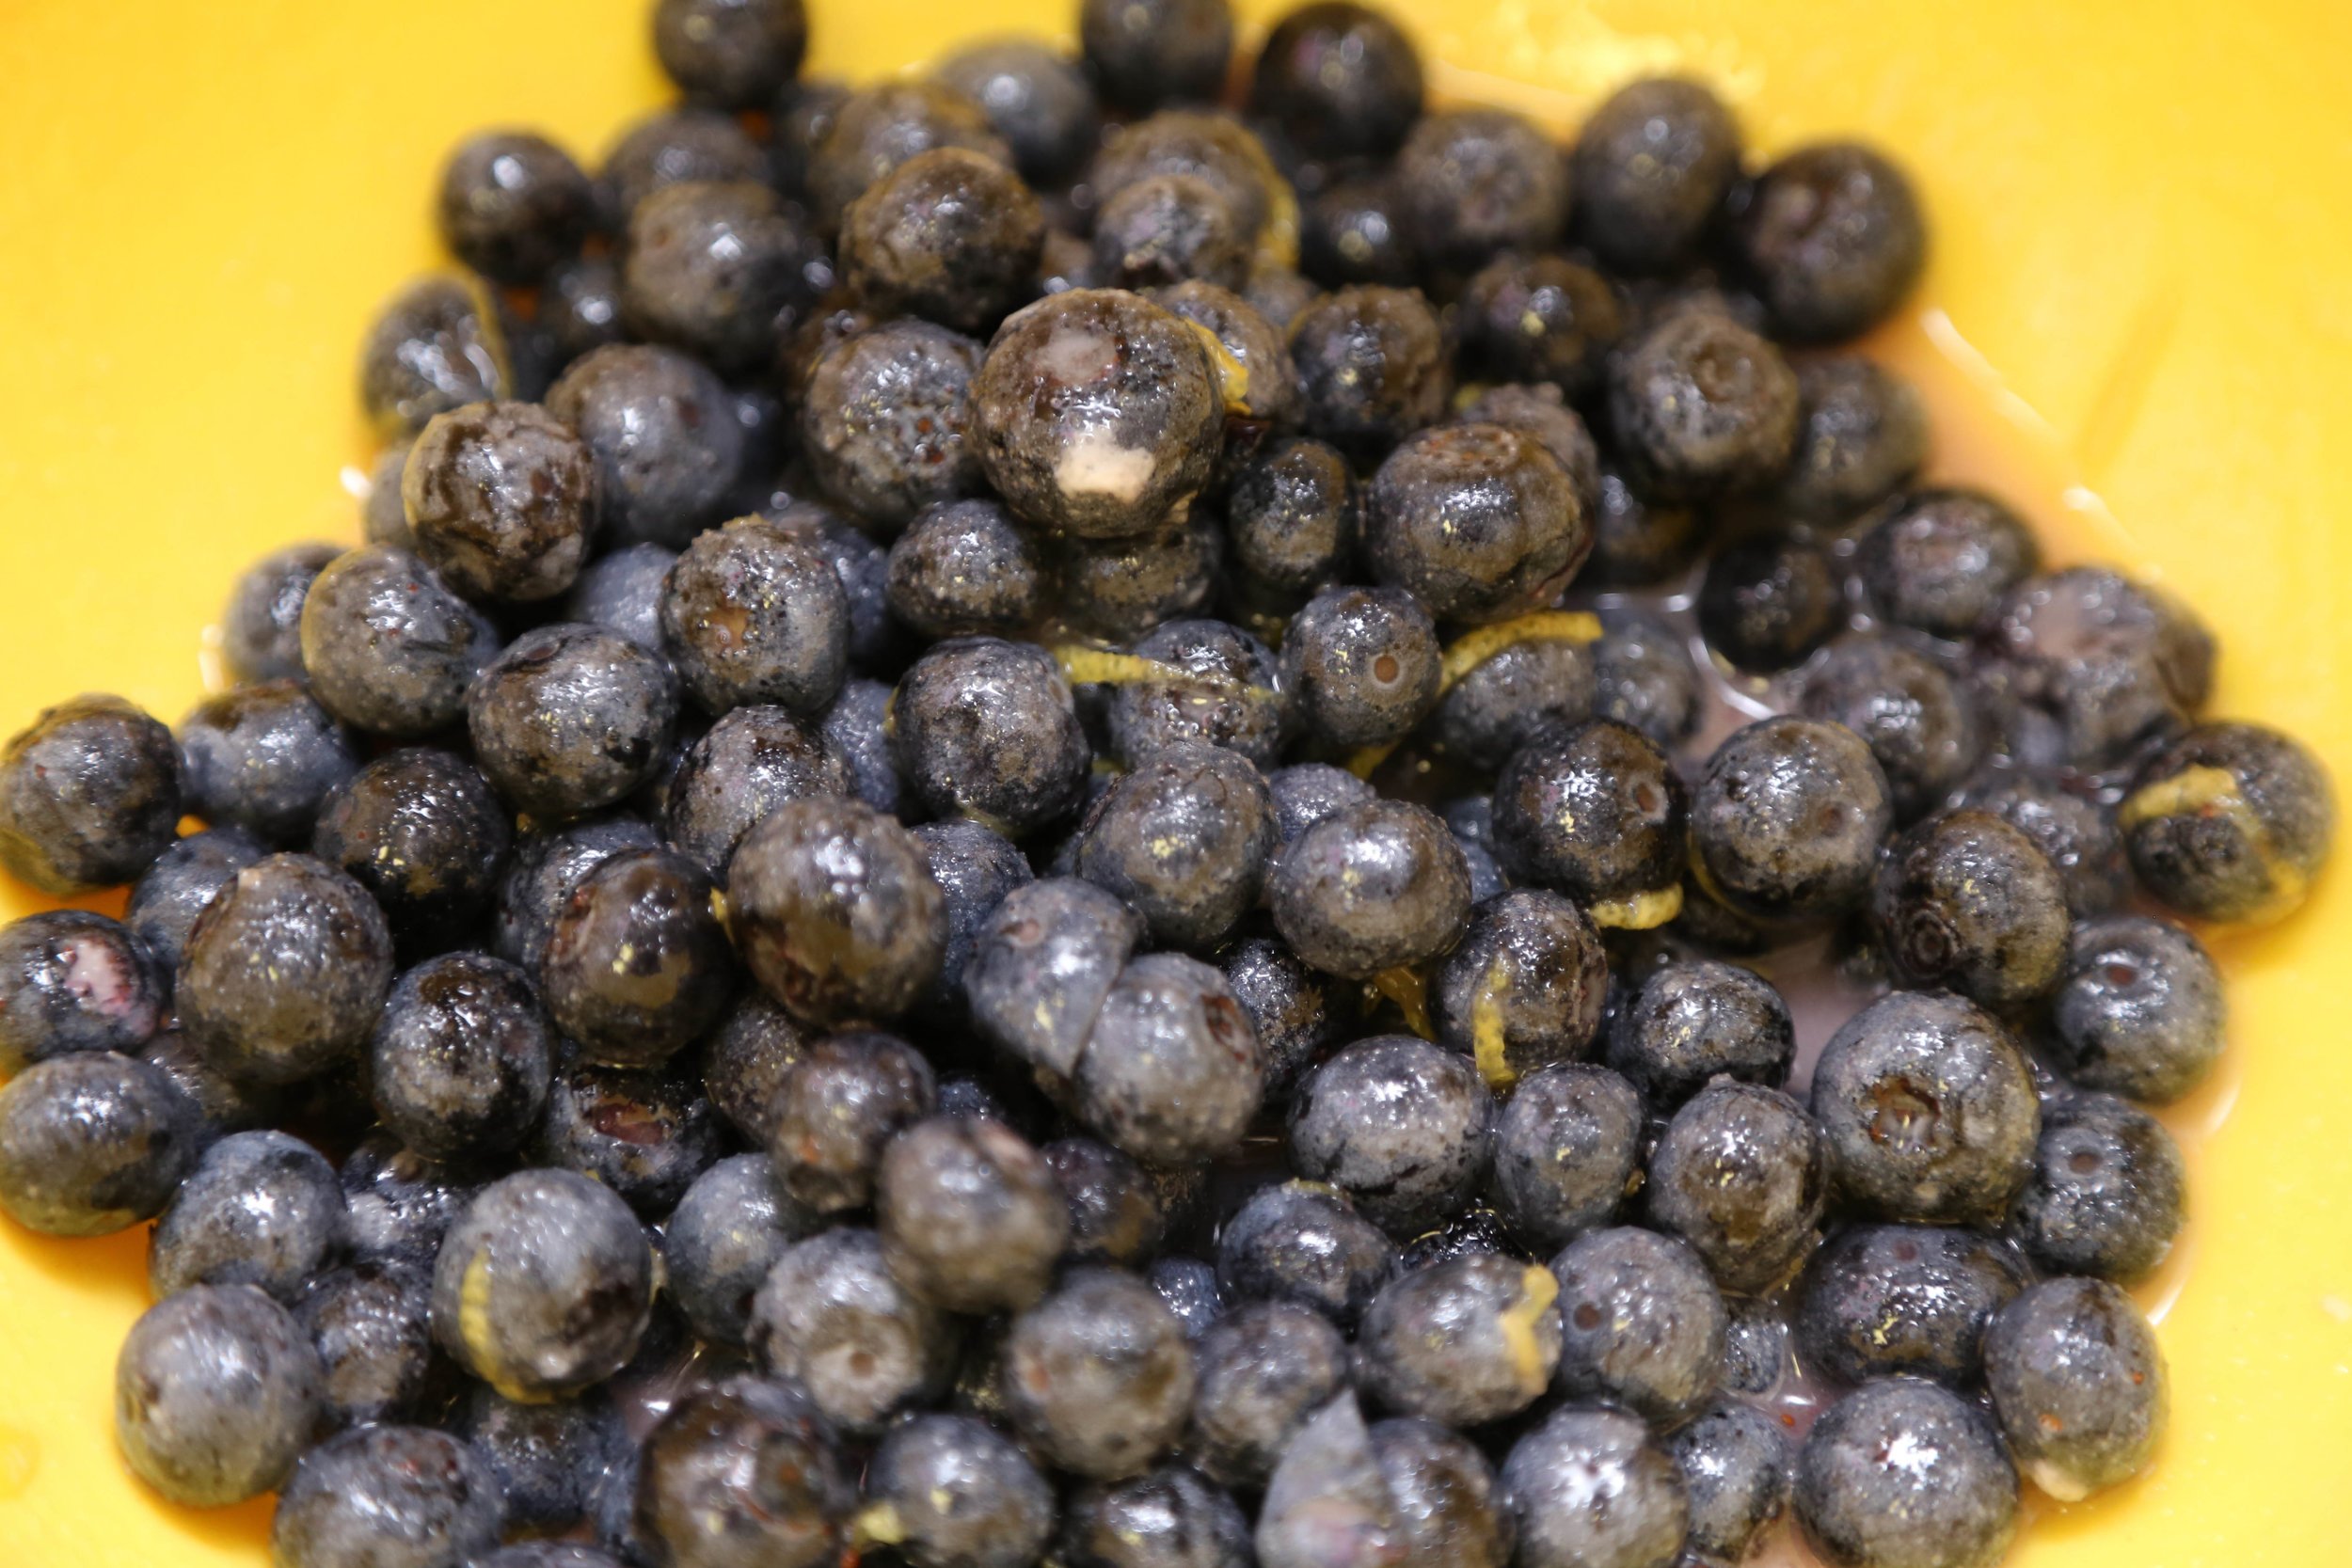
Make the filling - wash and dry the blueberries, mix all the ingredients together and let sit for 15-20 minutes in the refrigerator...
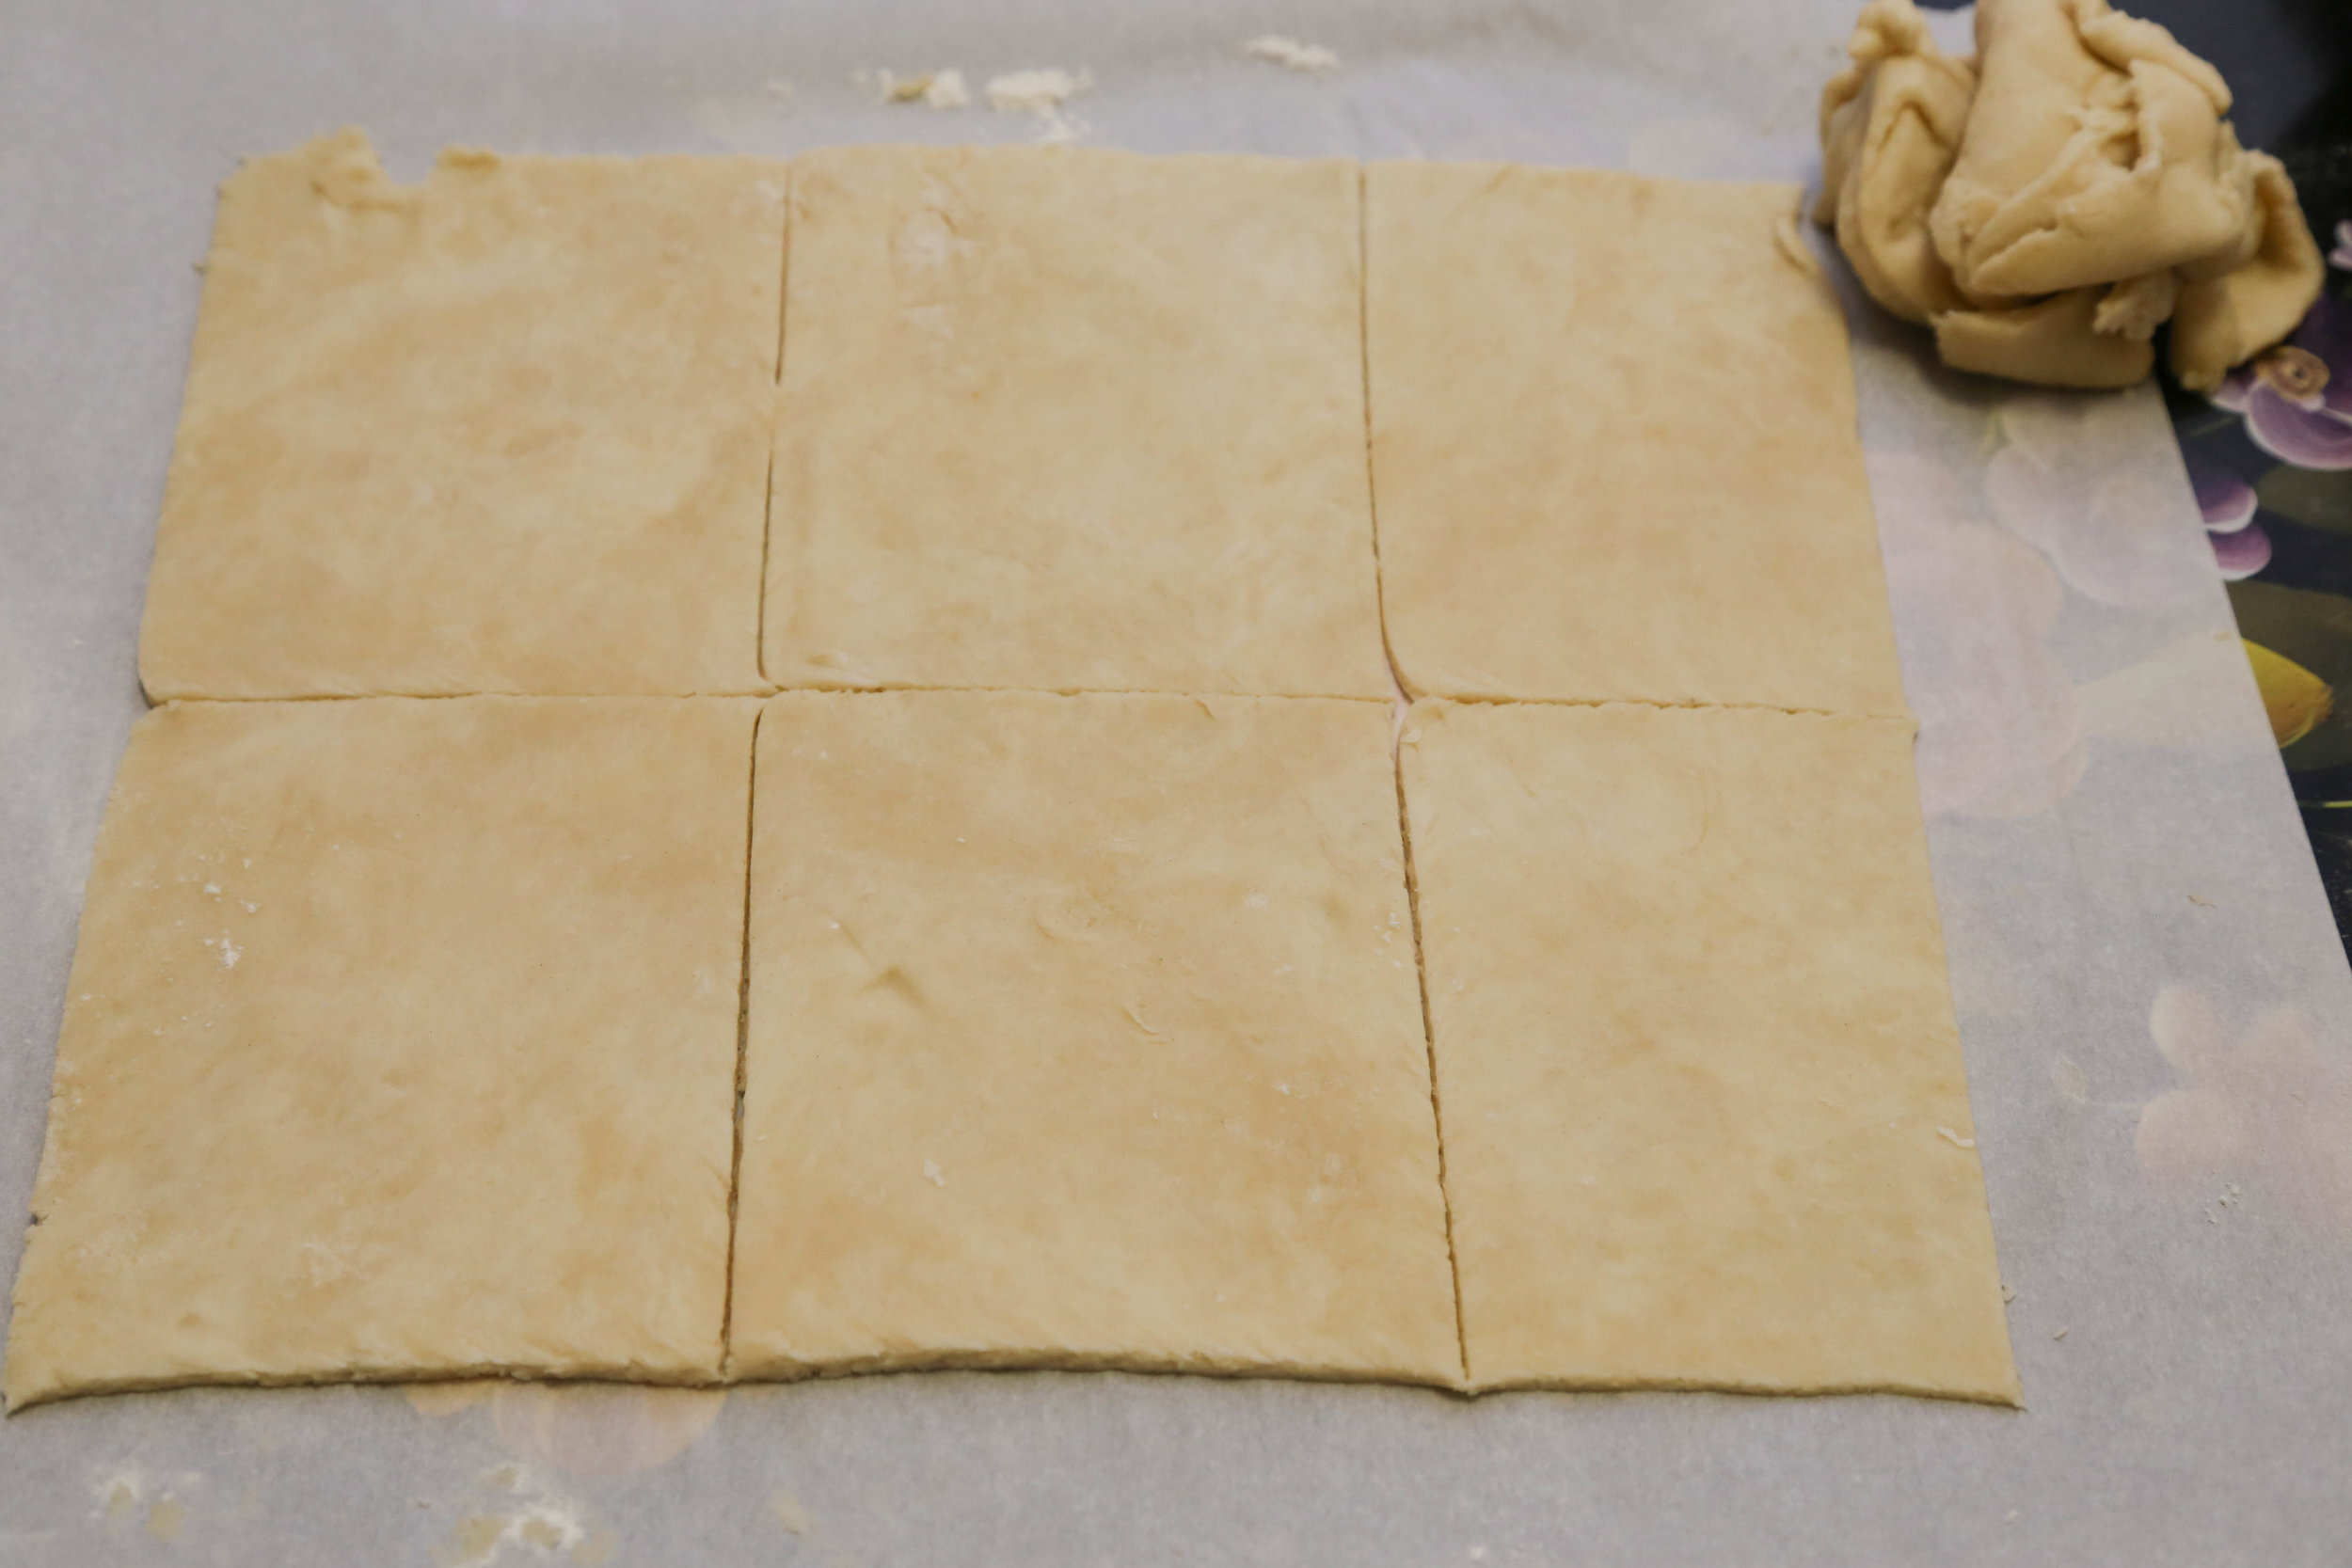
Time to assemble - roll out the crust, cut into squares if you're going to make hand pies or leave as one big crust for crostata...

give your blueberries a good stir then pile them in the center of the dough...
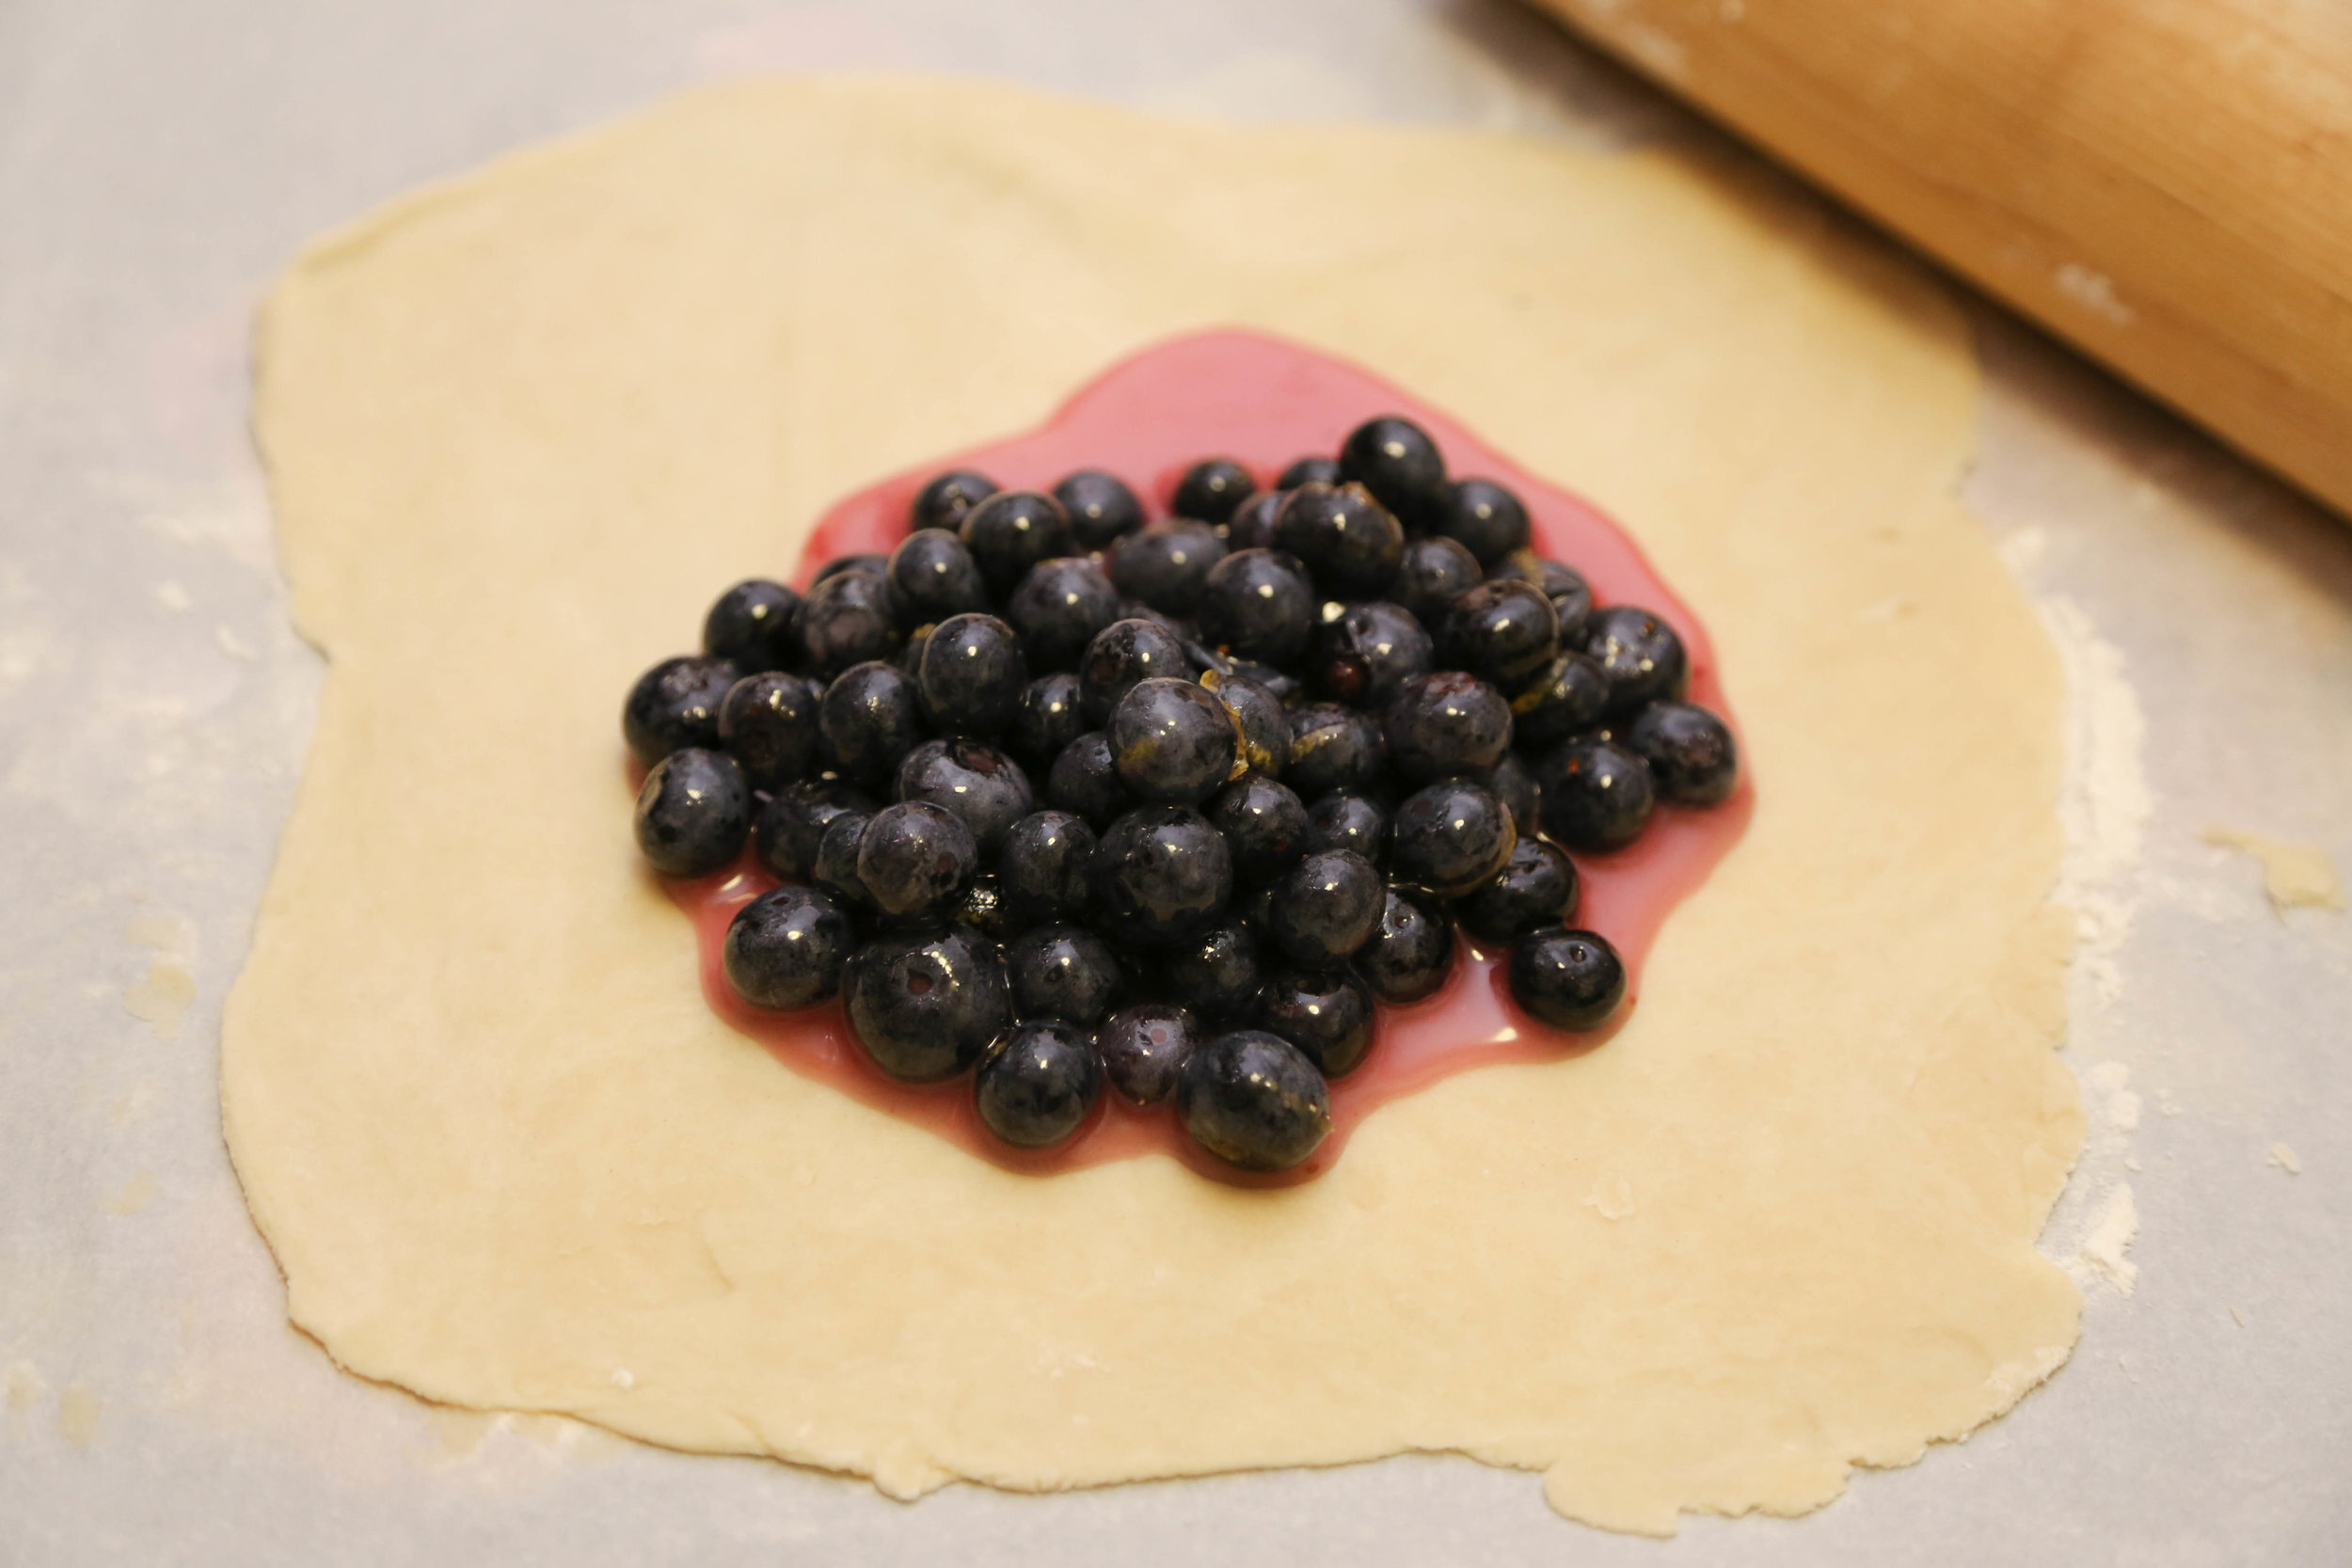

fold up the edges if you're making a crostata or add the top of the hand pie and pinch the edges...


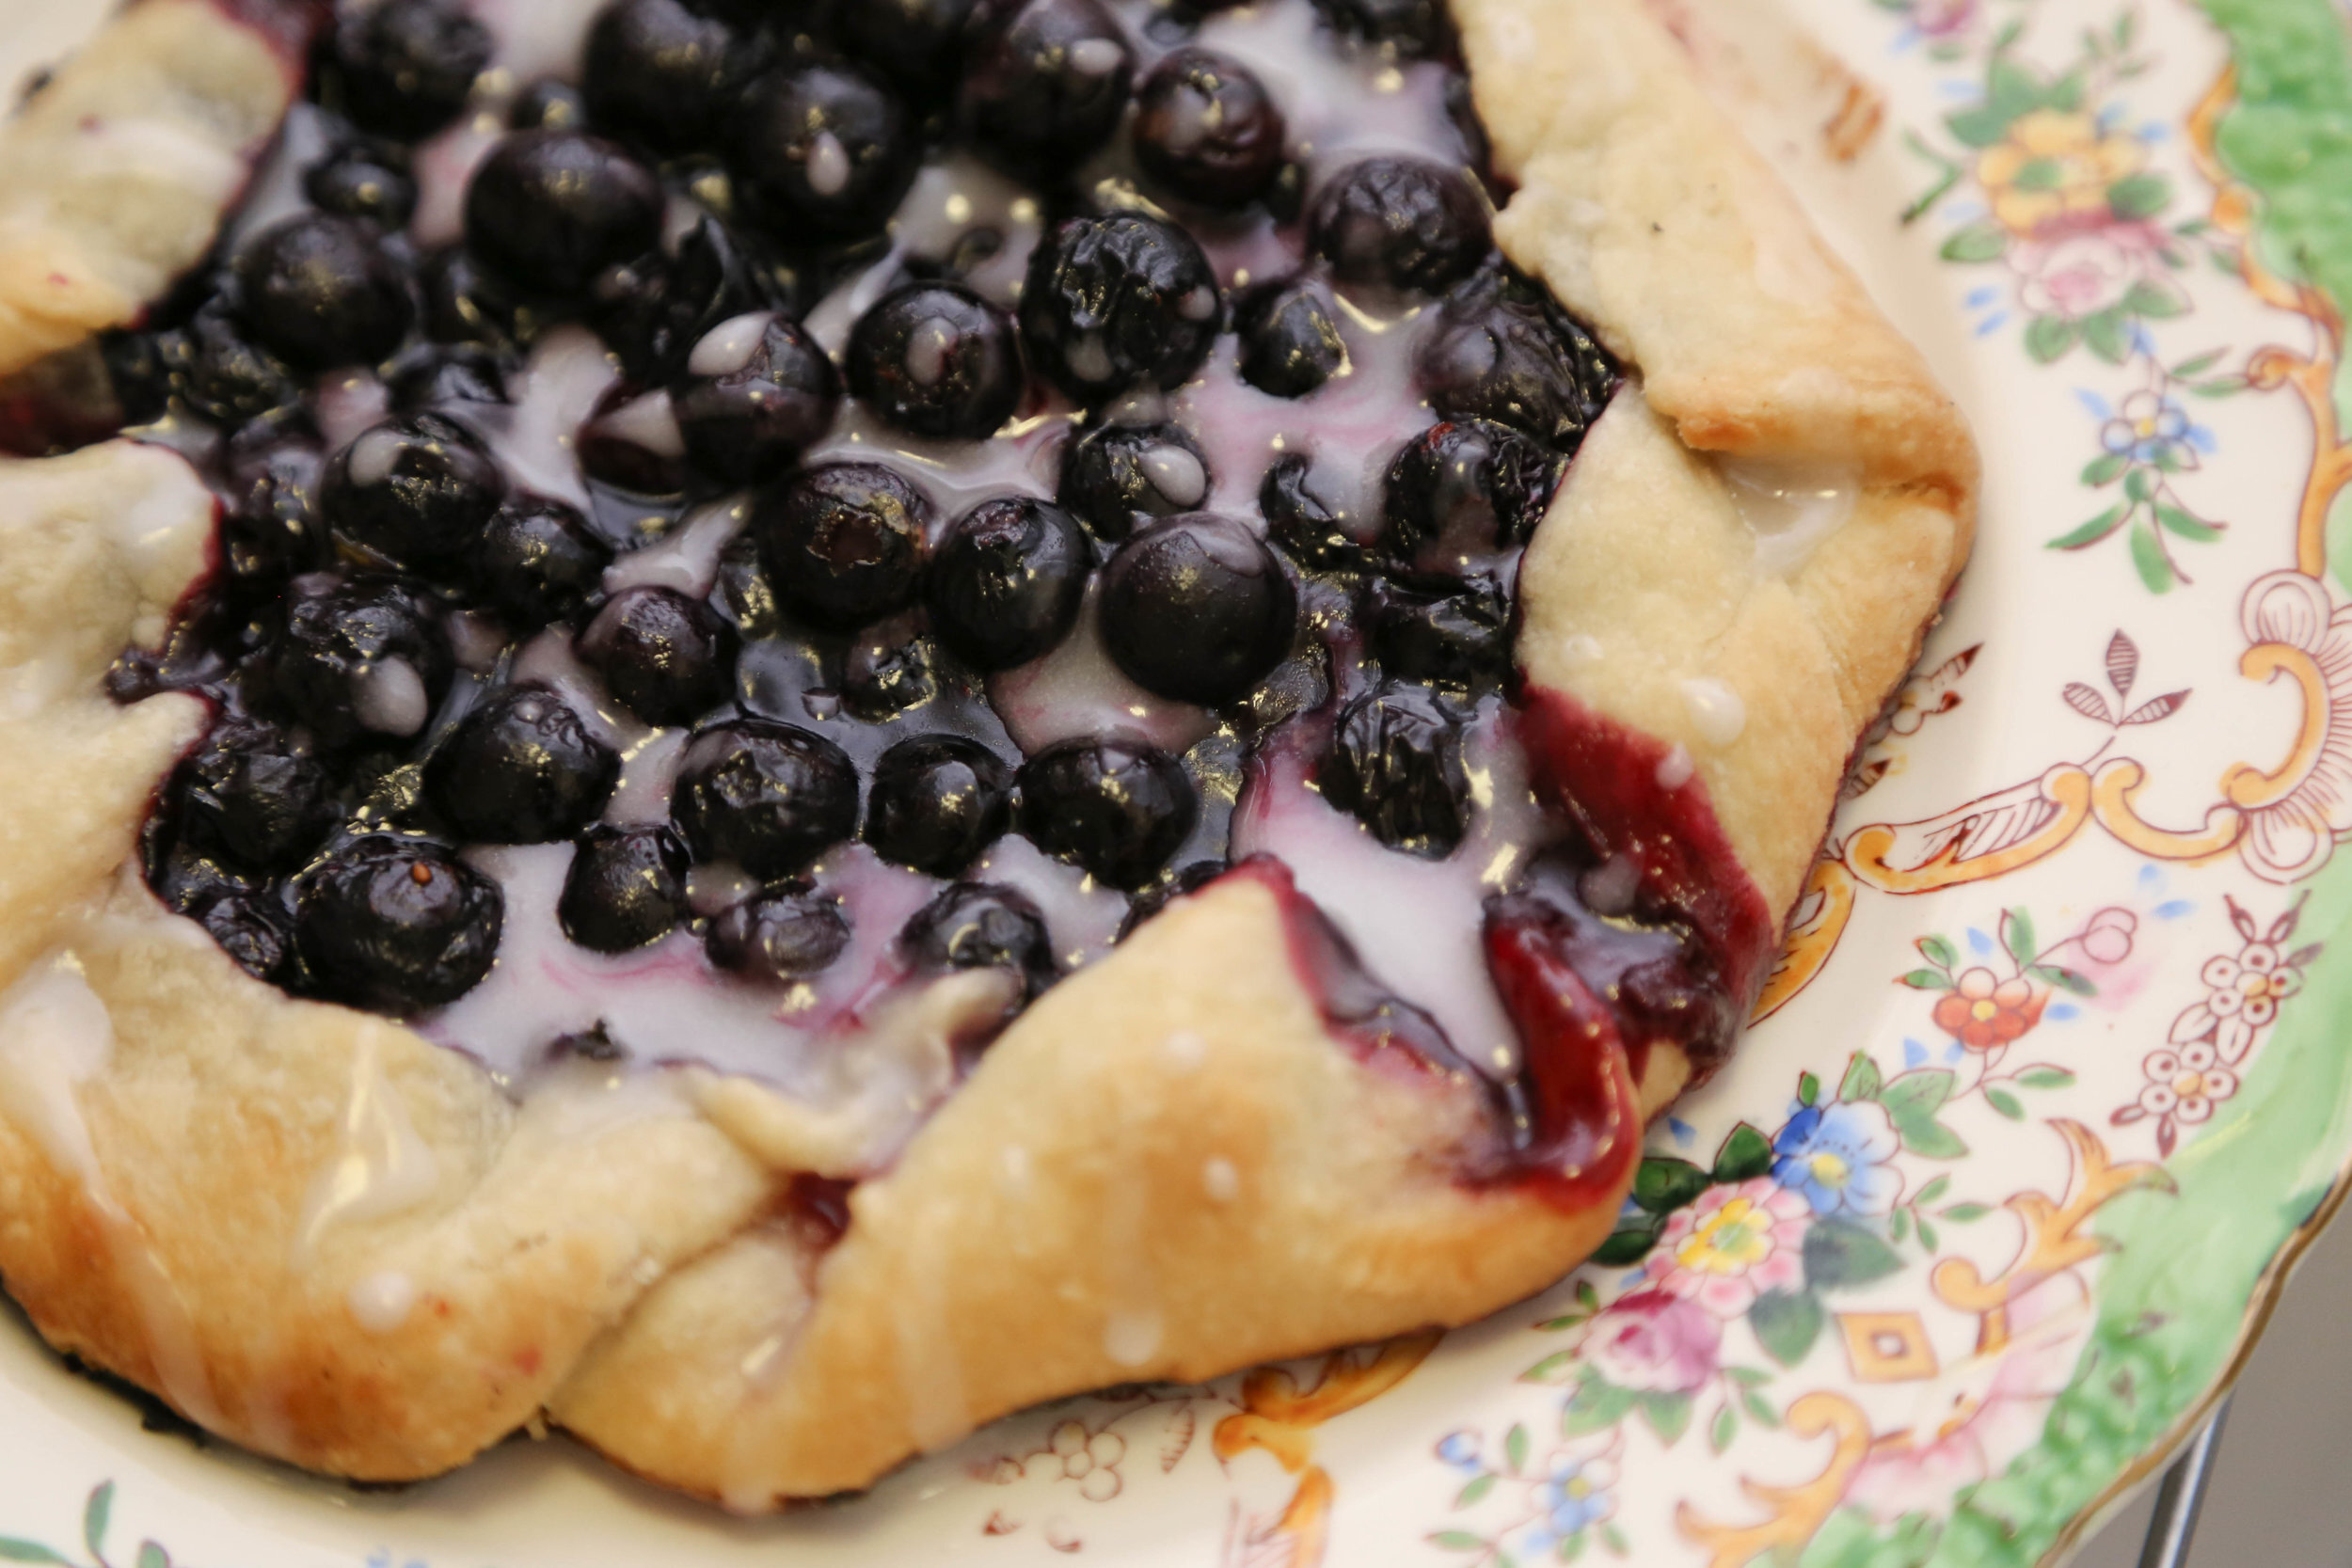
place on a parchment lined baking sheet and bake for 30 ish minutes or until the edges are golden and brown... remove and cool on a wire rack... don't worry the leakage is normal!


while they're cooling make the glaze...


once they're cooled, glaze them up, serve, and enjoy! OR... if you're taking them camping... pack them up and refrigerate them and pack them with your cold food...

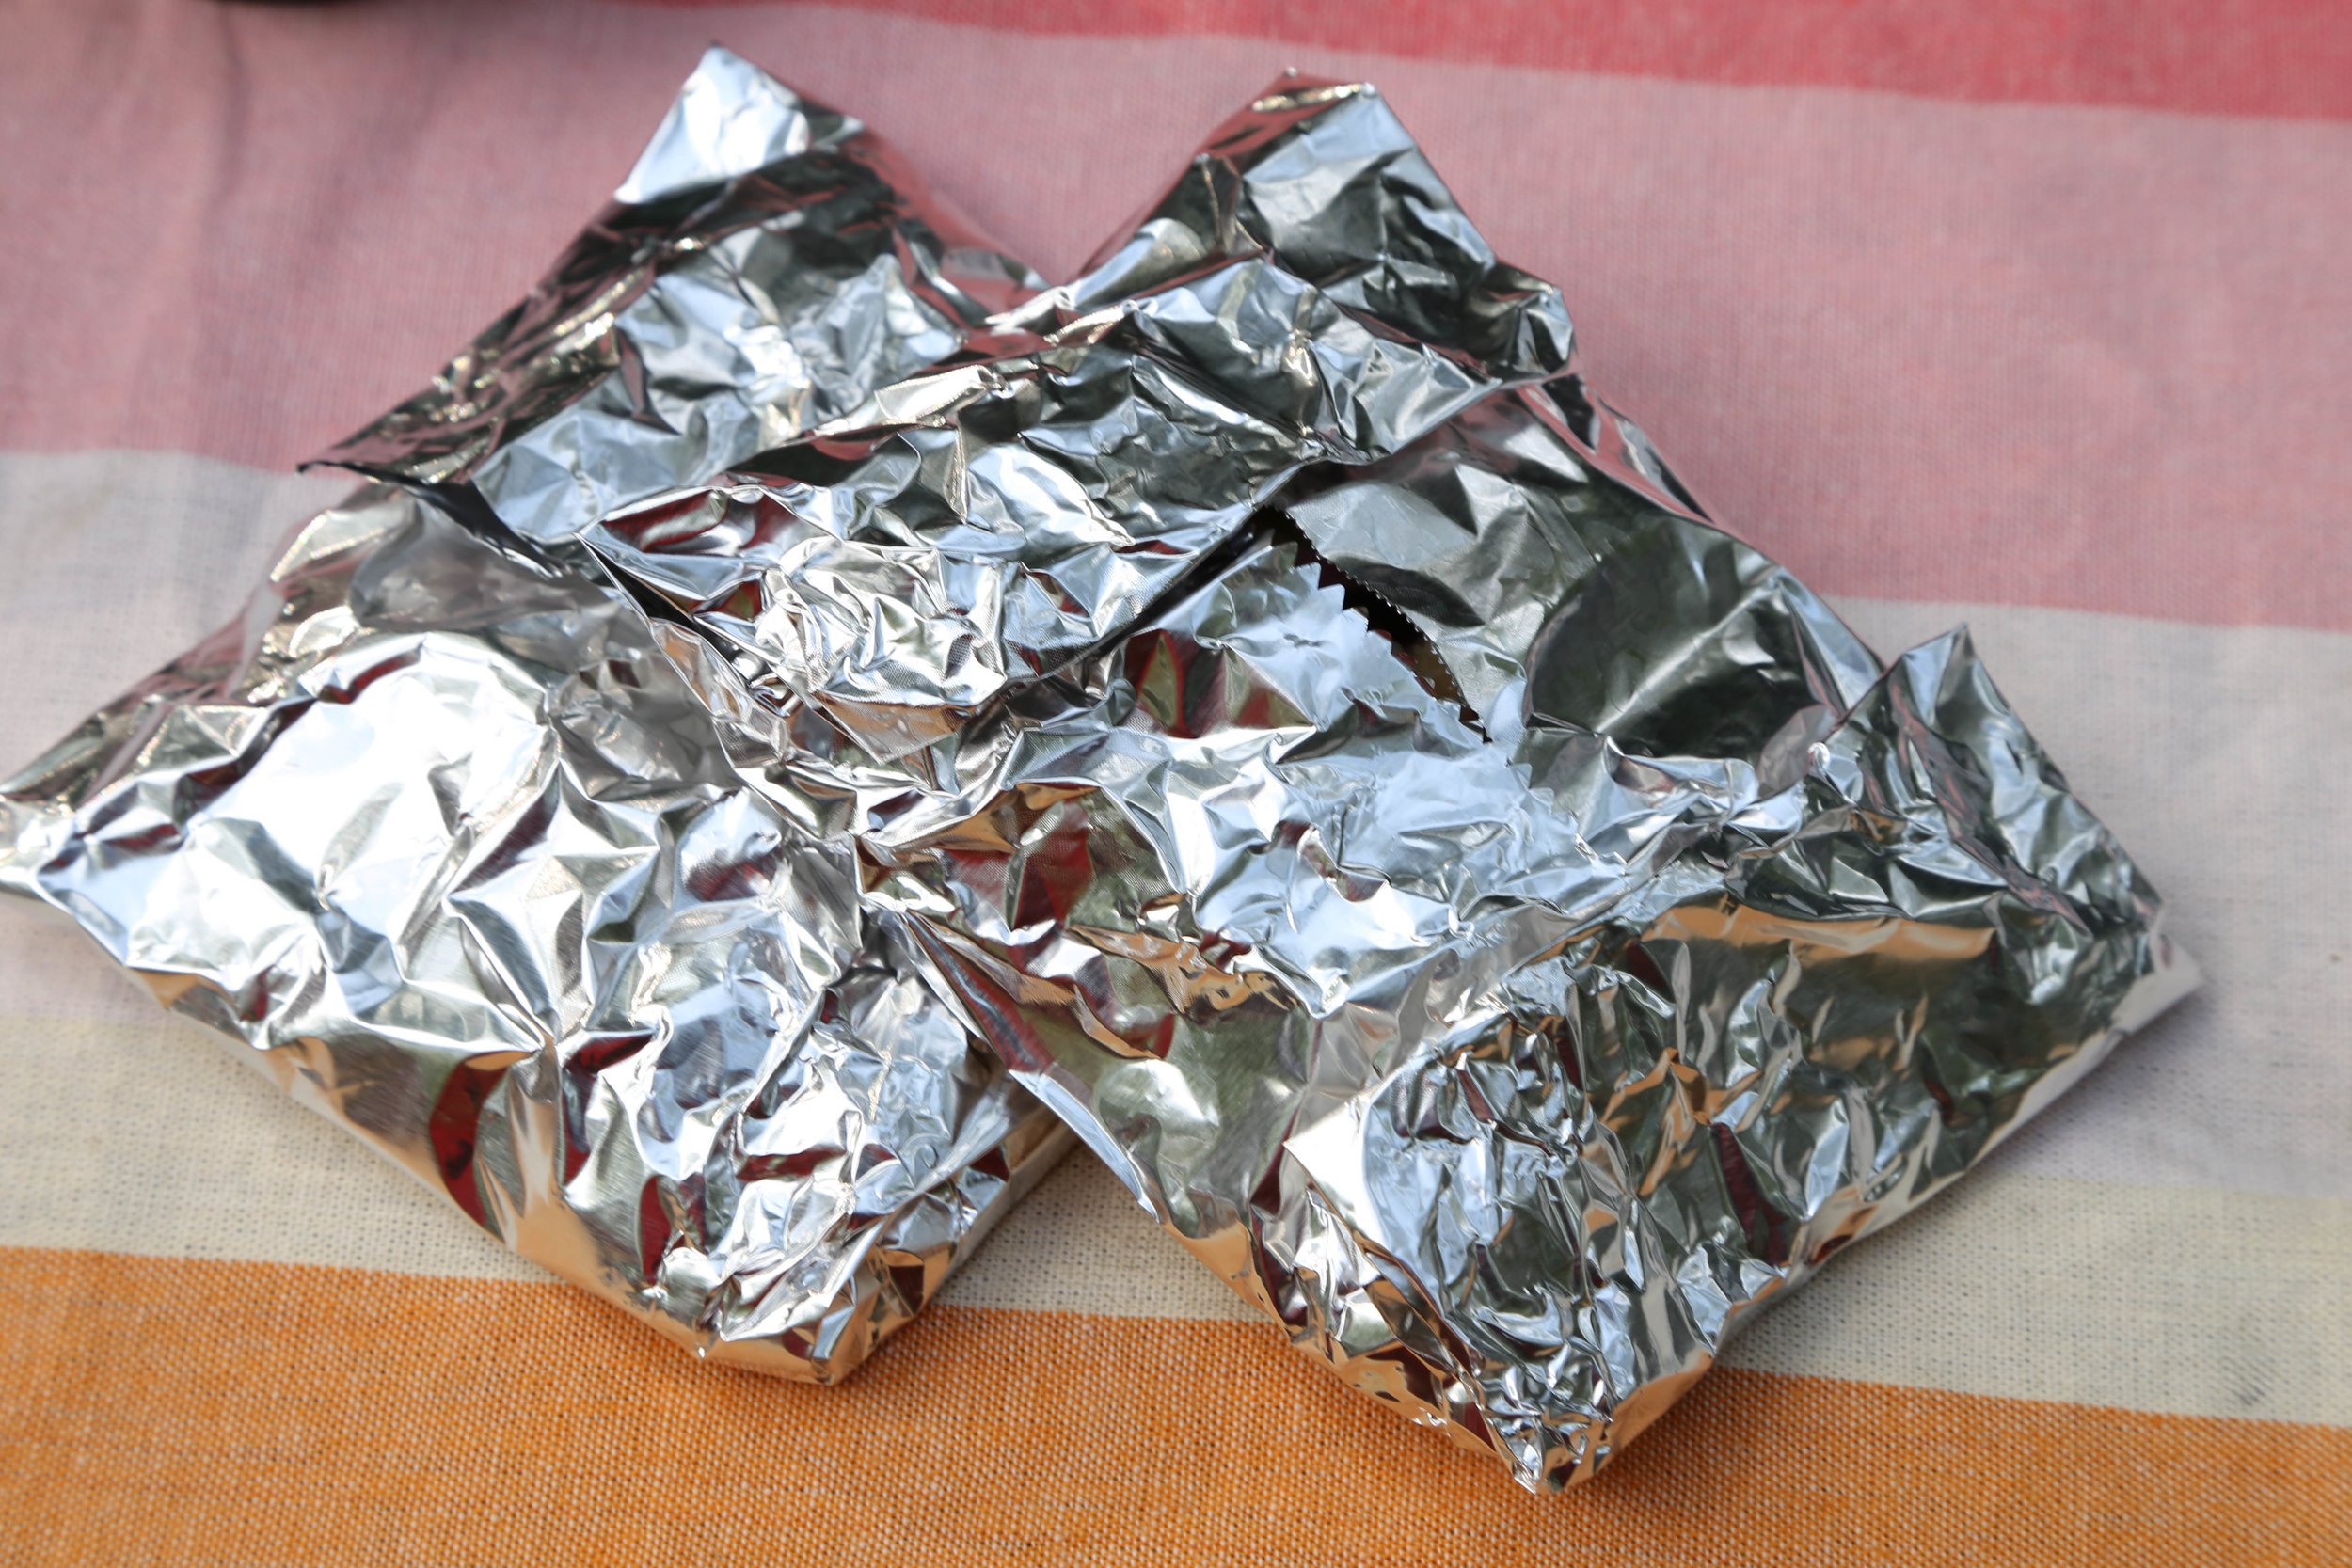
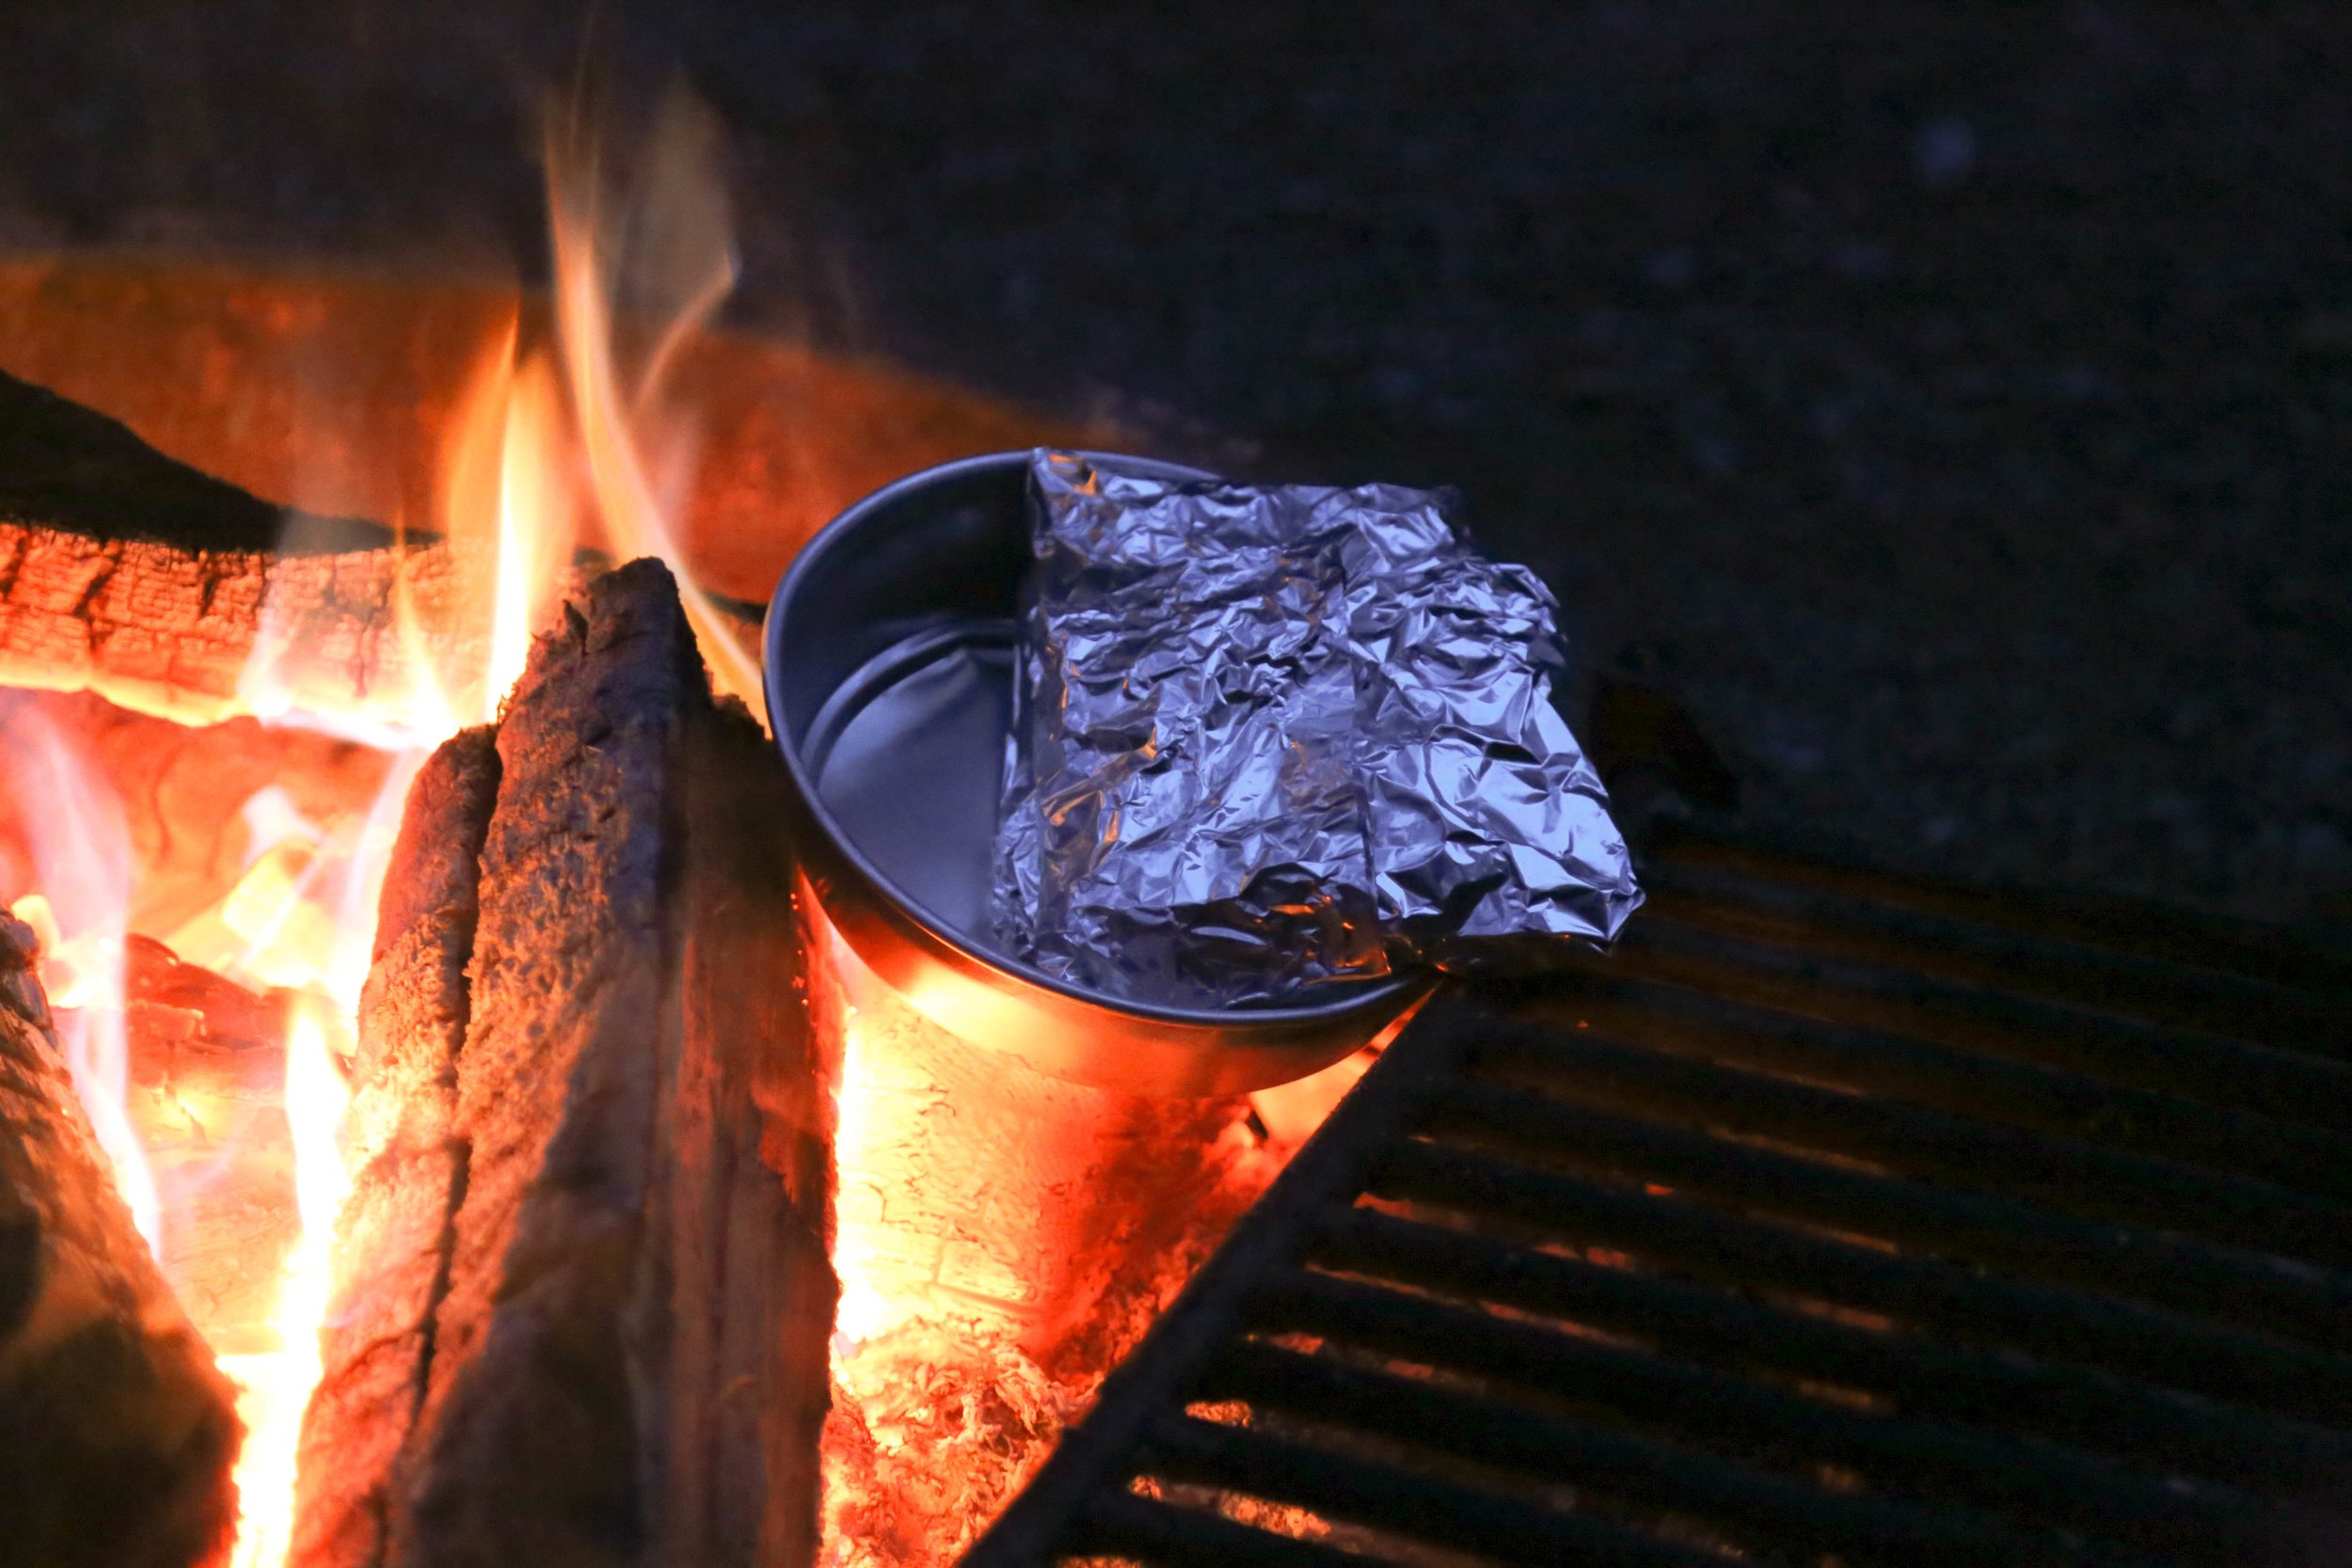
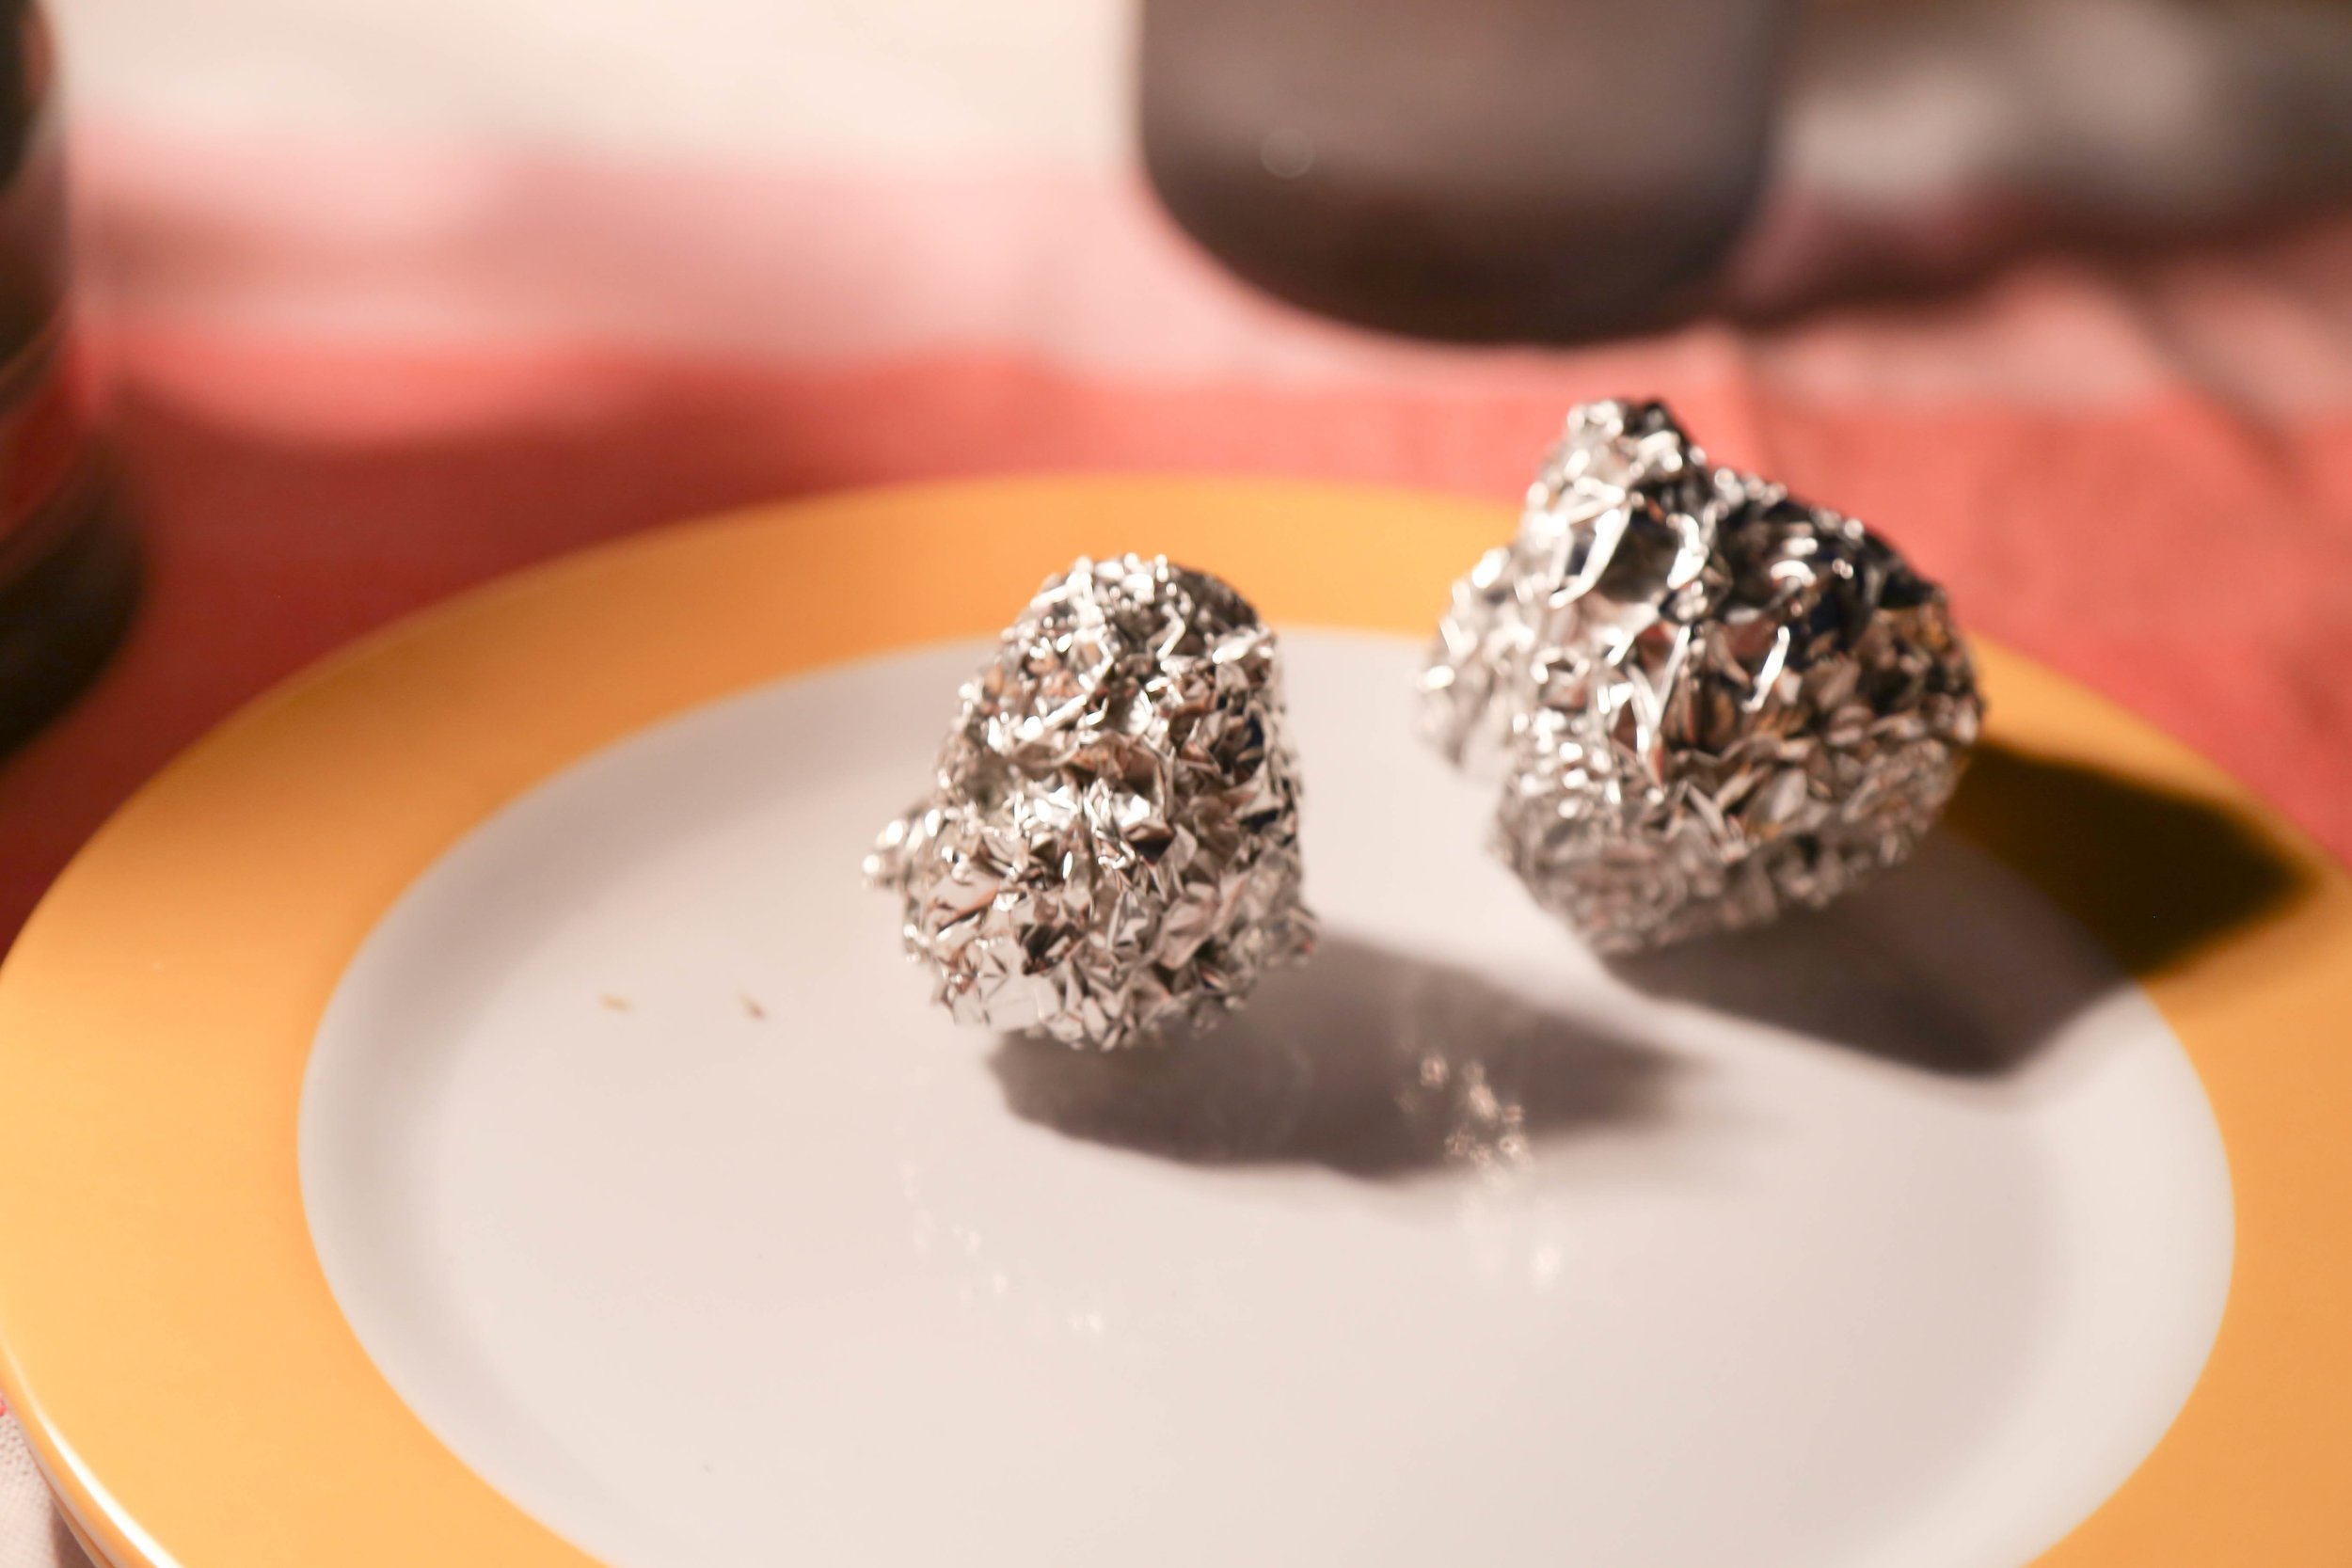
once you get to the campsite, wrap them in foil, and cook over indirect heat until they're warm to the touch... the best part about this dessert is the clean up, quick and easy!
Step-by-Step:
- preheat your oven to 350
- Make the crust by combining all dry ingredients - flour, salt, brown sugar
- cut in your cold, cubed butter - I like to cube my butter before I do anything else and then stick it in the freezer
- the mixture should be crumbly, bring it together with some water, don't over mix, just bring it together
- wrap it up in some plastic wrap and stick it in the fridge
- make the blueberry filling by combining your washed and dried blueberries with lemon zest, lemon juice, sugar, flour, and salt
- let your crust and blueberry mixture chill in the fridge for 15-20 minutes
- roll out your dough - if you're making one big crostata roll it out into a circle, if you're making hand pies, roll into a rectangle and cut 6 small rectangles (makes 3 hand pies), use the left over dough for a small crostata or 3 more pies (6 more rectangles)
- pile on the blueberries
- bake on a parchment lined cookie sheet for 30-40 minutes* or until the edges are golden brown and the blueberries are bubbling
- let cool and make your glaze by combining all the ingredients in a small bowl and mixing until you form a smooth glaze
- top the crostata or hand pies with glaze and let set
- serve and enjoy or pack them up for your camping trip - once you get to the site, wrap in tinfoil and reheat over indirect heat until warm
*if you're making hand pies and you're going to freeze them, just bake for about 30 minutes, cool, and freeze - to reheat, defrost, and reheat them on a lined cookie sheet, bake until golden and heated all the way through. Make a little of your glaze by 1/2 or 1/4 the recipe, drizzle, and enjoy.